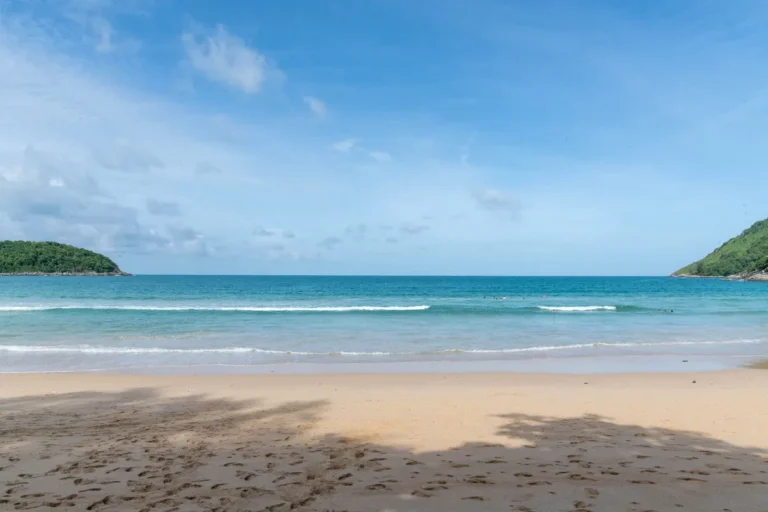
Category: Beaches & Nature

  • Ilhabela What to Do: Beaches and a No-Bug Itinerary

    Ilhabela What to Do: Beaches and a No-Bug Itinerary

    🇧🇷 POR | 🇫🇷 FR | 🇺🇸 EN | 🇪🇸 ES

    Ilhabela what to do: how to use the ferry, pick beaches, avoid biting bugs, and plan an itinerary without crossing the island in vain. The difference lies in organizing travel times and tides before choosing each beach. Before booking, define your base, confirm your first transfer, and keep a simple backup plan for any change in weather.

    Ilhabela calls for a flexible itinerary: leave at least one free slot to adapt your plan to the weather, the sea, and local logistics.

    Build in a buffer slot. It absorbs a weather change, a boat delay, or a beach that deserves more time.

    How to get to Ilhabela

    Ilhabela is reached by ferry between São Sebastião and the island. On holidays, the line can affect your first day: keep an eye on the operation and consider arriving outside peak times. If you’re coming without a car, you can use buses, taxis, and local tours. Check out ideas for the Bahia coast too when your route allows.

    Travel landscape related to ilhabela what to do
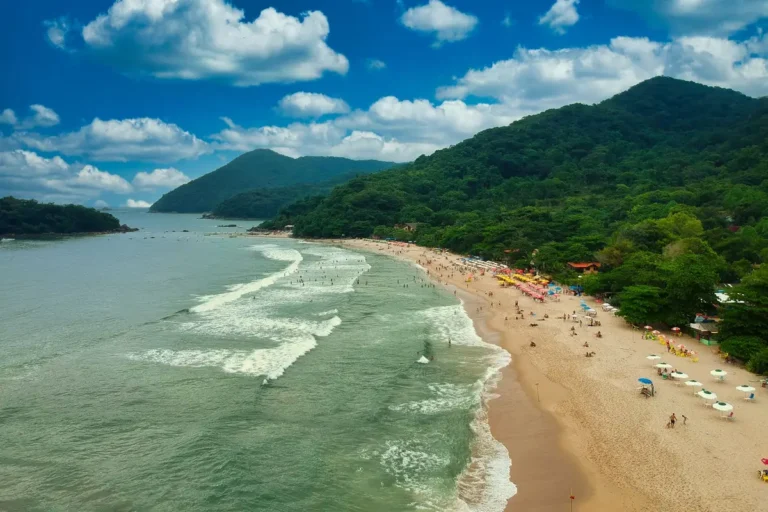
    Praia do Curral: choose your time based on the sea and travel distance. | Photo: Nathan Marcam / Pexels

    For your initial transfer, confirm the meeting point and wait time; this keeps you from losing the morning to lines or hunting for a driver at the last minute.

    When to go and how many days to book

    Three or four nights let you combine southern beaches, the center, and a boat trip. Leave one day flexible for ferry conditions, rain, or a trip to Castelhanos, which requires specific planning. Check out ideas for the Bahia coast too when your route allows.

    What to do: beaches and historic center

    Ilhabela’s Historic Center is perfect for a late afternoon, with restaurants and little shops near the pier. On the coast, Curral and Feiticeira are simple choices; Jabaquara and Castelhanos require more travel. Check out ideas for the Bahia coast too when your route allows.

    If you’d rather not negotiate every leg on the spot, there are options to book your tour or transfer in advance.

    Do you need a car? Where to stay and eat

    A car makes remote beaches easier, but it’s not essential if you stay near the center and pick your tours wisely. During peak season, book accommodation early and check parking, bus schedules, and the crossing before you board the ferry. Check out ideas for the Bahia coast too when your route allows.

    Start with the map: mark your accommodation, starting point, and a nearby beach. This overview keeps you from choosing an itinerary that looks great on paper but doesn’t work in a single day.

    Check the forecast the day before and note the wind direction. On an open coast, it changes how the sand feels, how the swim is, and even your comfort during a crossing.

    Set aside the first day to get a feel for the local rhythm. After arrival, check-in, and basic shopping, an easy beach usually pays off more than trying to squeeze in a distant excursion.

    Travel landscape related to ilhabela what to do
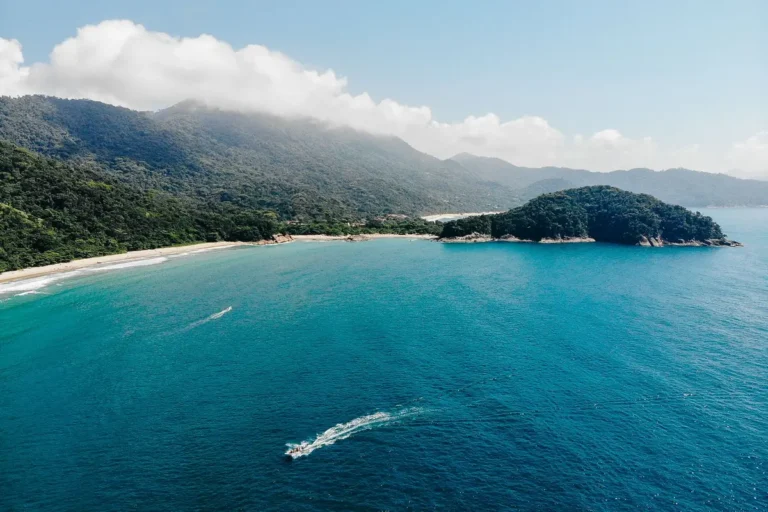
    Praia da Feiticeira: choose your time based on the sea and travel distance. | Photo: Nathan Marcam / Pexels

    Plan meals around travel time, not just reviews. Bringing water and a simple snack helps when your chosen beach has few options or the return trip takes a while.

    If you’re traveling in high season, book your transfer, boat, or desired restaurant before you head out. The time you save is usually worth more than scrambling for an alternative once the day is already underway.

    Make a short list of items that can’t stay in your suitcase: sunscreen, bug repellent, a beach blanket, charger, and ID. At beach destinations, buying these at the last minute limits your choices.

    For hikes, wear footwear that can get wet and keep your phone protected. The access trail is part of the adventure, but it stops being fun when you run out of water or carry too much weight.

    Don’t treat transport times as a detail. Note the last return and set a realistic buffer to reach the dock, the road, or the meeting point.

    When tides are involved, check the tide table the day before. It guides you on beach crossings, natural pools, and the safest time to leave a more remote beach.

    Split your days by region. Mixing beaches from different sides of the destination adds time in the car and cuts into the very calm that motivated the trip.

    Ask your accommodation about road, trail, and sea conditions. Local info doesn’t replace caution, but it reveals recent changes that an old itinerary won’t show.

    Travel landscape related to ilhabela what to do
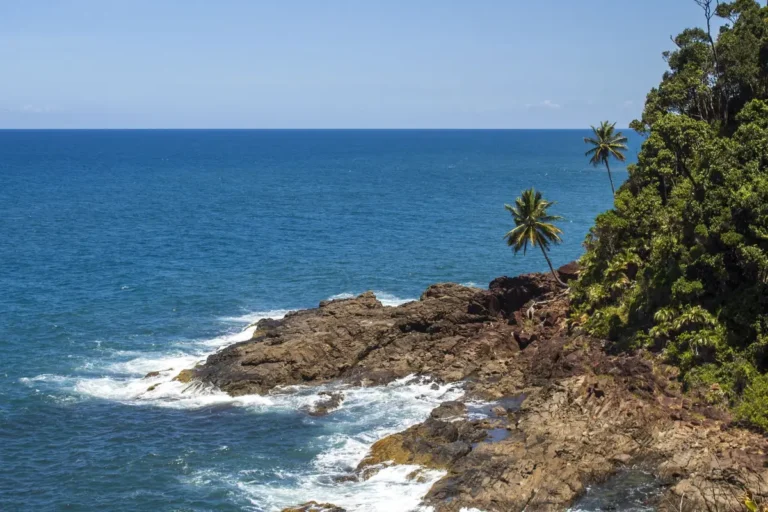
    Praia de Castelhanos: choose your time based on the sea and travel distance. | Photo: Maurício Mascaro / Pexels

    On rainy days, swap the beach goal for a village, a café, a local museum, or rest. Forcing an outdoor outing usually costs more and delivers less.

    Avoid stacking paid activities on the same day. Combining a boat trip with a beach you can reach by land keeps your budget and energy in check.

    Carry a small cash reserve, even if you use cards. Signal, card machines, and connections can fail just when you’re at a remote kiosk or on a boat.

    Photograph or save your receipts offline before boarding. This simple move solves situations where signal disappears near departure time.

    Choose your inn with the nighttime return in mind. Being near the center can cut cab fares and make dinner easier; being near the beach can pay off when your priority is waking up early.

    Respect preservation areas and carry your trash until you find collection. Infrastructure varies, and the experience of those who come after depends on these small choices.

    If you’re traveling with kids or someone with reduced mobility, confirm access, bathrooms, and shade before heading to remote beaches. The photo of the place doesn’t tell you these conditions.

    Leave the last morning without a rigid schedule. It’s for repeating your favorite beach, making up for a lost day, or simply leaving without turning checkout into a race.

    When putting together your budget, separate local transport from food and tours. It’s in this daily sum that a seemingly simple destination can get pricier than planned.

    Also use the Arraial d’Ajuda guide, the Salvador itinerary, and the Brazil beach tips to compare routes. Also confirm information with the Ministry of Tourism and official environmental sources.

    A good itinerary also plans for breaks. After a crossing or a long drive, taking a shower, reorganizing your bag, and eating calmly changes the quality of the rest of the day.

    Prefer one main choice per slot: a beach, a hike, or a boat trip. Stacking three transfers usually turns the trip into a series of check-ins.

    When comparing costs, always ask whether transfers, boarding fees, parking, or minimum consumption charges are included. The right comparison is the final price, not the advertised rate.

    If the sea conditions aren’t right for your planned activity, pick a nearby alternative instead of pushing through. Flexibility beats a rigid checklist of attractions every time.

    Traveling without a car? Base yourself somewhere with walkable markets and restaurants. That way, you save your transport budget for what actually expands your itinerary.

    Travel landscape related to what to do in Ilhabela
    Jabaquara Beach: time your visit based on the sea and travel distance. | Photo: fabifer / Pixabay

    Before leaving the beach, pick up your trash, check the tide, and protect your electronics. These small habits prevent headaches and help preserve the place you came to enjoy.

    During peak season, wake up earlier to beat the parking lots and boarding lines. The difference shows in that first hour, when the destination is still quiet.

    When you get back to your pousada, jot down what worked that day. That quick review sharpens your next choices and keeps you from repeating a trip that wasn’t worth it.

    Plan your return before you head out. It protects your beach time and keeps unexpected costs down.

    Keep an eye on local conditions without turning your trip into a spreadsheet. One check in the morning and another before you leave is all you need to adjust your day safely.

    Stuck between two beaches? Choose the one that fits your available time best. The closer option often means more swimming and less commuting.

    Beach itineraries work best when they include downtime. Setting aside an afternoon with no heavy travel keeps fatigue from dictating your last-day choices.

    If you’re booking a guide or tour, read what’s included and ask about their weather policy. Transparency before you book beats a frustrating experience later.

    Keep realistic expectations about cell service, traffic, and lines. Travelers who accept small plan changes enjoy themselves more when the destination is packed.

    When choosing a beach stall or restaurant, confirm whether there’s a minimum spend and which payment methods they accept. That one-minute conversation saves surprises when the bill arrives.

    Protect yourself from the sun even on cloudy days, and pack a light layer for the late afternoon. Staying comfortable extends your outing without forcing an early retreat.

    For group trips, agree on departure times and budget beforehand. Settling the basics early prevents standoffs when everyone’s ready to have fun.

    Use maps only as a starting point. On the ground, trust signage, local advice, and access rules—especially at beaches, trails, and boarding points.

    On your last day, keep your bags organized and pick an activity close to your departure point. That way, a transport delay won’t turn your trip’s finale into a scramble.

    On the south coast, schedule your moves before lunch: the heat and beach-to-beach traffic can stretch things out more than the map suggests. Choosing two nearby stops usually beats crossing the whole island trying to see everything.

    For the ferry crossing, check operations on arrival day and don’t treat departure times as set in stone on holidays. That buffer protects your reservations, tours, and that first swim.

    Frequently Asked Questions

    When is the best time to visit Ilhabela?

    Plan your arrival around current schedules and confirm operations the day before; that way, your travel doesn’t depend on guesswork.

    Is Ilhabela expensive?

    The ideal trip length depends on your pace, but splitting nearby and farther beaches across different days keeps your itinerary from being tied to transport.

    Which beaches should I visit in Ilhabela?

    The best base is one that combines amenities, easy returns, and the type of beach you want. Compare the actual distance before deciding based only on the nightly rate.

    How do I get to Ilhabela?

    For beaches that require a boat or trail, confirm your return before heading out, bring water, and keep a backup plan for weather changes.

    Conclusion

    Ilhabela rewards travelers who pick fewer spots per day and know how they’re getting back. Keep planning with the Voyage Voyage guides.

  • Ilha Grande What to Do: Itinerary and Lopes Mendes Without a Hitch

    Ilha Grande What to Do: Itinerary and Lopes Mendes Without a Hitch

    🇧🇷 POR | 🇫🇷 FR | 🇺🇸 EN | 🇪🇸 ES

    Ilha Grande: how to get there by boat, how many days to stay, where to sleep, and how to plan Lopes Mendes with a buffer for the weather. The difference lies in organizing your transfers and tides before picking each beach. Before you book, settle on your base, confirm your first transfer, and keep a simple backup plan for any change in the weather.

    A solid Ilha Grande itinerary needs some slack: leave at least one free half-day to adapt your plan to the weather, the sea, and local logistics.

    Build in a buffer half-day. It absorbs a weather shift, a boat delay, or a beach that deserves more of your time.

    How to get to Ilha Grande

    Ilha Grande has no road access: you arrive by boat from Angra dos Reis, Conceição de Jacareí, or Mangaratiba. Compare your departure point based on your land route and leave a buffer for the last boat; the sea and operations can change schedules. Check out ideas for the Bahia coast when your route allows.

    Travel landscape related to ilha grande what to do
    Vila do Abraão: pick your time based on the sea and your transfer. | Photo: Gabriel Fontes de Sousa / Pexels

    For your initial transfer, confirm the meeting point and the waiting time; this keeps you from losing your morning to lines or scrambling for a driver at the last minute.

    Abraão or another village?

    Vila do Abraão is the easiest base for a first trip because it concentrates inns, markets, restaurants, agencies, and boat departures. Smaller villages serve those who already know where they want to stay and are okay with fewer services and connections. Check out ideas for the Bahia coast when your route allows.

    Travel landscape related to ilha grande what to do
    Lagoa Azul: pick your time based on the sea and your transfer. | Photo: Pedro Slinger / Pexels

    How many days and which itinerary to follow

    Four nights let you cover Abraão, a day on a boat, and Lopes Mendes without turning everything into a race. With two days, pick just one boat trip and one hike; with more time, fit in Aventureiro, Dois Rios, or coves on the other side of the island. Check out ideas for the Bahia coast when your route allows.

    Travel landscape related to ilha grande what to do
    Lopes Mendes: pick your time based on the sea and your transfer. | Photo: romaneau / Pixabay

    If you’d rather not negotiate every leg on the ground, there are options to book your tour or transfer in advance.

    Lopes Mendes: how to get there

    For Lopes Mendes, the classic combo is a boat to Pouso and a final hike, or a longer walk from Abraão. The beach isn’t a place to wing it: bring water, snacks, sunscreen, and confirm the sea conditions, the return boat, and the hike time. Check out ideas for the Bahia coast when your route allows.

    Travel landscape related to ilha grande what to do
    Praia Preta: pick your time based on the sea and your transfer. | Photo: Mayumi Maciel / Pexels

    Start with the map: mark your lodging, your starting point, and a nearby beach. That read prevents you from picking an itinerary that looks great on paper but falls apart on the same day.

    Check the forecast the night before and watch the wind direction. On an open coast, it changes how the sand feels, how the swim is, and even how comfortable a crossing is.

    Set aside the first day to get a feel for the local rhythm. After arrival, check-in, and basic shopping, an easy beach usually pays off more than trying to squeeze in a distant excursion.

    Plan meals around your transfers, not just reviews. Bringing water and a simple snack helps when your chosen beach has few options or when the return trip takes longer.

    If you’re traveling in high season, book your transfer, boat, or desired restaurant before you head out. The time you save is usually worth more than hunting for a backup once the day is already rolling.

    Make a short list of items that can’t stay in your suitcase: sunscreen, bug spray, a beach blanket, a charger, and your ID. In beach destinations, buying these at the last minute limits your choices.

    For hikes, wear shoes that can get wet and keep your phone protected. The access trail is part of the adventure, but it stops being fun when you run out of water or carry too much weight.

    Don’t treat transport times as a detail. Note the last return and set a realistic buffer to reach the dock, the road, or the meeting point.

    When tides are involved, check the tide table the day before. It guides you on beach crossings, natural pools, and the safest time to leave a more remote beach.

    Split your days by region. Mixing beaches from different sides of the destination adds time in the car and cuts into the very calm that motivated the trip.

    Ask your lodging about road, trail, and sea conditions. Local info doesn’t replace caution, but it reveals recent changes that an old itinerary won’t show.

    On rainy days, swap the beach goal for a village, a café, a local museum, or rest. Forcing an outdoor excursion usually costs more and delivers less.

    Avoid stacking paid activities on the same day. A boat experience paired with a beach you can reach on foot keeps your budget and energy in check.

    Carry a small cash reserve, even if you use a card. Signal, card machines, and connections can fail right at remote kiosks or boats.

    Take photos or save your receipts offline before boarding. That simple move solves situations when the signal drops near departure time.

    Choose your inn with the nighttime return in mind. Being close to the center can cut rides and make dinner easier; being near the beach can pay off when your priority is waking up early.

    Respect preservation areas and carry your trash out until you find collection. Infrastructure varies, and the experience of those who come after depends on these small choices.

    If you’re traveling with kids or someone with reduced mobility, confirm access, bathrooms, and shade before heading to remote beaches. The photo of the place doesn’t tell you those conditions.

    Leave the last morning with no rigid commitments. It’s for repeating your favorite beach, making up for a lost day, or simply leaving without turning checkout into a race.

    When building your budget, separate local transport from food and tours. It’s in that daily sum that a seemingly simple destination can get pricier than planned.

    Also check out the Arraial d’Ajuda guide, the Salvador itinerary, and the Brazil beach tips to compare routes. Also double-check details on the Ministry of Tourism and official environmental sources.

    A good itinerary also builds in downtime. After a ferry crossing or a long drive, taking a shower, reorganizing your backpack, and eating at a relaxed pace changes the quality of the rest of the day.

    Pick one main activity per stretch of the day: a beach, a hike, or a boat trip. Stacking three different transfers usually turns the trip into a series of check-ins.

    When weighing costs, always ask whether transfers, boarding fees, parking, or minimum consumption are included. The right comparison is the final price, not the advertised one.

    If the sea conditions aren’t right for your plan, pick a nearby activity instead of pushing through. Flexibility beats a rigid list of attractions.

    Travelers without a car should base themselves where markets and restaurants are within walking distance. That saves your transport budget for what actually expands the itinerary.

    Before leaving the beach, pick up your trash, check the tide, and protect your electronics. These small habits prevent losses and help preserve the place you visited.

    In high season, wake up earlier to hit parking lots and boarding points with less pressure. The difference shows in the first hour, when the destination is still emptier.

    When you get back to your inn, jot down what worked that day. That quick review sharpens your next choices and keeps you from repeating a transfer that wasn’t worth it.

    Plan your return before you head out. That preserves beach time and cuts down on surprise costs.

    Keep an eye on local conditions without turning the trip into a spreadsheet. One check in the morning and another before you leave is enough to adjust your day safely.

    When torn between two beaches, pick the one that fits your available time best. The closer option often delivers more swimming and less moving around.

    Beach itineraries work best when they include rest. Setting aside an afternoon with no heavy transfers keeps fatigue from dictating your last-day choices.

    If you’re hiring a guide or booking a tour, read what’s included and ask about the time policy. Transparency before booking prevents a frustrating experience later.

    Keep realistic expectations about cell signal, traffic, and lines. Travelers who accept small plan changes enjoy the destination more when it’s crowded.

    When choosing a beach stall or restaurant, confirm whether there’s a minimum spend and which payment methods are accepted. That one-minute conversation prevents surprises at the bill.

    Protect yourself from the sun even on cloudy days and bring a light layer for late afternoon. Staying comfortable helps you stretch out the outing without heading back early.

    For a group trip, agree on departure times and budget beforehand. Settling the basics early reduces standoffs when everyone’s ready to have fun.

    Use maps only as a starting point. On the ground, prioritize signage, locals’ advice, and access rules, especially around beaches, trails, and boarding points.

    On your last day, keep your luggage organized and choose an activity close to your exit point. That way, a transport delay doesn’t turn the end of the trip into a worry.

    On Ilha Grande, the return time is no small detail. After picking a cove or trail, confirm the last boat and keep your hike within daylight hours.

    Abraão handles the logistics for a first trip, but that choice changes if your priority is silence, snorkeling, or a specific beach. Compare available services and boat time before trading convenience for isolation.

    Frequently Asked Questions

    How do I get to Ilha Grande?

    Plan your arrival around current schedules and confirm operations the day before; that way, getting there stops being a guessing game.

    How many days should I spend on Ilha Grande?

    The ideal length depends on your pace, but splitting nearby and farther beaches across different days keeps the itinerary from getting stuck on transport.

    Abraão or another village?

    The best base is the one that matches services, return options, and the type of beach you want. Compare the real distance before deciding on nightly rate alone.

    How do I get to Lopes Mendes?

    For beaches that require a boat or a hike, confirm the return before you leave, bring water, and keep a backup plan for weather changes.

    Conclusion

    Ilha Grande What to Do pays off more when you pick fewer spots per day and know how you’re getting back. Keep planning with the Voyage Voyage guides.

  • Itacaré What to Do: Walkable Beaches and a No-Rush Itinerary

    Itacaré What to Do: Walkable Beaches and a No-Rush Itinerary

    🇧🇷 POR | 🇫🇷 FR | 🇺🇸 EN | 🇪🇸 ES

    Itacaré: a guide to urban and rural beaches, how many days to stay, when to go, and how to decide between walking and using a car. The key is organizing your travel routes and tides before picking each beach. Before booking, settle on your home base, confirm your first transfer, and keep a simple backup plan for any change in weather.

    An Itacaré itinerary needs some breathing room: leave at least one free block of time to adapt your plans to the weather, the sea, and local logistics.

    Build in a buffer block of time. It absorbs a shift in weather, a boat delay, or a beach that deserves a longer stay.

    How to get there and get around

    The most direct arrival is via Ilhéus Airport, followed by a road transfer. In the town center, many urban beaches are walkable; for Itacarezinho, Jeribucaçu, and the waterfalls, a car, taxi, or organized tour makes the day much more feasible. Check out more ideas for the Bahia coast if your route allows.

    Travel landscape related to what to do in Itacaré
    Concha and Resende: choose your time based on the sea and your route. | Photo: Jakeline Guimarães de Lucena / Pexels

    For your initial transfer, confirm the meeting point and wait time; this helps you avoid losing your morning to lines or scrambling for a driver at the last minute.

    When to go and how many days to stay

    Four days give you a solid first impression of Itacaré: two for beaches near town, one for a rural beach, and one for a waterfall or the Rio de Contas. Between April and July, it tends to rain more in southern Bahia; weather and sea conditions change, so treat the forecast as a guide, not a promise. Check out more ideas for the Bahia coast if your route allows.

    Travel landscape related to what to do in Itacaré
    Tiririca and Ribeira: choose your time based on the sea and your route. | Photo: MARCIA ANDRADE / Pexels

    Urban beaches and trails worth your time

    From Concha, you can walk to Resende, Tiririca, Costa, and Ribeira. This sequence is great for anyone who wants to mix swimming, surfing, and quick stops without driving. Prainha requires a trail and some preparation; don’t start late or go without checking local conditions. Check out more ideas for the Bahia coast if your route allows.

    Travel landscape related to what to do in Itacaré
    Prainha: choose your time based on the sea and your route. | Photo: Murillo Molissani / Pexels

    If you’d rather not negotiate every leg of the trip on the ground, there are options to book your tour or transfer in advance.

    An itinerary combining beach and waterfall

    Set aside one morning for a rural beach and another for a waterfall. A tour with stops at Itacarezinho, Havaizinho, and Engenhoca avoids transport improvisation and leaves your evening free for Rua da Pituba. Check out more ideas for the Bahia coast if your route allows.

    Travel landscape related to what to do in Itacaré
    Itacarezinho: choose your time based on the sea and your route. | Photo: gustavoboulhosa / Pixabay

    Start with the map: mark your accommodation, starting point, and a nearby beach. This overview helps you avoid choosing an itinerary that looks great on paper but is impractical for the same day.

    Check the forecast the night before and observe the wind direction. On an open coast, it changes the feel of the sand, the swimming conditions, and even your comfort during a crossing.

    Set aside your first day to get a feel for the local rhythm. After arriving, checking in, and grabbing essentials, an easy beach usually pays off more than trying to squeeze in a distant excursion.

    Plan your meals around your route, not just reviews. Bringing water and a simple snack helps when your chosen beach has few options or when the trip back takes longer than expected.

    If you’re traveling in high season, book your transfer, boat, or desired restaurant before you head out. The time you save is usually worth more than hunting for alternatives once the day is already underway.

    Make a short list of items that can’t stay in your suitcase: sunscreen, insect repellent, a sarong, a charger, and your ID. At beach destinations, buying these at the last minute limits your choices.

    For hikes, wear footwear that can get wet and keep your phone protected. The access trail is part of the adventure, but it stops being enjoyable when you run out of water or are carrying too much.

    Don’t treat transport times as a minor detail. Note the last return and set a realistic buffer to get to the dock, the road, or the meeting point.

    When tides are involved, check the tide table the day before. It guides you on beach crossings, natural pools, and the safest time to leave a more remote beach.

    Divide your days by region. Mixing beaches on different sides of the destination adds time in the car and cuts into the very tranquility that inspired the trip.

    Ask your accommodation about road, trail, and sea conditions. Local information doesn’t replace caution, but it reveals recent changes that an old itinerary won’t show.

    On rainy days, swap your beach goal for the town, a café, a local museum, or rest. Forcing an outdoor excursion usually costs more and delivers less.

    Avoid stacking paid activities on the same day. Combining a boat experience with a beach accessible by land keeps both your budget and energy in check.

    Carry a small cash reserve, even if you use a card. Signals, card machines, and connections can fail just when you’re at a remote kiosk or on a boat.

    Take a photo or save your receipts offline before boarding. This simple habit solves problems when the signal drops near departure time.

    Choose your guesthouse with your nighttime return in mind. Being close to the center can reduce taxi fares and make dinner easier; being close to the beach can pay off when your priority is waking up early.

    Respect preservation areas and carry your trash with you until you find collection. Infrastructure varies, and the experience of those who come after you depends on these small choices.

    If you’re traveling with children or someone with reduced mobility, confirm access, restrooms, and shade before heading to remote beaches. A photo of the place doesn’t tell you about these conditions.

    Leave your last morning free of rigid commitments. It’s for revisiting your favorite beach, making up for a lost day, or simply heading out without turning checkout into a race.

    When building your budget, separate local transport from food and tours. It’s in this daily sum that a seemingly simple destination can end up costing more than planned.

    Also check out the Arraial d’Ajuda guide, the Salvador itinerary, and the Brazil beach tips to compare routes. Also double-check details on the Ministry of Tourism and official environmental sources.

    A good itinerary also builds in downtime. After a boat crossing or a long drive, taking a shower, reorganizing your backpack, and eating at a relaxed pace changes the quality of the rest of the day.

    Pick one main activity per stretch of the day: a beach, a hike, or a boat trip. Stacking three different transfers usually turns the trip into a series of check-ins.

    When weighing costs, always ask whether transfers, boarding fees, parking, or minimum spend are included. The right comparison is the final price, not the advertised one.

    If the sea isn’t suitable for your plan, pick a nearby activity instead of pushing through. Flexibility beats a rigid list of attractions.

    Travelers without a car should base themselves where markets and restaurants are within walking distance. That saves your transport budget for what actually expands the itinerary.

    Before leaving the beach, pick up your trash, check the tide, and protect your electronics. These small habits prevent losses and help preserve the place you’re visiting.

    In high season, wake up earlier to hit parking lots and boarding points with less pressure. The difference shows in the first hour, when the destination is still emptier.

    When you get back to your pousada, jot down what worked that day. That quick review sharpens your next choices and keeps you from repeating a transfer that wasn’t worth it.

    Plan your return before you head out. That preserves beach time and cuts down on surprise costs.

    Keep an eye on local conditions without turning the trip into a spreadsheet. One check in the morning and another before heading out is enough to adjust your day safely.

    When torn between two beaches, pick the one that fits your available time best. The closer option often delivers more swimming and less moving around.

    Beach itineraries work best when they include rest. Setting aside an afternoon with no heavy transfers keeps fatigue from dictating your last-day choices.

    If you’re hiring a guide or a tour, read what’s included and ask about the time policy. Transparency before booking prevents a frustrating experience later.

    Keep realistic expectations about cell signal, traffic, and lines. Travelers who accept small plan variations enjoy themselves more when the destination is packed.

    When choosing a beach bar or restaurant, confirm whether there’s a minimum spend and which payment methods are accepted. That one-minute conversation prevents surprises at the bill.

    Protect yourself from the sun even on cloudy days and bring a light layer for late afternoon. Staying comfortable helps you stretch out the outing without heading back early.

    For a group trip, align the departure time and budget beforehand. Basic decisions made in advance reduce standoffs when everyone’s already ready to have fun.

    Use maps only as a starting point. Once you’re there, trust signage, locals’ directions, and access rules, especially around beaches, trails, and boarding points.

    On your last day, keep your luggage organized and pick an activity close to your departure point. That way, a transport delay doesn’t turn the end of the trip into a worry.

    Frequently asked questions

    How many days should you spend in Itacaré?

    Plan your arrival around current schedules and confirm operations the day before; that way, getting there stops depending on guesswork.

    Are Itacaré’s beaches walkable or do you need a car?

    The ideal length depends on your pace, but splitting nearby and farther beaches across different days keeps the itinerary from getting stuck on transport.

    When is the best time to go to Itacaré?

    The best base is the one that combines services, getting back, and the type of beach you want. Compare the real distance before deciding on nightly rate alone.

    Which beach should you pick for the first day?

    For beaches that require a boat or a hike, confirm the return before leaving, bring water, and keep an alternative option for weather changes.

    Conclusion

    Itacare O Que Fazer pays off more when you choose fewer spots per day and arrive knowing how you’ll get back. Keep planning with the Voyage Voyage guides.

  • Trancoso Bahia: Beaches and the Quadrado Without Wasting Time

    Trancoso Bahia: Beaches and the Quadrado Without Wasting Time

    🇧🇷 POR | 🇫🇷 FR | 🇺🇸 EN | 🇪🇸 ES

    Trancoso Bahia: how to get there, which beaches to choose, when to go, and how to organize days around the Quadrado without unexpected costs. The key is planning your routes and checking the tides before picking each beach. Before booking, settle on your home base, confirm your first transfer, and keep a simple backup plan for any change in weather.

    Trancoso Bahia calls for a flexible itinerary: leave at least one free block of time to adapt your plans to the weather, the sea, and local logistics.

    Build in a buffer block of time. It absorbs a weather shift, a boat delay, or a beach that deserves a longer stay.

    How to get to Trancoso

    The most common entry point is Porto Seguro Airport. From there, compare a direct transfer with the ferry route to Arraial d’Ajuda: it might be more scenic, but lines and schedules add up. Check out more ideas for the Bahia coast when your route allows.

    Travel scenery related to Trancoso Bahia
    Praia dos Nativos: pick your time based on the sea and travel time. | Photo: LUDDMYLA / Pexels

    For your initial transfer, confirm the meeting point and wait time; this keeps you from losing the morning to lines or scrambling for a driver at the last minute.

    When to go and how many days to book

    Trancoso works well with three or four nights. Arrive with your first beach already picked and keep one day flexible for low tide, especially if your plan includes Espelho or a long hike. Check out more ideas for the Bahia coast when your route allows.

    Travel scenery related to Trancoso Bahia
    Praia dos Coqueiros: pick your time based on the sea and travel time. | Photo: LUDDMYLA / Pexels

    What to do: Quadrado and beaches

    Trancoso’s historic Quadrado is best enjoyed in the late afternoon, when the São João Batista church and the colorful little houses fit into your plans without the harsh sun. On the sand, Nativos and Coqueiros are the easy walkable picks; Itapororoca requires a ride. Check out more ideas for the Bahia coast when your route allows.

    Travel scenery related to Trancoso Bahia
    Praia de Itapororoca: pick your time based on the sea and travel time. | Photo: Victor Barbosa / Pexels

    If you’d rather not negotiate every leg once you’re there, there are options to book your tour or transfer in advance.

    Where to stay, eat, and manage costs

    It’s pricey, especially during holidays, New Year’s Eve, and at Quadrado restaurants. Staying near the center cuts down on late-night rides; staying farther out can work if you already have a transfer arranged. Check minimum spend and parking before choosing your beach barraca. Check out more ideas for the Bahia coast when your route allows.

    Travel scenery related to Trancoso Bahia
    Praia do Espelho: pick your time based on the sea and travel time. | Photo: nathsegato / Pixabay

    Start with a map: mark your lodging, your starting point, and a nearby beach. This quick look helps you avoid picking an itinerary that looks great on paper but doesn’t work in a single day.

    Check the forecast the night before and pay attention to wind direction. On an open coastline, it changes how the sand feels, how the water is, and even how comfortable a crossing is.

    Set aside your first day to get a feel for the local pace. After arrival, check-in, and basic errands, an easy beach usually pays off more than trying to squeeze in a distant excursion.

    Plan meals around your route, not just reviews. Bringing water and a simple snack helps when your chosen beach has few options or when the trip back takes a while.

    If you’re traveling in high season, book your transfer, boat, or must-have restaurant before you head out. Saving time usually beats hunting for alternatives once the day is already underway.

    Make a short list of items that can’t stay out of your bag: sunscreen, bug spray, a sarong, a charger, and your ID. At beach destinations, buying these at the last minute limits your choices.

    For hikes, wear shoes that can get wet and keep your phone protected. The access trail is part of the adventure, but it stops being fun when you run out of water or carry too much weight.

    Don’t treat transport times as a minor detail. Note the last return and give yourself a realistic buffer to get to the dock, the road, or the meeting point.

    When tides are involved, check the tide table the day before. It guides you on beach crossings, natural pools, and the safest time to leave a more remote beach.

    Split your days by region. Mixing beaches on opposite sides of the destination adds time in the car and cuts into the very calm that inspired the trip.

    Ask your lodging about road, trail, and sea conditions. Local intel doesn’t replace caution, but it reveals recent changes that an old itinerary won’t show.

    On rainy days, swap the beach goal for the village, a café, a local museum, or rest. Forcing an outdoor outing usually costs more and delivers less.

    Avoid stacking paid activities on the same day. Pairing a boat experience with a beach you can reach by land keeps both your budget and your energy in check.

    Carry a small cash reserve, even if you use a card. Signal, card machines, and connections can fail right when you’re at a remote kiosk or on a boat.

    Photograph or save your receipts offline before you board. This simple move solves situations when signal drops near departure time.

    Choose your pousada with the nighttime return in mind. Being close to the center can cut rides and make dinner easier; being close to the beach can pay off when your priority is waking up early.

    Respect protected areas and carry your trash with you until you find collection. Infrastructure varies, and the experience of those who come after depends on these small choices.

    If you’re traveling with kids or someone with limited mobility, confirm access, bathrooms, and shade before heading to remote beaches. The photo of the place doesn’t tell you those conditions.

    Keep your last morning free of rigid plans. It’s for repeating your favorite beach, making up for a lost day, or simply leaving without turning checkout into a race.

    When building your budget, separate local transport from food and activities. It’s in that daily total that a seemingly simple destination can get pricier than planned.

    Also use the Arraial d’Ajuda guide, the Salvador itinerary, and the Brazil beach tips to compare routes. Also double-check details on the Ministry of Tourism and official environmental sources.

    A good itinerary also builds in breaks. After a ferry crossing or a long drive, taking a shower, reorganizing your backpack, and eating at a relaxed pace changes the quality of the rest of the day.

    Pick one main activity per stretch of the day: a beach, a hike, or a boat trip. Stacking three different moves usually turns the trip into a series of check-ins.

    When weighing costs, always ask whether transfers, boarding fees, parking, or minimum spend are included. The right comparison is the final price, not the advertised one.

    If the sea isn’t suitable for your plan, pick a nearby activity instead of pushing through. Flexibility beats a rigid list of attractions.

    Travelers without a car should base themselves where markets and restaurants are within walking distance. That saves the transport budget for what actually expands the itinerary.

    Before leaving the beach, pick up your trash, check the tide, and protect your electronics. These small habits prevent losses and help preserve the place you visited.

    In high season, wake up earlier to hit parking lots and boarding points with less pressure. The difference shows in the first hour, when the destination is still emptier.

    When you get back to your pousada, jot down what worked that day. That quick review sharpens your next choices and keeps you from repeating a move that wasn’t worth it.

    Plan your return before you head out. That preserves beach time and cuts down on surprise costs.

    Keep an eye on local conditions without turning the trip into a spreadsheet. One check in the morning and another before heading out is enough to adjust the day safely.

    When torn between two beaches, pick the one that fits the time you have. The closer option often delivers more swimming and less moving around.

    Beach itineraries work best when they include rest. Setting aside an afternoon with no heavy travel keeps fatigue from dictating your last-day choices.

    If you’re hiring a guide or booking a tour, read what’s included and ask about the time policy. Transparency before booking prevents a frustrating experience later.

    Keep realistic expectations about signal, traffic, and lines. Travelers who accept small plan variations enjoy themselves more when the destination is packed.

    When choosing a beach stall or restaurant, confirm whether there’s a minimum spend and which payment methods are accepted. That one-minute conversation prevents surprises at the bill.

    Protect yourself from the sun even on cloudy days and bring a light layer for late afternoon. Staying comfortable thermally lets you stretch the outing without heading back early.

    For a group trip, align the departure time and budget beforehand. Basic decisions made in advance cut down on standoffs when everyone’s ready to have fun.

    Use maps only as a starting point. Once you’re there, prioritize signage, locals’ advice, and access rules, especially around beaches, trails, and boarding areas.

    On the last day, keep your luggage organized and pick an activity close to your exit point. That way, a transport delay doesn’t turn the trip’s finale into a worry.

    In Trancoso, distances look short on the map, but the road, the tide, and leaving the Quadrado change the real timing. Pick one direction per day and save the other for when you have confirmed transport.

    For Praia do Espelho, the win comes from leaving early and checking the tide, not from trying to squeeze it in after a full morning at the urban beaches. The drive deserves a day with some buffer.

    Frequently asked questions

    When should I go to Trancoso?

    Plan your arrival around current schedules and confirm operations the day before; that way, getting around stops depending on guesswork.

    Is Trancoso expensive?

    The ideal length of stay depends on your pace, but splitting nearby and farther beaches across different days keeps the itinerary from getting stuck on transport.

    Which beaches should I visit in Trancoso?

    The best base is the one that combines services, getting back, and the type of beach you want. Compare the real distance before deciding on nightly rate alone.

    How do I get to Trancoso?

    For beaches that require a boat or a trail, confirm the return before leaving, bring water, and keep a backup option for weather changes.

    Conclusion

    Trancoso Bahia pays off more when you pick fewer spots per day and arrive knowing how you’ll get back. Keep planning with the Voyage Voyage guides.

  • Iceland Ring Road: Complete Itinerary, Costs, and Best Time to Go

    Iceland Ring Road: Complete Itinerary, Costs, and Best Time to Go

    🇧🇷 POR | 🇫🇷 FR | 🇺🇸 EN | 🇪🇸 ES

    This Iceland itinerary works best when you treat the Ring Road as a trip of at least eight days, not a race for photos. This guide lays out the route, the costs, and the best time to go, plus an alternative plan for those who don’t want to drive.

    Duration: 8 days for the Ring Road; 10 to 12 days to include detours at a relaxed pace.
    Base: Reykjavík on arrival and departure; a different town each night along the circuit.
    Airport: Keflavík (KEF), usually a separate arrival from Reykjavík.
    Transport: a rental car gives you freedom; tours based in Reykjavík work for a short trip without a car.
    Budget: expensive destination; set aside extra beyond lodging and car rental.
    Season: summer for easier driving; winter for the northern lights, with a shorter, more flexible route.
    Entry: check passport, insurance, and immigration rules before booking.

    How many days do you need to drive the Ring Road in Iceland?

    Set aside at least seven days; to avoid turning every stop into a rushed photo op, eight days is the comfortable minimum. Visit Iceland notes that the Ring Road, Route 1, is 1,322 km long and recommends a minimum of seven days.

    With seven nights, you’ll be driving almost every day, but you can still see the essentials: the waterfalls and beaches of the South, the glacial lagoon, the Eastfjords, the Mývatn region in the North, and the return through the West. With ten days, add Snæfellsnes or an extra night in the East. The Westfjords don’t fit into this shorter loop—they need their own trip or extra days.

    Use the distance between overnight stops as your main criterion, not just the kilometers. Wind, stops, short hikes, and weather stretch out a leg that looks simple on the map.

    Icebergs at the Jökulsárlón glacial lagoon, Iceland
    Jökulsárlón, a stop on the south-eastern stretch. Photo: X1ntao ZHOU/Pexels. Source.

    8-Day Ring Road Itinerary: The Sequence That Avoids Backtracking

    You can drive the loop in either direction; for a first trip, heading south first concentrates the most famous stops early on and leaves the return through the North and West more direct. The choice doesn’t change the rule: 1,322 km demands buffer days.

    1. Day 1 — Arrival and Reykjavík: sleep in the capital if your flight lands late in the day. Use the time to stock up at the grocery store and pick up the car only the next morning if it’s just going to sit parked.
    2. Day 2 — Golden Circle and Selfoss/Hella: Þingvellir, Geysir, and Gullfoss make a great first impression. Sleep to the south to shorten the next day.
    3. Day 3 — South Coast and Vík: Seljalandsfoss, Skógafoss, and Reynisfjara beach are all on the way. At Reynisfjara, keep your distance from the sea: sneaker waves are a real danger.
    4. Day 4 — Vík to Höfn: pass by Fjaðrárgljúfur if conditions allow, then Skaftafell and Jökulsárlón. Sleep in Höfn or nearby.
    5. Day 5 — Eastfjords and Egilsstaðir: this is the day to accept that the landscape demands a slow pace. Choose Egilsstaðir if you prioritize services; coastal villages if you prioritize scenery.
    6. Day 6 — Mývatn: Dettifoss, Hverir, and the lake area fill the day nicely. Sleep in Mývatn or Akureyri depending on your booking.
    7. Day 7 — Akureyri and Borgarfjörður: cover the North without trying to squeeze in every attraction. This is a travel day, so keep one main stop and a plan B.
    8. Day 8 — Return to Reykjavík/KEF: time your drive to your flight. If you’re sleeping in Reykjavík, also check out our 3-day Reykjavík itinerary.

    Hotel bookings drive this itinerary more than the urge to “check off” every stop. If bad weather is forecast, swap a nearby visit or skip a detour; don’t push yourself to drive tired at night.

    Black sand beach and cliffs in Iceland
    Iceland’s South Coast. Photo: Rostyslav Savchyn/Pexels. Source.

    How Much Does a Trip to Iceland Cost?

    For planning, consider a mid-range reference of about US$ 275 per person per day, excluding airfare (verified in August 2026), according to the 2025–2026 estimate from GoIce Travel. As a safe range, work with US$ 220 to US$ 350 per person/day before your flight; July, a single room, car insurance, and paid lagoons push the total up significantly.

    Profile How they travel What costs the most
    Budget grocery stores, shared rooms or camping when possible, shared car vehicle coverage and lodging availability
    Mid-range guesthouse/simple hotel, shared car, and a few activities nightly rates, food, and insurance
    Comfort well-located hotel, larger car, and lagoons/tours high season and paid activities

    Get three separate quotes: car with all fees and protection, lodging per night, and food. Then add fuel, parking, flights, and activities. Don’t treat the insurance deductible as a detail: read the exclusions for wind, gravel, and road damage before accepting the rental.

    For a two-person, eight-day trip, splitting the car and room is the most concrete way to save. Cooking some meals cuts daily costs; dropping essential insurance to lower the daily rate is not a safe saving.

    Icebergs and mountains in an Icelandic lagoon
    Icebergs and mountains in Iceland. Photo: David Hitchcock/Pexels. Source.

    When to Go to Iceland?

    June to August is the easiest window for a first Ring Road trip: more daylight, more accessible roads, and more options in remote areas. In winter, the trip is still possible, but it requires daily monitoring of road, snow, wind, and alerts—guidance reinforced by Visit Iceland.

    Season Choose it if you want The adjustment needed
    Summer full Ring Road, hikes, and long days book lodging and car early
    September/October less light, autumn colors, and a chance of aurora accept itinerary changes due to weather
    Winter aurora and snowy landscapes shorten the route, keep buffer time, and avoid driving under pressure
    Spring transition with fewer crowds for part of the season check road and service openings

    Prioritizing the aurora? Check out where to see the Northern Lights and what it costs and our guide to the best time to see the aurora. It’s never guaranteed on any given night—the sky and solar activity call the shots, so don’t use an aurora hunt to justify a long stretch of driving.

    Do you need a 4×4 for the Ring Road?

    No. The Ring Road doesn’t require a 4×4, according to the official tourism source. A 4×4 only makes sense for certain mountain roads and specific conditions—don’t rent one just because of the trip’s name.

    Before you head out, check road conditions and the forecast; do it again before each long stretch. If a route closes or the wind picks up, changing your plan is just part of the trip. Never drive an F-road without the right vehicle and authorization, and don’t cross rivers unless you know the procedure and local conditions.

    Black sand coast near Vík, Iceland
    Black sand in the Vík area. Photo: David Hitchcock/Pexels. Source.

    Can you explore Iceland without driving?

    Yes, as long as you base yourself in Reykjavík and accept seeing the country in pieces. There’s a South Coast and waterfalls tour leaving from the capital; it covers one of the most in-demand stretches without a rental.

    Build three independent days: the Golden Circle, the South Coast, and an aurora or lagoon activity. The Golden Circle route is another solid day-trip option. For the full Ring Road, a multi-day tour or a car are the more realistic solutions; public buses and walking routes just can’t match the freedom of stopping at every attraction.

    Do Brazilians need a visa to enter Iceland?

    For tourism, double-check the current requirements before you fly. The official Ísland.is page states that non-EEA/EFTA visitors must have a passport issued less than ten years ago and valid for at least three months after departure; Schengen rules cap short stays at 90 days within any 180-day period.

    Bring proof of accommodation, return travel, and funds, and check your airline’s requirements too. Entry rules can change—this is a step to review on the official channel close to your date, not something to trust from an old list.

    Five mistakes that can derail your Ring Road trip

    • Booking one night in each town with no buffer for weather.
    • Choosing a car by daily rate and discovering fees or exclusions at the counter.
    • Planning your KEF arrival, Reykjavík stay, and car pickup as if they’re all the same place.
    • Adding the Westfjords to an eight-day itinerary.
    • Treating an aurora forecast as a guaranteed appointment.

    Frequently asked questions

    Which direction should you drive the Ring Road?

    There’s no mandatory direction: heading south first puts waterfalls, beaches, and Jökulsárlón at the start. Choose your direction based on the forecast, accommodation bookings, arrival time, and which stretch feels safest to drive.

    Is it safe to drive in Iceland in winter?

    It can be safe for drivers with experience, the right vehicle, and flexibility, but winter demands daily checks on roads, wind, snow, and alerts. Shorten your route, keep spare nights, and never drive just to honor a reservation.

    Is Iceland an expensive destination?

    Yes: accommodation, car, insurance, fuel, and activities add up fast. A mid-range benchmark of US$275 per person per day, verified in August 2026, is a good starting point; real quotes for your dates will set the final number.

    The safest starting point

    Plan for eight days, choose stays that break up the long drives, and let the weather fine-tune your route. The Ring Road rewards a little slack in your schedule: that’s how a shift in the wind becomes a route adjustment, not a travel headache.

  • Northern Lights: Where to See Them, When to Go, and How Much It Costs

    Northern Lights: Where to See Them, When to Go, and How Much It Costs

    🇧🇷 POR | 🇫🇷 FR | 🇺🇸 EN | 🇪🇸 ES

    To decide where to see the northern lights, choose Tromsø if you want an urban base, frequent tours, and easy logistics; choose Iceland if you prefer to combine the hunt with road trips, waterfalls, and volcanic landscapes. In both, travel between September and April, stay at least three nights, and treat the aurora as a possibility, not a guarantee.

    Best window: September to April. Easiest base: Tromsø, Norway. Base for combining attractions: Reykjavík, Iceland. Book: accommodation and tours before December to February. Visa: Brazilians traveling for tourism follow current Schengen rules; confirm before booking.

    Where to see the northern lights with the most infrastructure for a first trip?

    Tromsø is the simplest choice for a first attempt because it concentrates hotels, restaurants, and operators downtown, letting you head out at night with a guide without driving on winter roads. Reykjavík works better for those willing to spend more time on travel and combine the hunt with an Iceland road trip.

    The phenomenon has no ticket: you’re looking for darkness, clear skies, and solar activity. The advantage of a base city isn’t “buying” the aurora, but having a viable plan when the forecast changes. In Tromsø, the city center reduces logistics; in Iceland, getting away from Reykjavík’s lights usually makes a bigger difference.

    Northern lights over the landscape of Tromsø, Norway
    Northern lights in Norway. Photo: Pratima Patel, Pexels.

    Tromsø or Iceland: which destination should you choose?

    Choose Tromsø if the aurora is your top priority and you want to book a night hunt from the city; choose Iceland if the aurora is part of a larger nature trip. Visit Norway notes that winter is high season in Tromsø and suggests March and early April for fewer crowds.

    Profile Tromsø Iceland
    First trip without a car Best: tours depart from the city. Possible with an excursion from Reykjavík.
    Trip with other landscapes Fjords, Sami culture, and Arctic activities. Best: Golden Circle, south coast, and geothermal lagoons.
    Infrastructure for a hunt night High concentration of operators. Good, but clouds and distance from the capital weigh more.
    Verdict Go if your #1 goal is maximizing nights of trying. Go if you want a broader trip and are okay sharing the focus.

    Don’t choose based on the KP index alone. A clear-cloud forecast is worth more than high solar activity hidden under overcast skies. In Norway, the city also lets you fill your days with attractions like the 3-day Reykjavík itinerary when the forecast doesn’t help; for Iceland, use the planning from Arctic trips and winter nature as an organizational reference.

    Night view of Tromsø in winter
    Tromsø at night, an urban base in the Arctic. Photo: Efrem Efre, Pexels.

    When to go to increase your chances?

    For both destinations, plan your trip between September and April and book three to five nights; in Iceland, Visit Iceland points to this window for its long, dark nights. September and March are good compromises between hours of darkness, daytime scenery, and the chance of more intense activity near the equinoxes.

    December to February delivers the most pronounced winter feel, but also high demand and less daylight for outings. March and early April are the best choice for those who want aurora at night and roads or attractions during the day. Stay more than one night: this protects your trip against clouds, wind, and a low-activity night.

    Northern lights in the sky over Iceland
    Northern lights in Iceland. Photo: Artem Stoliar, Pexels.

    Can you see the northern lights without a car?

    Yes: in Tromsø, book a tour with a central departure; the vehicle takes the group to less-lit areas and the guide changes the route based on clouds and forecast. In Iceland, take an excursion from Reykjavík or use a transfer and guided tour, avoiding driving alone in winter conditions without experience.

    For non-drivers, Tromsø is the most predictable bet. A minibus tour listed by Visit Tromsø includes transport, thermal clothing, hot drinks, and photos; confirm inclusions and meeting point before paying. Bring thermal layers, a beanie, gloves, and insulated boots, even when the company lends a jumpsuit.

    How much does it cost to plan a northern lights trip?

    The aurora itself is free (€0.00; Aug 2026), but a paid viewing night varies based on transport, group size, and inclusions. In Tromsø, a cruise starts at 1,090 NOK (Aug 2026) and a minibus safari starts at 1,590 NOK (Aug 2026), according to official local listings; flights, accommodation, food, and clothing still factor into the budget.

    As a useful range, consider €0.00 (Aug 2026) for the phenomenon itself and set aside at least 1,090 NOK (Aug 2026) for a basic experience or 1,590 NOK (Aug 2026) for a minibus hunt with inclusions. Then add flights, three to five nights, meals, and on-the-ground transport. This avoids the false precision of converting an entire trip into reais months in advance: exchange rates, airfares, and hotels change constantly.

    Compare what’s included before comparing just the price. Thermal clothing, photos, return transfer, and the policy for a night without aurora can significantly change the real cost. Also check out other ideas for nature and outdoor travel to combine with your trip.

    See the northern lights tour in Tromsø and compare the excursion from Reykjavík.

    Frequently Asked Questions

    Is the Northern Lights guaranteed on a tour?

    No. Your guide can improve your odds by hunting for a break in the clouds and areas away from city lights, but cloud cover and solar activity ultimately call the shots. Check the operator’s policy for a second-chance tour and keep at least three nights open.

    Which month has the best chance of seeing the Northern Lights?

    September and March are strong picks because they sit close to the equinoxes, while December through February offers more hours of darkness. The smartest move is to prioritize a multi-night stay between September and April rather than betting everything on one specific date.

    Do I need to book a Northern Lights tour in advance?

    Book ahead if you’re traveling between December and February, when hotels and winter activities fill up faster. Outside peak season, it’s still worth booking on arrival only if the forecast allows for flexibility; always double-check the time, meeting point, and what’s included.

    Can you see the Northern Lights near Reykjavík?

    Yes, but the capital’s light pollution dims the viewing quality. The official advice is to seek dark, open skies, which is why a tour that leaves the urban area or a night in the countryside usually delivers better conditions.

    The Bottom Line

    For a first trip focused squarely on the aurora, Tromsø is the easiest call: an urban base, night tours, and less need for a rental car. Iceland wins when the lights are just one stop on a bigger itinerary. Wherever you go, pick the right window, book multiple nights, and treat the forecast as a guide — not a promise.

  • Yellowstone: What to Do, Itinerary, and When to Go

    Yellowstone: What to Do, Itinerary, and When to Go

    🇧🇷 POR | 🇫🇷 FR | 🇺🇸 EN | 🇪🇸 ES

    What to do in Yellowstone depends on how much time you have and the season: in three days, you can see geysers, hot springs, the canyon, and wildlife without crisscrossing the park. Yellowstone National Park is massive, has seasonal roads, and works best with a rental car, well-chosen bases, and early starts.

    Duration: 3 full days is the comfortable minimum; 4 or 5 allows for hikes and buffer time for weather.

    Base: inside the park to cut down on driving; West Yellowstone, Gardiner, and Canyon Village are the most practical options.

    Transportation: rental car. There’s no internal public transit network connecting the main sights.

    Best time to go: late May to June or September, balancing open roads and lighter summer crowds.

    Reservations: buy your pass and book lodging early; check road conditions and alerts before you head out.

    What to do in Yellowstone on your first trip

    Prioritize four areas: Old Faithful and the Upper Geyser Basin, Grand Prismatic Spring, the Grand Canyon of the Yellowstone, and Lamar Valley. This sequence covers the geothermal wonders, the canyon scenery, and bison watching, without trying to cross the entire park in a single day.

    Start with the geyser area: the walk between Old Faithful and the thermal basins reveals dozens of active features along boardwalks. Then, check out Grand Prismatic Spring from the Fairy Falls Trail overlook or the lower boardwalk; the first gives you a panoramic view of the color bands, while the second shows the steam and the sheer scale of the place.

    Grand Prismatic Spring in Yellowstone National Park
    Grand Prismatic Spring. Photo: I Bautista / Pexels.

    Set aside another block of time for the Grand Canyon of the Yellowstone: Artist Point is the most direct stop, and the North Rim trail offers different views of Lower Falls. Save Lamar Valley for early or late in the day, when animals are usually easier to spot from a distance. Bring binoculars; they change the experience without turning an approach into a risk.

    How many days to plan for

    Three full days work well for an organized first visit, as long as you sleep near the areas you’re exploring. With two days, stick to the geothermal core and the canyon; with four or five, add Lamar Valley, Yellowstone Lake, and a short hike without sacrificing the main stops.

    Time available Practical decision What gets cut
    2 days Old Faithful, Grand Prismatic, and the canyon Lamar Valley or Yellowstone Lake
    3 days Itinerary below, with two bases or one central base Long hikes and detours
    4–5 days Add the lake, Lamar, and a morning hike Nothing essential

    Don’t plan your route by straight-line distance. Roads wind around lakes and thermal basins, animals can block the way, and drive times stretch out in the summer. Check the National Park Service road page the night before and each morning of your trip.

    Yellowstone National Park: 3-day itinerary

    The most efficient itinerary splits the park by region: day 1 for the Upper Geyser Basin and Grand Prismatic, day 2 for the canyon and Hayden Valley, and day 3 for Lamar Valley or Yellowstone Lake. This cuts down on backtracking, keeps good light for landscapes, and lets you absorb small delays without derailing the plan.

    Day 1: Geysers and hot springs

    Get to Old Faithful early, walk the Upper Geyser Basin, and have a relaxed lunch before heading to Midway Geyser Basin. Finish at Grand Prismatic. If there’s heavy steam, try coming back when temperatures are higher or use the Fairy Falls Trail overlook, which often offers a wider view.

    Geyser eruption in Yellowstone National Park
    Geyser in Yellowstone. Photo: Marije Kouyzer / Pexels.

    Day 2: Canyon, waterfalls, and Hayden Valley

    Head to the Grand Canyon of the Yellowstone before the crowds, alternating between Artist Point and the North Rim overlooks depending on the weather. Drive down toward Hayden Valley in the late afternoon: the road connects the canyon to the southern part of the park and is a great area for spotting animals from your car, always without blocking traffic.

    Day 3: Lamar Valley or Yellowstone Lake

    Choose Lamar Valley if wildlife is your focus and you can get out early; choose Yellowstone Lake if you want a more laid-back day and are staying in the south. Both options require a long drive: treat them as a full-day destination, not a quick stop between attractions.

    When to visit Yellowstone

    For a balance of open roads, running services, and shorter lines, aim for late May, June, or September. July and August bring the most services, but also traffic and packed parking lots; in winter, visiting requires specific planning, as many roads close to regular vehicles.

    The deciding factor is operational, not photographic: check the official road status for what’s open on your dates. Spring can bring snow and access changes; in the fall, some facilities shut down before the end of the month. Get to popular attractions before 8 a.m. or visit in the late afternoon.

    Yellowstone landscape with hot springs and mountains
    Yellowstone landscape. Photo: 12019 / Pixabay.

    How to get there and which entrance to choose

    The best gateway depends on your route: the West Entrance works well for those staying in West Yellowstone and starting with the geysers; the North Entrance, via Gardiner, favors Mammoth and Lamar Valley. The South and East Entrances suit those combining Yellowstone with Grand Teton or Cody, but they don’t shorten all internal drives.

    For most travelers, flying into Bozeman, Jackson Hole, Idaho Falls, or Salt Lake City and picking up a car is more practical than relying on buses. Before booking, compare your first and last days on a map: switching bases might cost an extra night, but it can save hours of driving.

    For context on a broader U.S. trip, the guide to San Francisco without a car and the California first-timer itinerary help you separate an urban circuit from a national park leg.

    Passes, reservations, and budget

    You don’t need to reserve a vehicle to enter Yellowstone, but you do need an entrance pass and should book lodging well in advance. As of August 1, 2026, the private vehicle pass costs $35 and is valid for seven days; double-check the price before paying, as fees can change.

    The National Park Service states that there’s no vehicle reservation to enter: just bring a valid pass and arrive early. The private vehicle pass is $35 for seven days (August 2026), per the official fee schedule.

    Your total budget will vary more based on your car and your bed than on your ticket. As a planning range, set aside $35 for entry (August 2026), gas for getting around the park, lodging, and food; add in insurance and any nights spent outside the park. Don’t count on finding gas stations, cell service, or restaurants near every stop.

    Where to Stay

    Staying inside the park is your best bet if you want to start early and cut down on driving, but spots are limited; West Yellowstone is the most versatile base outside the park for the geysers, while Gardiner works better for the North Entrance and Lamar Valley. Choose your base based on the region you’ll be exploring on day one, not just the lowest price.

    The park’s lodging options have varying availability and require booking well in advance during peak seasons. West Yellowstone offers more restaurants and services; Canyon Village shortens your day at the canyon; Gardiner gives you direct access to the North Entrance. When booking, consider staying two nights at the same base unless switching hotels saves you at least two hours of driving.

    Wildlife, Boardwalks, and Mistakes That Derail Your Itinerary

    Yellowstone isn’t a zoo or a fenced-in theme park. Stay on the boardwalks in thermal areas, keep your car off the road, and don’t turn a wildlife traffic jam into a close encounter. The park service requires 100 yards of distance from bears and wolves and 25 yards from all other animals.

    American bison in Yellowstone National Park
    American bison in Yellowstone. Photo: Mark Direen / Pexels.

    Don’t walk across thermal crusts, and don’t stop in the middle of the road to take photos. Bring water, a waterproof jacket, snacks, and a downloaded map. The cold-weather, layered planning that works for an Alaska trip is also a solid reference for Yellowstone’s chilly mornings and evenings.

    An Extra Off the Main Loop

    If you have an extra afternoon in Gardiner, rafting on the Yellowstone River is a fun adventure that gets you away from the main geothermal sights. Save this activity for an extra day: it’s not a substitute for Old Faithful, Grand Prismatic, or the canyon on a short first visit.

    Frequently Asked Questions About Yellowstone

    Is it possible to visit Yellowstone without a car?

    It’s possible only with organized tours and a very limited itinerary; to see geysers, the canyon, valleys, and the lake in the same trip, a rental car is the practical choice. There’s no regular internal public transportation connecting all the attractions, and taxis won’t solve the long distances between regions.

    What precautions should I take when watching wildlife in Yellowstone?

    Always observe from the road or designated areas, without feeding, chasing, or cornering animals. Keep at least 100 yards from bears and wolves, and 25 yards from bison and other animals, per park rules; binoculars and a long lens are safer than getting closer.

    What’s the best entrance to Yellowstone?

    The West Entrance is the simplest choice if you’re prioritizing Old Faithful and Grand Prismatic, since West Yellowstone has great amenities. The North Entrance, in Gardiner, is better for Mammoth and Lamar Valley. The best option is the one that matches your first night’s lodging and avoids backtracking on the same road.

    Yellowstone Without the Rush: The Decision That Improves Your Trip

    The best Yellowstone itinerary isn’t a checklist of every attraction: it’s a plan that groups nearby regions, leaves room for weather and wildlife, and protects your mornings for the most crowded spots. Book three days, choose your base based on your entrance, and check road conditions and official alerts before you head out.

  • Hawaii Itinerary: Oahu or Maui Without Losing Days in Transit

    Hawaii Itinerary: Oahu or Maui Without Losing Days in Transit

    🇧🇷 POR | 🇫🇷 FR | 🇺🇸 EN | 🇪🇸 ES

    Hawaii itinerary doesn’t start with a list of beaches: it starts with choosing just a few islands and giving each one real time. For a first trip, Oahu is the best base for city life, history, and logistics; Maui comes in when you have at least seven to ten days and your goals include road trips, hikes, and natural scenery.

    In one week, do only Oahu or split Oahu and Maui into four and three nights; with ten days, five nights on each island is the most practical balance. Inter-island flights are quick, but airports, car returns, baggage, and check-in eat up a significant part of the day.

    Ideal length 7 days for one island; 10 days for Oahu + Maui without rushing.
    Cost Lodging, car rental, and inter-island flights set the budget; confirm rates by island and date before booking.
    Key reservations Diamond Head requires an advance reservation for visitors; sunrise at Haleakalā requires a per-vehicle reservation.
    Transportation Inter-island flight; a car is most useful on Maui and for Oahu’s North Shore.
    Initial base Honolulu/Waikīkī, on Oahu, for a first trip and international arrival.
    Time zone Hawaii uses HST and does not observe daylight saving time; check the difference from your home time zone on your travel dates.

    Hawaii itinerary: how to plan without trying to see too many islands?

    The best Hawaii itinerary limits the trip to one island for up to seven days and two islands for ten days. Each island change looks short on the map, but it includes airport transfers, car rental, hotel check-in, and route adjustments — exactly what steals time from the beach and the trails.

    Aerial view of Waikiki in Oahu, Hawaii
    Waikīkī is a practical base for starting on Oahu. | Photo: Jess Loiterton / Pexels

    Use Oahu for arrival, history, and urban beaches; Maui for nature, the Road to Hāna, and Haleakalā; the Big Island for volcanoes; and Kauai for hiking and greener coastline. For a seven-day debut, Oahu alone is enough. For ten days, do Oahu first and Maui after, without planning day trips between the islands. Book your first and last night near the airport when your flight times make that more comfortable.

    This block-by-block itinerary logic avoids the same mistake of trying to cover too many neighborhoods in a big city. If your US trip also includes California, compare it with our San Francisco without a car itinerary before deciding on the number of days. For another very different urban stop, it’s also worth saving our guide to things to do in Chicago.

    Oahu or Maui: which island should you choose for your first trip to Hawaii?

    Oahu is the most complete choice for a first trip to Hawaii when you want convenience, restaurants, surfing, Pearl Harbor, and little risk of overspending on a car. Maui is better for those who don’t mind driving, seek natural scenery, and have time to enjoy the Road to Hāna and Haleakalā.

    Criteria Oahu Maui
    Best for First trip, city life, history, and transportation Nature, road trips, snorkeling, and a slower pace
    Car Optional in Waikīkī; useful for the North Shore Almost always recommended
    Pace More urban and varied More about the road and the landscape

    Don’t treat this as a competition. Oahu and Maui complement each other, but they require more days. On Oahu, the experience that best blends history and logistics is booking the Pearl Harbor and Honolulu tour; the page was verified in Jul/2026.

    Waterfall and vegetation in Maui, Hawaii
    Maui’s landscape rewards days without rushing. | Photo: rustygage / Pixabay

    If you choose both islands, look for a Maui day trip from Honolulu only when your schedule doesn’t allow an overnight stay. To truly see Maui, spending the night on the island is the smartest decision.

    What to do in Hawaii in 7 to 10 days?

    In seven days in Hawaii, a solid Oahu itinerary brings together Waikīkī, Diamond Head, Pearl Harbor, the east coast, and the North Shore. In ten days, add Maui with three days for the Road to Hāna, Haleakalā, and a beach of your choice without rushing.

    On Oahu, reserve the first day to recover from your flight in Waikīkī; save Diamond Head for one morning and Pearl Harbor for another. Use two more days for Kualoa/the east coast and the North Shore. On Maui, don’t try to do the Road to Hāna, Haleakalā, and the beach on the same day: each deserves its own block.

    Sunrise at Haleakalā requires a vehicle reservation between 3am and 7am; the reservation fee is US$ 1 per vehicle, according to Recreation.gov as of Jul/2026, plus the park entrance fee. Come prepared for cold weather, as the summit’s altitude and temperature are very different from the coast.

    The most expensive mistake is buying an inter-island flight to “see everything” and return the same day: the bill grows, the travel time dominates, and you miss what makes the destination special.

    How to get around between islands and within Oahu or Maui?

    To travel between Oahu and Maui, fly—there’s no regular passenger ferry service between the main islands. On Oahu, public transit, walking, and ride-hailing apps work well in Honolulu and Waikīkī, while Maui calls for a rental car on most itineraries.

    Add baggage fees to your airfare: Hawaiian Airlines charges US$ 30 for the first checked bag and US$ 40 for the second on inter-island flights, rates current as of the page consulted in Jul/2026. Double-check the rules of the airline you actually plan to use before booking your fare.

    Volcanic crater in Hawaii
    Volcanoes and trails require planning for access and weather. | Photo: Duffyman / Pixabay

    On Maui, book your car early and plan your accommodation’s parking. For the Road to Hāna, start early, fill up the tank beforehand, and treat the drive as a full-day excursion; road conditions can change. As of March 2026, the local tourism authority recommended using licensed operators to handle variable access after weather events.

    What’s the best time to visit Hawaii?

    Hawaii works year-round, but the best time depends on what you want to do: spring and fall usually balance weather and demand, while winter draws those hoping to watch big waves on the North Shore, and summer tends to favor calmer seas in some areas.

    The weather in Waikīkī doesn’t automatically describe Oahu’s North Shore or Maui: treat every move as another microclimate. Monitor rain, surf, and local alerts in the week before departure, especially if hikes, snorkeling, or the Road to Hāna are on your plan.

    How much does Hawaii cost: what budget should you consider?

    Hawaii is expensive because it stacks a long flight, hotels, food, a car, and—if you’re visiting two islands—inter-island flights and baggage. Instead of promising a one-size-fits-all figure, calculate costs in blocks and set aside a buffer for fees and attractions, since the season changes everything.

    An honest split for ten days is: 5 nights on Oahu + 5 on Maui, staying in well-located areas, renting a car only on days that call for the road, and one standout paid activity per island. The confirmed additional cost for sunrise at Haleakalā is US$ 1 per vehicle for the reservation (Jul/2026); other entry fees, lodging, and airfares should be verified on official sources for your dates.

    This is where the itinerary gains efficiency: staying only on Oahu can cut car rental and inter-island flights; splitting Oahu and Maui adds variety but isn’t a money-saver. If you’re comparing U.S. destinations, you can cross-check these costs with our practical Miami itinerary.

    Where to stay and what to eat in Hawaii?

    On Oahu, Waikīkī is the simplest base for a first trip; Kaimana or nearby areas work for those wanting fewer hotels; the North Shore calls for a different logic and more driving. On Maui, choose lodging based on your route: Kihei/Wailea favor the south, while Kāʻanapali requires attention to updated West Maui guidance.

    Sunset on a Hawaiian beach
    Set aside time for beaches without turning every day into a commute. | Photo: Soly Moses / Pexels

    Eat at local spots, try poke, fish dishes, malasadas, and plate lunch, and make reservations when a restaurant is a priority. On Maui, the Hawaii Tourism Authority asks visitors to respect Lahaina’s recovery: don’t enter impacted areas, don’t treat tragedy as a tourist attraction, and support small businesses with sensitivity.

    Which reservations are mandatory before the trip?

    Book ahead for Diamond Head, Haleakalā at sunrise, hotels, cars, and fixed-date experiences. Diamond Head uses an official reservation system for visitors and can sell out; the site allows purchases up to 30 days in advance and notes that entry and parking must be bought online.

    The pitfalls are predictable: arriving late to your Diamond Head time slot can block entry; the Haleakalā sunrise ticket doesn’t replace the park entry fee; and a packed island-hopping schedule leaves little room for delays. For Oahu, also check the activities available for your dates in the widget below.

    Frequently asked questions

    How many days are enough for Hawaii?

    Seven days are enough to get to know one Hawaiian island well, like Oahu. To combine Oahu and Maui without spending your trip in airports, plan for about ten days.

    Do you need to rent a car in Hawaii?

    A car isn’t essential in Waikīkī and Honolulu, where walking, buses, and ride-hailing apps help. On Maui and for the North Shore on Oahu, renting a car greatly expands your options.

    Is it possible to visit Oahu and Maui on the same trip?

    It’s possible to visit Oahu and Maui on the same trip, but ideally you’ll have at least seven to ten days. For less time, choose just one island and enjoy it more.

    Is Hawaii expensive for Brazilians?

    Hawaii tends to be expensive for Brazilians because it combines a long flight, the dollar, lodging, food, a car, and activities. Reduce the impact by limiting islands, comparing lodging, and skipping a car when staying in Waikīkī.

    What should you book before going to Hawaii?

    Book hotels, a car, and inter-island flights as soon as you settle on your islands. Diamond Head and the sunrise at Haleakalā require advance reservations for visitors and should be part of your planning before buying your ticket.

    Conclusion

    The best Hawaii isn’t a collection of islands checked off a map. Choose Oahu for a complete first experience, add Maui when you have time, and let each day breathe. At Voyage Voyage, you’ll find more itineraries to turn logistics into a real trip.

  • Azores Portugal: How Many Days, When to Go, and What Not to Miss

    Azores Portugal: How Many Days, When to Go, and What Not to Miss

    🇧🇷 POR | 🇫🇷 FR | 🇺🇸 EN | 🇪🇸 ES

    The Azores, Portugal, is an archipelago of nine volcanic islands in the middle of the Atlantic, and the most common question from people researching the destination isn’t whether it’s worth it—it’s where to start and how many days to set aside. The Azores are about a 2h25 flight from Lisbon to Ponta Delgada, the best time to go is from May to August, and the ideal is to set aside 4 to 7 days on São Miguel so you’re not just rushing past Lagoa das Sete Cidades, Furnas, and the volcanic coastline that make the destination worth the trip.

    São Miguel, the largest island and the best served by flights, is the natural gateway for anyone with just one trip to see the archipelago. It’s home to the most sought-after spots: Sete Cidades, Furnas, and the volcanic coastline of Ponta Delgada.

    Before diving into the details of each section, check out the photo that sums up why so many people put São Miguel at the top of their Portugal list.

    Lagoa das Sete Cidades seen from the viewpoint, Azores
    Lagoa das Sete Cidades, with its two-tone water, is the most photographed viewpoint in the archipelago. | Photo: Alexandre Moreira / Pexels
    Lisbon–Ponta Delgada flight direct, about 2h25 (Azores Airlines and TAP), from ~€130 round trip (Jul/2026) — check current prices
    Best time to go May to August (68-77°F, less rain); Nov-Feb has more cloud cover but mild weather
    Recommended days minimum 3 days, ideal 4-7 on São Miguel
    Visa for Brazilians Portugal is Schengen; Brazilian tourists don’t need a visa for stays up to 90 days — confirm on the official consulate website before traveling
    Getting around the island rental car is the most practical; there are also guided van tours
    Currency euro (€)

    How to get to the Azores

    The most common route leaves from Lisbon direct to Ponta Delgada, on São Miguel, with a flight of about 2h25 on Azores Airlines or TAP Portugal. There are also direct flights from Porto and, depending on the season, direct connections from Brazil and other European cities—but going through Lisbon is the most reliable route year-round.

    Historic center of Ponta Delgada, São Miguel, Azores
    Ponta Delgada is home to the main airport and the island’s historic center. | Photo: Ndumiso Zimu / Pexels

    If you’re already in mainland Portugal, you’ll find round-trip flights from ~€116 on Azores Airlines, with fares varying quite a bit depending on how far in advance you book. It’s worth booking 2-3 months in advance during high season (May to August), when prices go up and seats get more competitive.

    Origin Flight duration Approximate price Best for
    Lisbon → Ponta Delgada 2h25 from €116 (Jul/2026) most frequent route, year-round
    Porto → Ponta Delgada ~2h40 varies by season those already in northern Portugal
    Direct flight from Brazil (seasonal) ~5-6h varies quite a bit those who want to skip the Lisbon layover

    Best time to go and how long to stay in the Azores, Portugal

    High season runs from May to August, with temperatures between 68°F and 77°F, less rain, and more sun—it’s also when whale and dolphin watching is easiest. From November to February, it rains more and the sky is cloudier, but the weather stays mild for those who don’t mind overcast days and prefer lower prices.

    As for how many days to set aside: 3 days is enough to see the most famous spots on São Miguel at a fast pace; 4 to 7 days lets you explore the island at a relaxed pace, including Sete Cidades, Furnas, Ponta Delgada, and at least one natural volcanic water pool. If your plan includes a second island (Terceira or Faial are the most sought-after after São Miguel), add at least 3 more days—inter-island flights aren’t always daily.

    What to do on São Miguel, Azores

    São Miguel is home to the archipelago’s main attractions: Lagoa das Sete Cidades, a volcanic crater with two lakes of different colors (the Vista do Rei viewpoint is the most famous angle); the Furnas Valley, with fumaroles, hot springs, and the traditional cozido cooked in the earth’s heat; and the Ponta da Ferraria, a natural pool where seawater mixes with warm volcanic springs.

    In downtown Ponta Delgada, it’s worth strolling by Igreja Matriz de São Sebastião and the Portuguese cobblestone streets of the historic center—the same paving technique you’ll see in Porto and Sintra. If you have more time, Parque Natural da Ribeira dos Caldeirões and Ilhéu de Vila Franca round out the itinerary without straying too far from the main route.

    Furnas Valley with geothermal activity, Azores
    Furnas is about 45 minutes from Ponta Delgada and is home to fumaroles, hot springs, and the famous Furnas cozido. | Photo: Eduardo Jorge Machado / Pexels

    A boat trip for whale and dolphin watching, leaving from Ponta Delgada’s port, is considered almost a must-do—spring and summer are the best times, with trips lasting about 3 hours.

    What to combine with your Azores trip

    Those with time combine São Miguel with a second island (Terceira, with Angra do Heroísmo, or Faial, a base for sailboats crossing the Atlantic) or extend the trip through mainland Portugal, since Lisbon is the natural connection. To book a guided tour in Portuguese from home, the Sete Cidades and Lagoa do Fogo excursion is one of the most complete for those who won’t rent a car.

    Another very popular option is the boat tour for whale and dolphin watching, and for those who prefer to explore Ponta Delgada on foot, it’s worth booking a free guided tour of the historic center.

    Where to eat on São Miguel

    Azorean cuisine revolves around fresh fish, São Jorge cheese, pineapple grown in local greenhouses, and the famous Furnas cozido, slow-cooked in the earth’s volcanic heat for about 6 hours. In Ponta Delgada, restaurants around the historic center and marina tend to have the fairest prices; a fish dish with sides runs between €12 and €20 (Jul/2026) at most tourist spots.

    Where to stay on São Miguel

    Ponta Delgada is the most practical base: it’s home to the airport, restaurants, nightlife, and easy car access to all of the island’s sights. If you’re after more peace and scenery, you can stay in Furnas, closer to the thermal valley but with fewer dinner options at night.

    Cliffs and volcanic coastline of São Miguel, Azores
    São Miguel’s volcanic coast forms cliffs and natural pools all along the island. | Photo: Francesco Ungaro / Pexels

    Practical tips and what nobody tells you about the Azores

    Real total cost of 5 days on São Miguel, for 1 person: Lisbon-Ponta Delgada round-trip flight (~€130) + simple accommodation (~€250-350 for 5 nights) + rental car (~€150-200 for 5 days) + food and activities (~€200-300) — a range of €730 to €980 (Jul/2026), not counting the international flight to Lisbon.

    • The weather changes several times a day — bring a windbreaker even in summer, especially for the higher viewpoints.
    • Book your rental car in advance during high season: the island’s fleet is small and sells out fast in July and August.
    • Ponta da Ferraria is only swimmable at favorable low tide — check the tide schedule before you go, or the trip turns into just a photo op.
    • Many restaurants close earlier outside Ponta Delgada’s center; don’t leave dinner past 9 PM in smaller villages.
    • Cell signal is weak or nonexistent at many viewpoints and trails — download the offline map before leaving the city.

    Frequently asked questions

    Do Brazilians need a visa for the Azores?

    No. The Azores are part of Portugal and the Schengen Area, and Brazilian tourists can enter without a visa for stays of up to 90 days. Always check the updated rules on the official Portuguese government visa website before traveling.

    How long is the flight from Lisbon to the Azores?

    The direct flight from Lisbon to Ponta Delgada, on São Miguel, takes about 2h25 and is operated by Azores Airlines and TAP Portugal, with prices starting at around €116 round-trip (Jul/2026).

    Is it worth visiting more than one Azores island?

    It is, but it requires more time and planning: flights between the Azores islands aren’t always daily. For a first trip of up to 5-7 days, focusing on São Miguel gives you a more complete itinerary than splitting your time between two islands.

    Can you see whales and dolphins in the Azores?

    Yes, whale and dolphin watching tours leave from Ponta Delgada’s harbor, last about 3 hours, and spring and summer are the best times, when several species pass through the archipelago’s waters.

    Are the Azores expensive to visit?

    A 5-day trip to São Miguel for 1 person, including the inter-island flight, simple accommodation, rental car, and food, comes to between €730 and €980 (Jul/2026) — a mid-range cost by European standards, cheaper than destinations like Paris or London.

    Conclusion

    The Azores reward travelers who plan a little ahead: book your inter-island flight early, pick May through August if you want sunshine and calmer seas, and give São Miguel at least 4 days so you’re not rushing through Sete Cidades and Furnas. For more Portugal itineraries, Voyage Voyage has complete guides to Madeira Island and the Algarve if you want to extend your trip.

  • Madeira Island: A 5-Day Itinerary Without Relying Only on a Car

    Madeira Island: A 5-Day Itinerary Without Relying Only on a Car

    🇧🇷 POR | 🇫🇷 FR | 🇺🇸 EN | 🇪🇸 ES

    Madeira calls for simple choices: pick your base, book anything with a set time, and leave some buffer for getting around. With a block-style itinerary, you can hit the main sights without turning your trip into a race between parking lots, lines, and viewpoints.

    Quick answer: plan at least three days if you want to combine the highlights with real downtime; on a short visit, prioritize the most in-demand spot and one walkable area.

    How to plan Madeira

    For Madeira, the key decision at this stage is to cut down on friction and save time for what really matters.

    Aerial view of Funchal in Madeira
    Aerial view of Funchal in Madeira. | Photo: Fernando B M / Pixabay

    How to plan Madeira: First step: Start with the one thing on your schedule that can’t change. Put that commitment early in the day and arrange everything else by location; this order cuts down on backtracking and keeps you from realizing too late that the best light or access is already gone. Before you lock in the day, compare the distance on the map, the actual timing, and the total cost. This check keeps an attractive-on-paper choice from turning into a needless detour, and lets you swap plans without losing the main event of your trip. Jot down a nearby backup, confirm accessibility, and keep your phone charged: small choices prevent retracing your steps and protect the best part of the day.

    How to plan Madeira: The most comfortable approach is to split morning, afternoon, and evening by neighborhood or region. Use the first block for the place with controlled entry, the second for a relaxed stroll, and the evening for dinner near your stay. Before you lock in the day, compare the distance on the map, the actual timing, and the total cost. This check keeps an attractive-on-paper choice from turning into a needless detour, and lets you swap plans without losing the main event of your trip. Jot down a nearby backup, confirm accessibility, and keep your phone charged: small choices prevent retracing your steps and protect the best part of the day.

    How to plan Madeira: Check conditions and hours on the official source before you pay. Seasonal rules, tides, trails, and visitor capacity change; booking only after checking the operator’s page eliminates most surprises. Before you lock in the day, compare the distance on the map, the actual timing, and the total cost. This check keeps an attractive-on-paper choice from turning into a needless detour, and lets you swap plans without losing the main event of your trip. Jot down a nearby backup, confirm accessibility, and keep your phone charged: small choices prevent retracing your steps and protect the best part of the day.

    Practical itinerary to make the most of it

    For Madeira, the key decision at this stage is to cut down on friction and save time for what really matters.

    Practical itinerary to make the most of it: The most comfortable approach is to split morning, afternoon, and evening by neighborhood or region. Use the first block for the place with controlled entry, the second for a relaxed stroll, and the evening for dinner near your stay. Before you lock in the day, compare the distance on the map, the actual timing, and the total cost. This check keeps an attractive-on-paper choice from turning into a needless detour, and lets you swap plans without losing the main event of your trip. Jot down a nearby backup, confirm accessibility, and keep your phone charged: small choices prevent retracing your steps and protect the best part of the day.

    Funchal coastline, Madeira
    Funchal coastline, Madeira. | Photo: jhamel0210 / Pixabay

    Practical itinerary to make the most of it: Check conditions and hours on the official source before you pay. Seasonal rules, tides, trails, and visitor capacity change; booking only after checking the operator’s page eliminates most surprises. Before you lock in the day, compare the distance on the map, the actual timing, and the total cost. This check keeps an attractive-on-paper choice from turning into a needless detour, and lets you swap plans without losing the main event of your trip. Jot down a nearby backup, confirm accessibility, and keep your phone charged: small choices prevent retracing your steps and protect the best part of the day.

    Practical itinerary to make the most of it: Don’t fill every empty slot in your schedule. A long coffee, a quick rain shower, finding parking, or waiting for a bus are all part of the logistics; an hour of buffer makes the itinerary actually workable. Before you lock in the day, compare the distance on the map, the actual timing, and the total cost. This check keeps an attractive-on-paper choice from turning into a needless detour, and lets you swap plans without losing the main event of your trip. Jot down a nearby backup, confirm accessibility, and keep your phone charged: small choices prevent retracing your steps and protect the best part of the day.

    Where to stay and set up your base

    For Madeira, the key decision at this stage is to cut down on friction and save time for what really matters.

    Where to stay and set up your base: Check conditions and hours on the official source before you pay. Seasonal rules, tides, trails, and visitor capacity change; booking only after checking the operator’s page eliminates most surprises. Before you lock in the day, compare the distance on the map, the actual timing, and the total cost. This check keeps an attractive-on-paper choice from turning into a needless detour, and lets you swap plans without losing the main event of your trip. Jot down a nearby backup, confirm accessibility, and keep your phone charged: small choices prevent retracing your steps and protect the best part of the day.

    Madeira coastline in Portugal
    Madeira coastline in Portugal. | Photo: hellracer / Pixabay

    Where to stay and set up your base: Don’t fill every empty slot in your schedule. A long coffee, a quick rain shower, finding parking, or waiting for a bus are all part of the logistics; an hour of buffer makes the itinerary actually workable. Before you lock in the day, compare the distance on the map, the actual timing, and the total cost. This check keeps an attractive-on-paper choice from turning into a needless detour, and lets you swap plans without losing the main event of your trip. Jot down a nearby backup, confirm accessibility, and keep your phone charged: small choices prevent retracing your steps and protect the best part of the day.

    Where to stay and set up your base: If you’re traveling without a car, focus on a base with a grocery store, restaurants, and connections. With a car, sort out parking and access before picking the hotel: a cheap rate far from your route can cost you time every single day. Before you lock in the day, compare the distance on the map, the actual timing, and the total cost. This check keeps an attractive-on-paper choice from turning into a needless detour, and lets you swap plans without losing the main event of your trip. Jot down a nearby backup, confirm accessibility, and keep your phone charged: small choices prevent retracing your steps and protect the best part of the day.

    Transport, bookings, and travel pace

    For Madeira, the key decision at this stage is to cut down on friction and save time for what really matters.

    Transport, bookings, and travel pace: Don’t fill every empty slot in your schedule. A long coffee, a quick rain shower, finding parking, or waiting for a bus are all part of the logistics; an hour of buffer makes the itinerary actually workable. Before you lock in the day, compare the distance on the map, the actual timing, and the total cost. This check keeps an attractive-on-paper choice from turning into a needless detour, and lets you swap plans without losing the main event of your trip. Jot down a nearby backup, confirm accessibility, and keep your phone charged: small choices prevent retracing your steps and protect the best part of the day.

    Aerial view of Funchal, Madeira
    Aerial view of Funchal, Madeira. | Photo: Fernando B M / Pixabay

    Getting around, booking, and travel pace: If you’re traveling without a car, focus on a base with a market, restaurants, and good connections. With a car, prioritize parking and access before picking your hotel: a cheap nightly rate far from your route can cost you time every single day. Before you lock in your plans, compare the distance on the map, the actual travel time, and the total cost. This quick check keeps an attractive-on-paper choice from turning into unnecessary backtracking, and lets you swap plans without missing the main highlight of your trip. Jot down a nearby backup option, confirm accessibility, and keep your phone charged: small choices prevent retracing your steps and protect the best part of your day.

    Getting around, booking, and travel pace: Bring water, sturdy footwear, and a light jacket whenever there’s coastline, altitude, or hiking involved. These are small details, but they change the experience on routes that look easy on the map but stretch out under sun, wind, or uneven rock. Before you lock in your plans, compare the distance on the map, the actual travel time, and the total cost. This quick check keeps an attractive-on-paper choice from turning into unnecessary backtracking, and lets you swap plans without missing the main highlight of your trip. Jot down a nearby backup option, confirm accessibility, and keep your phone charged: small choices prevent retracing your steps and protect the best part of your day.

    Final tips before you head out

    For Madeira Island, the key decision at this stage is to cut down on friction and save your time for what really matters.

    Final tips before you head out: If you’re traveling without a car, focus on a base with a market, restaurants, and good connections. With a car, prioritize parking and access before picking your hotel: a cheap nightly rate far from your route can cost you time every single day. Before you lock in your plans, compare the distance on the map, the actual travel time, and the total cost. This quick check keeps an attractive-on-paper choice from turning into unnecessary backtracking, and lets you swap plans without missing the main highlight of your trip. Jot down a nearby backup option, confirm accessibility, and keep your phone charged: small choices prevent retracing your steps and protect the best part of your day.

    Final tips before you head out: Bring water, sturdy footwear, and a light jacket whenever there’s coastline, altitude, or hiking involved. These are small details, but they change the experience on routes that look easy on the map but stretch out under sun, wind, or uneven rock. Before you lock in your plans, compare the distance on the map, the actual travel time, and the total cost. This quick check keeps an attractive-on-paper choice from turning into unnecessary backtracking, and lets you swap plans without missing the main highlight of your trip. Jot down a nearby backup option, confirm accessibility, and keep your phone charged: small choices prevent retracing your steps and protect the best part of your day.

    Frequently asked questions

    How many days should you spend in Madeira?

    Five days give you a well-rounded first look at Madeira Island: Funchal, a levada, and the east and west coasts. Seven days let you reschedule mountain days depending on the weather.

    Do you need a car in Madeira?

    A car helps a lot for viewpoints and remote spots, but it’s not essential if you stay in Funchal and book tours for your mountain days.

    Which levadas are good for beginners?

    Beginners should stick to official, open trails that are short and match the group’s fitness level. The Levada Vale Paraíso is a great reference for an easy route; always check the trail conditions beforehand.

    When is the best time to visit Madeira?

    Madeira can be visited year-round, but the mountains and coast have their own microclimates. Spring and fall offer a good balance of temperatures and crowds; for hiking, prioritize the forecast and official warnings.

    Before you lock it in:

    Conclusion

    Madeira Island works best when you book the essentials and embrace a realistic pace. If you’re planning to visit more than one Portuguese island on the same trip, it’s worth comparing with our Azores Portugal guide, which also depends on choosing your base and days wisely. Use these choices as your foundation, double-check details on the official source and Portugal’s official tourism site, and round out your research with more city itineraries, tours and attractions, and nature getaways. Voyage Voyage helps you plan a trip with less bad improvisation and more time to actually soak in your destination.