Category: Beaches & Nature

  • What to Do in The Hague: A Complete Guide

    What to Do in The Hague: A Complete Guide

    🇧🇷 POR | 🇫🇷 FR | 🇺🇸 EN | 🇪🇸 ES

    The Hague is the kind of city that surprises you because it packs three trips into one: the political heart of the Netherlands, a seriously strong museum scene, and a quick escape to the North Sea at Scheveningen. If you usually associate Holland only with Amsterdam, The Hague offers a more elegant, less obvious, and far more varied counterpoint than it might seem at first glance.

    What to do in The Hague means combining the Binnenhof, Mauritshuis, Peace Palace, museums, charming neighborhoods, and the beach at Scheveningen into one itinerary. The city is practical, works well by train and tram, and can take you from the center to the sea in just a few minutes.

    How to get to The Hague

    Getting to The Hague is simple if you’re already traveling through the Netherlands. The most common route is by train from Amsterdam, Schiphol, Rotterdam, or Delft, with short and frequent trips. In practice, many people use Schiphol as their entry point and head straight to the city by train, which saves you from switching hotels in Amsterdam on your very first day.

    Hofvijver and historic Binnenhof buildings in The Hague
    The Hofvijver helps you understand the more elegant side of The Hague’s center. | Photo: Kevin Demeyer / Pexels

    According to DenHaag.com, one of the destination’s biggest strengths is precisely the combination of city and sea: the center is about 15 minutes from the beach, which completely changes the logic of your itinerary. If you’re planning a bigger trip around the country, it makes sense to connect The Hague with Amsterdam and Rotterdam, because the travel times are short and each city offers a completely different vibe.

    Best time to visit and how long to stay

    The Hague works year-round, but the city really comes into its own between April and September. That’s when you can best enjoy walks through the center, the parks, unhurried museum visits, and especially Scheveningen with a better chance of clear skies. The official tourism site highlights that The Hague has 11 km of coastline, wide beaches, and expansive green areas, so the weather plays a big role in your experience.

    For most travelers, two or three days is plenty. Still, if you like to alternate between museums, neighborhoods, the beach, and day trips without rushing, it’s worth setting aside at least three days for The Hague. You can fit it into a single day, but you’d miss out on the very contrast that makes this destination work so well.

    What to do in The Hague

    Start in the center: Binnenhof, Hofvijver, and the government streets

    The Hague has a different energy from other Dutch cities because its heart revolves around politics and institutions. The most symbolic highlight is the Binnenhof, described by DenHaag.com as the heart of Dutch democracy. Even with the complex under renovation, the surrounding area is still worth the walk because of the Hofvijver lake, the historic facades, and the atmosphere that’s both official and elegant, dominating the center.

    This is a good place to adjust your expectations: The Hague doesn’t rely on a single monumental postcard. It works best as a city of atmosphere, of urban vignettes, and of short, sequential strolls. That’s why it’s worth linking the old center, the Plein area, and the Lange Voorhout in the same block.

    Visit the Mauritshuis and pick at least one more standout museum

    If you love art, The Hague deserves special attention. The Mauritshuis is the most obvious name and remains one of the easiest visits to justify on a first trip, especially for bringing together works by Vermeer, Rembrandt, and other Dutch masters in a compact palace. Meanwhile, the Kunstmuseum Den Haag, according to its official site, houses more than 160,000 works and usually works better for those looking to expand their itinerary beyond the “must-see basics.”

    View of The Hague's center with historic buildings near the Mauritshuis
    The center of The Hague blends museums, official buildings, and elegant architecture. | Photo: Martijn Stoof / Pexels

    To turn your visit into a deeper read of the city, a great idea is to book a guided tour of The Hague. It usually helps a lot because the city has many important landmarks that go unnoticed without context.

    Stop by the Peace Palace and the city’s diplomatic side

    Another point that helps you understand The Hague is the Peace Palace. The building appears on the official site as one of the symbols of the city of peace and justice, and that’s no exaggeration. Even when you’re just standing outside, the place reinforces an important trait of this destination: The Hague isn’t just about museums or the beach, but also about a diplomatic imaginary that almost no other European city offers in quite the same way.

    Peace Palace, one of the most symbolic buildings in The Hague
    The Peace Palace reinforces The Hague’s reputation as the city of peace and justice. | Photo: Patrick Jaksic / Pexels

    If you want a more original itinerary through the Netherlands, it’s precisely this axis of power, art, and diplomacy that makes The Hague stand out. Many generic lists mention the city only as a day-trip base, when the real payoff comes from treating it as a destination in its own right.

    Set aside a whole block of time for Scheveningen

    Scheveningen isn’t just a detail in your itinerary: it’s one of the reasons to visit The Hague. The official site sums up this advantage well by highlighting that you can get from the center to the beach in about 15 minutes. The area offers a stroll along the boardwalk, a break at a café, beach time when the weather cooperates, and a visit to the Pier, which DenHaag.com calls a unique spot on the Dutch coast.

    Scheveningen Pier with the North Sea in The Hague
    Scheveningen is the part of The Hague that changes the pace of your trip and takes you to the North Sea. | Photo: Igor Passchier / Pexels

    If you’re traveling with kids, the area also makes it easy to fit in Madurodam. If you’re after a more relaxed day, just combine the beach, the pier, and a smaller museum along the way. This flexibility is one of the ways The Hague often beats cities with more rigid itineraries.

    Explore neighborhoods, shop windows, and the more local side

    Once you’ve hit the main sights, it’s worth wandering through neighborhoods like Zeeheldenkwartier or the Noordeinde area. That’s where The Hague feels less institutional and more enjoyable to use: pretty streets, independent shops, cafés, and a rhythm that invites you to slow down. For those coming from busier capitals, this balance is usually a pleasant surprise.

    What to pair with The Hague

    The Hague pairs beautifully with Delft, Rotterdam, and Amsterdam. Delft works as a charming, compact day trip; Rotterdam brings the more contemporary side with bolder architecture; Amsterdam rounds out the trio with classic canals and museums. If you’re coming from Belgium, you can also slot the city between Bruges and the rest of the Netherlands, like in this what to do in Bruges in 1 day itinerary.

    The best scenario is to use The Hague not as a quick stopover, but as a base city for two or three nights. That way, you get the most out of the center, the beach, and still have room for a short day trip if you want.

    Where to eat in The Hague

    The Hague is less “picture-perfect” than Amsterdam, and that’s exactly why meals here tend to be more relaxed. The historic center works well for lunch between museums; the Noordeinde area and its surroundings are great for dinner; Scheveningen is good for a break with a sea view, especially on clear-sky days.

    The trick here is not to stick only to the attraction zone. In The Hague, many of the best breaks happen when you wander two or three streets away from the most touristy circuit. That applies to both coffee and dinner.

    Where to stay in The Hague

    For a first visit, the best bet is to sleep between Den Haag Centraal, Hofvijver, and the historic center. You’ll be close to the museums, do plenty of walking, and still have easy access to the trams to Scheveningen. If you prefer a more laid-back vibe, consider staying near the beach, but then you trade museum convenience for a seaside resort atmosphere.

    If you’re planning to travel around the Netherlands by train, staying near the central station is usually the most functional choice. You simplify arrivals, departures, and day trips without sacrificing access to what matters in the city.

    Practical tips

    The Hague is a city best handled with trains, trams, and walking. There’s no point relying on a car if your focus is the center, museums, and beach. The smartest combo is usually exploring the historic core on foot and leaving Scheveningen for a short public transport ride. For those who want context from the start, another practical way is to book a free tour of The Hague and use the rest of the day to dive deeper into whatever caught your attention.

    It’s also worth adjusting your expectations about the Binnenhof: since the area is undergoing renovation, part of the experience today is external and about the surroundings, not the classic interior visit. That doesn’t ruin the itinerary, but it does change how you structure your day. For Brazilians, the general rule for short tourism trips to the Netherlands usually doesn’t require a Schengen visa, but always double-check the official requirements before traveling.

    Frequently asked questions

    Is The Hague worth visiting?

    Yes, especially if you like cities with strong museums, an elegant center, and the chance to include a beach in the same itinerary. The Hague works really well as a destination in its own right, not just as a day trip.

    How many days should you spend in The Hague?

    The ideal is to set aside two or three days. In one day you can see the essentials, but you miss the chance to combine the center, museums, and Scheveningen at a more relaxed pace.

    What to do in The Hague and Scheveningen on the same itinerary?

    You can dedicate the morning to the center with the Binnenhof and Mauritshuis, and leave the afternoon for Scheveningen, with the beach, boardwalk, and the Pier. With two days, the combination gets even more comfortable.

    Which Dutch cities pair well with The Hague?

    The Hague pairs really well with Delft, Rotterdam, and Amsterdam. The distances are short, and each city offers a different slice of the country.

    Where to stay in The Hague on a first visit?

    The most practical option is to sleep near the historic center or Den Haag Centraal. That way, you have easy access to museums, restaurants, and transport to Scheveningen.

    Conclusion

    The Hague works best when you accept that it doesn’t need to compete with Amsterdam to be memorable. The charm lies in the balance between politics, art, elegant neighborhoods, and the beach. At Voyage Voyage, I’d put The Hague without hesitation in the group of cities that most reward those who go beyond the automatic Netherlands itinerary.

  • Things to Do in Armação dos Búzios: The Complete Guide

    Things to Do in Armação dos Búzios: The Complete Guide

    🇧🇷 POR | 🇫🇷 FR | 🇺🇸 EN | 🇪🇸 ES

    Deciding what to do in Armação dos Búzios gets much easier once you understand the vibe of each part of the peninsula. Instead of trying to rush through 23 beaches in one weekend, it’s better to split your time between calm-water beaches, stretches with wind and waves, boat trips, the town center, and great sunset spots. That way, Búzios feels more rewarding and less exhausting.

    In Búzios, the ideal itinerary mixes beaches that are completely different from each other, a boat or buggy tour, a late afternoon in Manguinhos or along Orla Bardot, and short evenings strolling down Rua das Pedras. If you have 2 to 4 days, you can easily put together a well-rounded trip without switching beaches every hour.

    Quick Answer

    What to do in Armação dos Búzios? For a first visit, focus on Geribá, Ferradura, João Fernandes, Azeda, and Azedinha, fit in a walk along Orla Bardot and Rua das Pedras, and book a schooner or buggy tour. With 3 days, you can see the essentials without feeling rushed.

    In This Article

    • How to get to Búzios
    • Best time to visit and how long to stay
    • Main beaches and tours
    • How to plan your itinerary
    • Where to eat
    • Where to stay
    • Practical tips

    How to Get to Búzios

    Búzios sits in the Região dos Lagos (Lakes Region), about 173 km from Rio de Janeiro, on an 8 km-long peninsula. In practice, most travelers fly into Rio de Janeiro’s airports and then continue by car, private transfer, or bus. The trip usually takes between 3 and 4 hours, depending on traffic leaving Rio and your arrival time.

    There is the Umberto Modiano Airport in Búzios, but it focuses on general aviation, not regular commercial flights. So, for almost every traveler, it makes more sense to fly into Galeão or Santos Dumont in Rio and continue overland.

    If you’d rather not drive, you can book a complete Búzios tour with a catamaran ride in advance, which is handy for seeing the main sights without relying on ride-hailing apps or parking. In July 2026, this tour was listed from around R$ 332 on Civitatis, so it’s worth checking the current price before your trip.

    Aerial view of Búzios bay with pier, boats, and green hills

    Photo: Zeca Souza / Pexels

    Best Time to Visit and How Long to Stay

    The town works year-round, but the experience changes a lot. In the summer and on holidays, Búzios gets crowded, with more traffic, packed beaches, and higher prices. Between March and June or August and November, you’ll usually find a better balance of weather, crowds, and cost.

    If your priority is calm water and a more relaxed swim, look at sheltered beaches like Ferradura, Tartaruga, and João Fernandes. If you enjoy wind, sports, and a longer stretch of sand, Geribá is usually the go-to beach. For a first visit, 3 full days are enough to see the essentials without turning your vacation into a marathon.

    What to Do in Búzios: Main Beaches and Tours

    If you’re putting together your list of things to do in Búzios, start with beaches that offer different experiences. That way, you’ll quickly figure out which side of town suits your trip best.

    Praia de Geribá

    Geribá is the beach for those who love a wide stretch of sand, wind, a lively atmosphere, and more energetic water. It’s great for an early morning walk, sunbathing with plenty of amenities nearby, and ending the day watching the beach change color in the late afternoon. On days with bigger waves, the vibe is more sporty than contemplative.

    Praia da Ferradura

    Ferradura offers a different mood: a sheltered cove, calmer water, and the feeling of a beach where you can spend more time in the sea. It’s a great choice for families, couples, or for a day when you want less wind and more peace. If you’re looking to mix beach time with light exercise, this is also where stand-up paddleboarding and kayaking trips usually depart from.

    João Fernandes and João Fernandinho

    João Fernandes has become almost a must-do on a first trip because it combines beautiful scenery with inviting water. This stretch tends to have more amenities and a higher concentration of visitors. João Fernandinho, right next door, usually feels a bit more secluded. Arriving early makes a big difference, especially in high season, when parking spots and the best spots on the sand disappear quickly.

    Búzios coastline with houses, vegetation, and a blue cove

    Photo: Zeca Souza / Pexels

    Azeda, Azedinha, Ossos, and Armação

    This group of beaches makes for a lovely morning if you enjoy walking without leaving the beautiful scenery behind. Praia dos Ossos and Armação have a more historic, urban feel, with boats, a waterfront promenade, and colorful houses. Azeda and Azedinha come into play when you’re up for a short hike to reach small, photogenic beaches. It’s a perfect route for mixing a quick swim, great views, and lunch in the center.

    Orla Bardot and Rua das Pedras

    Búzios isn’t all about the beach. Orla Bardot is the spot for a leisurely stroll, watching anchored boats and the late-afternoon light fall over the bay. Right after, Rua das Pedras is packed with shops, bars, and restaurants.

    To see the city from a different angle, a practical option is the Búzios tourist trolley, which was listed from around R$ 136 in July 2026 on Civitatis. It’s especially helpful if you don’t have a car and want a general overview before deciding where to return for a closer look.

    Want to see the peninsula from the sea and save time on your itinerary? The Búzios schooner tour is usually the most practical choice for a first visit.

    Schooner, Catamaran, and Buggy Tours

    If you want to see more scenery in less time, a boat tour is usually a safe bet. The logic is simple: you see parts of the peninsula from a different perspective, make stops for swimming, and can connect beaches and islands without spending the whole day in a car. The Búzios schooner tour was listed from around R$ 95 in July 2026, while the buggy tour started at roughly R$ 150 during the same period.

    If you’re short on time, pick one motorized tour and leave the rest of the day for a single beach. Trying to squeeze in a schooner, a buggy, three beaches, and dinner in the center all on the same day almost always turns into a rushed mess.

    Red boat anchored off the Búzios coast

    Photo: Nascimento Jr. / Pexels

    How to Plan Your Itinerary

    The most common mistake in Búzios is splitting your trip into “beach by day, center by night” without thinking about what’s geographically close. It works much better to plan your itinerary by zones. One day can be focused on Geribá, Ferradurinha, and Manguinhos. Another can mix Ossos, Azeda, Azedinha, Orla Bardot, and Rua das Pedras. If you want a strong third day, save it for a boat or buggy tour.

    To compare with other beach destinations that also make for a relaxed trip, it’s worth saving this 5-day Porto de Galinhas itinerary, this guide to Fortaleza in 5 days, and this post on Fernando de Noronha. For another option in the Região dos Lagos itself, also check out what to do in Arraial do Cabo in 2 days.

    Where to Eat in Búzios

    You don’t need to turn your trip into a foodie tour to eat well in Búzios. The practical rule is simple: have lunch near the beach on beach days and dinner on Rua das Pedras, Orla Bardot, or in Manguinhos. Manguinhos is especially great for late afternoon, with a more open atmosphere and sunset views.

    Only make reservations at the most sought-after restaurants if the meal is a central part of your trip. Otherwise, just follow the beach and your mood for the day. In Búzios, short travel distances are worth their weight in gold.

    Where to Stay in Búzios

    Where to stay in Búzios depends less on luxury and more on the kind of travel you want. If you prefer to do a lot on foot, you’ll likely enjoy the area around Rua das Pedras, Armação, Ossos, and João Fernandes. If you prioritize a more open beach, surfing, sunset bars, and a more laid-back vibe, look towards Geribá and Manguinhos. If you don’t have a car, it makes sense to pay a bit more to stay in an area where you can walk to the nightlife and part of your daytime itinerary.

    Boats anchored in a calm Búzios cove at dusk

    Photo: Zeca Souza / Pexels

    Practical Tips

    Get to the most famous beaches early, especially João Fernandes and Geribá, to beat the traffic and snag a better spot. On windy days, always keep a more sheltered beach in mind as a backup. Wear simple footwear for short walks between the center, the waterfront, and nearby beaches. And if you’re driving, check with your accommodation about parking before you arrive.

    If you prefer to compare options before deciding, it’s worth checking out this selection of tours in Búzios and filtering by boat, buggy, trail, or city tour.

    Frequently Asked Questions

    Is Búzios worth it for a first trip?

    Yes, especially if you’re looking for a beach destination with good infrastructure, lively nights, and beaches that each have their own vibe. The town works great for short 2-to-4-day getaways.

    How many days are ideal to spend in Búzios?

    Three full days are usually the sweet spot. With that amount of time, you can hit the main beaches, stroll through the town center, and fit in at least one boat or buggy tour.

    What’s the best beach in Búzios?

    It depends on your style. Geribá tends to please those who love a wide, lively beach. Ferradura is calmer. João Fernandes combines beautiful scenery with great amenities and usually makes it onto almost everyone’s itinerary.

    Can you explore Búzios without a car?

    Yes, but choosing your accommodation wisely makes a big difference. Staying near the center, Orla Bardot, Ossos, or João Fernandes helps a lot. To optimize your itinerary, organized tours can also replace some of the getting around.

    What’s the best time to visit Búzios?

    To balance weather and crowds, the months outside of major holidays and the peak of summer tend to work best. March through June and August through November are usually comfortable windows for most people.

    Conclusion

    If you wanted an honest shortcut on what to do in Armação dos Búzios, think of it this way: pick beaches with different vibes, book a tour on the water, leave room to walk along Orla Bardot, and end at least one night on Rua das Pedras. That simple blueprint already delivers the best of the destination without rushing. For more travel guides in Portuguese, keep browsing Voyage Voyage and use this itinerary as a base to plan your days on the peninsula.

  • Porto de Galinhas in 5 Days: A Beach Itinerary with Tips

    Porto de Galinhas in 5 Days: A Beach Itinerary with Tips

    🇧🇷 POR | 🇫🇷 FR | 🇺🇸 EN | 🇪🇸 ES

    Porto de Galinhas works great for a 5-day trip when you use the village center as your base and split the beaches by profile: calm waters at Muro Alto, natural pools and the village in Porto, and a surf vibe with stunning sunsets at Maracaipe. This way, you avoid unnecessary back-and-forth and make the most of sunny days and tide schedules.

    If you have 5 days in Porto de Galinhas, the best itinerary is to alternate between the center, the natural pools, Muro Alto, and Maracaipe without trying to cram everything into a single day. The secret is combining a good swimming beach, tide-dependent tours, and one or two more relaxed periods to rest or adapt to the weather.

    Is Porto de Galinhas worth 5 days?

    Yes, and it’s actually one of the best amounts of time for this destination. With five days, you’re not stuck on a single stretch of sand and can really feel the differences between the beaches in the Ipojuca district: the livelier vibe of the center, the calmer waters of Muro Alto, and the more rugged side of Maracaipe.

    View of Porto de Galinhas beach with clear sea and rafts on the sand
    Porto de Galinhas blends a lively village, rafts, and postcard-perfect sea. | Photo: Marcelo Verfe / Pexels

    It’s also an itinerary with room to adjust the order based on the weather. If the day starts out cloudier, for example, you can prioritize the village, restaurants, and the closest beach stretches. When the sun comes out and the tide is right, you can tackle the classic natural pools block.

    How to split your itinerary

    The best logic isn’t to separate by number of attractions, but by geography and type of experience. Porto de Galinhas concentrates the most practical part of the trip, with easy access, restaurants, and the traditional tour. Muro Alto works best as a day of calm waters and pure relaxation. Maracaipe and Pontal come in when you want a more open, less urban view with a particularly beautiful sunset.

    If you like to travel with everything planned out, it’s worth checking the Ipojuca city hall website for official destination info and using the Porto de Galinhas page as a quick reference for geographic context. For sea tours, confirm the tide closer to your trip: this detail makes a big difference in the experience.

    Day 1: Porto’s center and beach to get into the rhythm

    On the first day, the smartest strategy is to stay close to the center. After check-in, take a leisurely walk through the village, figure out where the restaurants are, the raft area, and the easiest beach access points. This reconnaissance helps a lot for the rest of the trip, because you’ll make better decisions about where to go for dinner, shopping, or an early start.

    On the beach, use this first contact to feel the water and set your own pace. If you’re tired from a flight or long drive, you’ll probably enjoy just staying put, with a swim, a walk, and a light evening in the village center. Don’t try to fit everything into your arrival day. In Porto de Galinhas, getting more out of your trip almost always means slowing down at the start.

    What to do on this day

    Save the afternoon for a walk on the sand, scouting a good dinner spot, and deciding if you want to revisit the center another night. If you have extra energy, you can stretch your walk to the end of the beach toward Cupe, but don’t make it an obligation.

    Day 2: Natural pools and free time in the village

    This is the most classic day of the itinerary. The natural pools are Porto de Galinhas’ postcard image, and the ideal is to schedule them when the tide is most favorable. Since this type of tour depends on sea conditions, it’s best to confirm closer to your date and keep the rest of the day flexible.

    Natural pools of Porto de Galinhas with transparent water and reefs
    The natural pools are the most iconic tour of the trip, but they’re best with some tide planning. | Photo: Frank Cordeiro / Pexels

    After the tour, head back for a relaxed lunch and use the afternoon for whatever you missed in the center: shopping, ice cream, rest, or more beach time. This setup works because you concentrate the most touristy stretch into a single day and leave the next ones for completely different landscapes.

    If you’d rather get this classic out of the way right away, the raft tour in Porto de Galinhas is the most direct shortcut to fit the natural pools into your itinerary without wasting time deciding at the last minute.

    How to make this day count

    If you love photography, head out early. If you’re traveling as a couple or with family, it’s worth keeping the afternoon free. Instead of rushing to another beach the same day, enjoy the village and save your energy for Muro Alto and Maracaipe, which call for a different vibe.

    Day 3: Muro Alto for a day of calm waters

    Muro Alto comes into the itinerary as your beach-relaxation day. The big advantage here is the sea, which is usually more protected by the reefs, creating an inviting environment for a peaceful swim, stand-up paddleboarding, kayaking, or simply spending more time in the water.

    Muro Alto beach with calm water and a strip of light sand
    Muro Alto is usually the most comfortable choice for a mellow beach day. | Photo: Max Luz / Pexels

    This is also the best day for those staying at a resort or wanting a more structured experience. If you prefer a guesthouse in the center, you can just go for the day and come back. The key is understanding that Muro Alto doesn’t replace Porto de Galinhas: it complements it. Here, the focus is on resting and enjoying the beach itself.

    Who Muro Alto makes the most sense for

    Couples wanting comfort, families with kids, and travelers who prioritize calmer seas usually love this stop. If your profile is more about hiking, simple bars, and raw scenery, you’ll probably connect more with Maracaipe the next day.

    Day 4: Maracaipe and Pontal on the destination’s rugged side

    Maracaipe changes the tone of the trip. The landscape opens up, the vibe is less touristy village and more beach with its own personality. It’s the best day to see how the destination goes beyond the natural pools: here you get more energetic seas, surf culture, and Pontal, which usually delivers a memorable sunset.

    Pontal de Maracaipe at dusk with palm trees and the meeting of the river with the sea
    Pontal de Maracaipe is one of the most beautiful spots to end the day in the region. | Photo: Alexandre Saraiva Carniato / Pexels

    If you had to pick just one sunset on this itinerary, I’d save it for Maracaipe. This is the day to have a leisurely lunch, walk a lot, and stay open to pauses rather than a packed schedule. Anyone who loves board sports or a landscape less tamed by tourism usually leaves here with the best memory of the trip.

    Maracaipe or Porto for swimming?

    It depends on what you’re looking for. Porto de Galinhas is more convenient and photogenic for a first impression; Muro Alto tends to be more comfortable for calm swimming; Maracaipe comes in when the goal is scenery, atmosphere, and a beach with more personality. On a five-day itinerary, the ideal is not to choose just one.

    Day 5: a wildcard day to repeat what you loved most or add an extra

    The fifth day works best when it’s intentionally left open. Instead of inventing a distant excursion just to fill the schedule, use this space to revisit your favorite beach, fit in something that depended on sunshine, or rest before heading back. This flexibility improves the trip a lot because the coastline doesn’t always deliver the same scenery every day.

    If you’re the type who prefers to add an extra, this is the moment to think about a buggy tour, a less central stretch of the coast, or even a day trip—as long as it doesn’t steal the spotlight from Porto de Galinhas. The biggest mistake here is turning the last day into a marathon.

    When the idea is to string together several beaches in less time, the buggy tour of Porto de Galinhas’ beaches can work well as a wildcard plan for the last day, especially if you want to see different stretches of the coast without driving or negotiating separate transfers.

    Where to stay for this itinerary to work well

    For a balanced itinerary, the center of Porto de Galinhas is usually the most practical base. You gain the freedom to walk to dinner, stay close to the main beach, and decide on the spot whether to repeat the center, head out to Muro Alto, or continue to Maracaipe.

    Muro Alto makes more sense for those who want to prioritize a hotel, amenities, and a more resort-like pace. Maracaipe, on the other hand, can appeal to those seeking something smaller, with a calmer and less urban atmosphere. Over five days, the choice doesn’t need to be about the absolute best beach, but about the travel style you want when you come back from the sand.

    If your travel profile is combining strong sea with impeccable amenities, you might also enjoy the contrast with island destinations like Fernando de Noronha. For another itinerary that works really well on a day-by-day basis, check out Monaco in 5 Days. And if your research is open to beaches with a very different vibe, the article about Bali might spark some interesting comparisons.

    Practical tips to make the most of your trip

    Check the tide before marking the day for the natural pools. On a short trip, this is the decision that changes your experience the most. It’s also worth keeping Muro Alto and Maracaipe as cards that can swap places depending on the weather: a more open day calls for the beach you want to see at its most beautiful; a more tiring day pairs better with amenities and rest.

    Another simple but powerful tip: don’t plan long lunches in the middle of your best beach hours. In destinations like this, the sea and daylight usually matter more than the food agenda. Use the town center to your advantage at night and keep your beach days lighter.

    If the goal is to put together a stress-free trip, think of this itinerary as a backbone, not a rule. Porto de Galinhas rewards those who adjust the order of days to the weather, the tide, and their own pace.

    Frequently asked questions about Porto de Galinhas, Muro Alto, and Maracaipe

    How many days should you spend in Porto de Galinhas?

    Five days make a great window because they let you explore the center, fit in the natural pools, and spread out Muro Alto and Maracaipe at a relaxed pace, without turning the trip into a race.

    Can you do Porto de Galinhas, Muro Alto, and Maracaipe on the same trip?

    Yes, and that’s actually one of the best ways to structure the itinerary. The three areas complement each other and deliver different beach experiences from the same base.

    Which beach is best for swimming?

    For those who want calmer water, Muro Alto is usually the most comfortable bet. Porto de Galinhas works well for its convenience and classic scenery. Maracaipe makes more sense for those who prioritize atmosphere and landscape.

    Do I need to follow the itinerary in this order?

    No. The best order is the one that fits the natural pools day with the most favorable tide and leaves you free to swap Muro Alto and Maracaipe depending on the weather.

    Is it worth staying in Muro Alto?

    It’s worth it for those who want resort amenities and a more relaxed daily rhythm. If your priority is mobility, walking to dinner, and ease of varying your outings, the center of Porto de Galinhas usually works better.

    Conclusion

    If you want a beach trip that isn’t just a single postcard, Porto de Galinhas in 5 days delivers exactly that: several versions of the Pernambuco coastline within short distances, with room to balance sightseeing, rest, and a repeat of the beach stretch that clicked with you most. In the end, the best itinerary is the one that uses Porto as a base, respects the tide, and lets Muro Alto and Maracaipe come in at the right moment of the trip.

  • Norway’s Fjords: How to Plan Your Route, Bases, and Tours

    Norway’s Fjords: How to Plan Your Route, Bases, and Tours

    🇧🇷 POR | 🇫🇷 FR | 🇺🇸 EN | 🇪🇸 ES

    Norway’s fjords deliver the kind of trip that looks like a movie set: sheer cliffs, blue-green water, waterfalls cascading straight into the sea, and small villages that work perfectly as bases for exploring the country’s west. If you’re trying to figure out where to start, the best approach is to think in terms of two or three bases and mix boat rides, scenic train journeys, and, if it makes sense, a few stretches by car.

    For a first trip, focus on Bergen, Flåm, and Geiranger or Loen: this slice of the country concentrates the most scenic fjords, relatively simple logistics, and landscapes that justify every bit of travel time.

    Which Norway fjords are most worth it

    Not every traveler needs to chase down all the famous fjords. The smartest move is to pick the scenery that matches your travel pace. For a first-timer, three names come up again and again for a reason: Nærøyfjord, Geirangerfjord, and Sognefjord.

    Boat sailing between mountains on the Nærøyfjord, one of Norway's most famous fjords
    View of the Aurlandsfjord at dusk, one of the most accessible landscapes for those combining Bergen and Flåm. | Photo: Thor Olason / Pexels

    The Nærøyfjord and the Geirangerfjord have been part of the UNESCO World Heritage list since 2005 and are described by the organization itself as classic examples of fjord landscapes, with extremely steep rock walls, waterfalls, and strong marks of glacial action. The Sognefjord, meanwhile, makes the cut because it’s massive and works as a connection hub for villages and scenic experiences in western Norway.

    Nærøyfjord

    If your goal is to experience the classic Norway fjord postcard, start here. The stretch between Flåm and Gudvangen is one of the most practical for combining a boat ride with the scenic Flåm Railway and easy transfers from Bergen or Oslo.

    Geirangerfjord

    This one tends to be the favorite for travelers who want dramatic mountains, viewpoints, and a scenic drive. The area around Geiranger gets even better when you add viewpoints like Ørnesvingen and Flydalsjuvet and tack the Geiranger-Trollstigen route onto your journey.

    Sognefjord

    Norway’s longest fjord works more like a travel region than a single stop. From here, you can reach super-scenic branches, small villages, and connections to Flåm, Aurland, and other practical bases.

    When to visit Norway’s fjords

    The easiest window for a first trip runs from late spring to early fall. That’s when boats are running more frequently, scenic roads are usually open, and the long daylight hours help you make the most of viewpoints, short hikes, and unhurried travel days.

    In peak summer, you’ll find the simplest logistics but also more crowds. In late spring, waterfalls tend to be at their most powerful thanks to the snowmelt. In early fall, the light is gorgeous and the trip feels calmer. In the cold months, the landscape is still spectacular, but the trip demands more flexibility: Visit Norway recommends extra preparation for driving between October and April, and several mountain roads may have restrictions or close temporarily.

    How to get there and where to set up base

    For most travelers, the fjords don’t really start in Oslo: they start when you reach the west of the country. Visit Norway itself treats Bergen as a natural starting point for many itineraries, and that makes sense because the city works well as a gateway for boats, trains, ferries, and organized day trips.

    Boat in Flåm, a base village for exploring Norway's fjords
    Geirangerfjord landscape, with sheer cliffs and snow on the peaks, in a photo that captures the visual impact of the Norwegian fjords. | Photo: Thea Cintia Paixão da Silva / Pexels

    Bergen

    Bergen is the best base for a first trip. You can get there by train or plane, sleep well in the city, and take day trips to Mostraumen, Flåm, and the Nærøyfjord. If you’re unsure where to start, start here.

    Flåm

    This works best for travelers who want to wake up right in the middle of the scenery and cut down on day-trip travel time. The village is small, touristy, and super functional for fitting in a fjord cruise, the Flåmsbana railway, and short trips to Aurland and Gudvangen.

    Geiranger, Loen, or Stryn

    These bases make more sense for a road trip or for travelers who want to extend their journey into the northwest of the country. Geiranger is more iconic; Loen and Stryn are great for combining fjord, cable car, lake, and panoramic road.

    Norway fjords itinerary

    If you have limited days, the secret is not to spread your bases too thin. An efficient Norway fjords itinerary can look like this:

    In 3 days

    Sleep in Bergen on arrival, spend one day focused on Flåm and the Nærøyfjord, and save the third day for a short boat trip, viewpoints, or more time in Bergen itself. That’s the minimum I’d consider to really feel the region without turning everything into a rush.

    In 5 days

    Spend 2 nights in Bergen, 1 or 2 nights in Flåm, and finish with 1 or 2 nights in Geiranger, Loen, or Stryn if you have a car. This is where the trip gains depth because you stop seeing just one fjord and start noticing how western Norway changes in scale along the route.

    In 7 days or more

    Now it’s worth including the Geiranger-Trollstigen stretch, detouring to roadside shops and cafes, fitting in a short hike, and sleeping in smaller villages. If you love scenic mountains, the logic gets close to an itinerary like the Dolomites in Italy, just with water, ferries, and even more compact villages.

    If you want a straightforward solution, this Norwegian fjords tour with the Flåm Railway and Nærøyfjord boat trip is a great way to condense the experience into a single day from Bergen, especially on a first visit.

    What to do beyond the cruise

    Seeing the fjords from the water is only part of the trip. What really changes the experience is switching up your perspectives.

    Fjord landscape near Bergen seen from the water
    A fjord surrounded by green mountains sums up the scale of the landscape in western Norway. | Photo: Erik Schereder / Pexels

    Take a short cruise or scenic ferry

    This is the most intuitive way to grasp the scale of the landscape. In some stretches, the mountains seem to rise straight out of the water, and it’s from the boat that you truly appreciate the size of the cliffs and the sheer number of waterfalls surrounding you.

    Hike up to a viewpoint

    In the fjords, seeing things from above changes everything. Viewpoints transform what looks narrow at water level into an enormous geography, full of curves, arms of the sea, and vertical slopes. In Geiranger, viewpoints like Ørnesvingen and Flydalsjuvet go a long way toward justifying the trip.

    Fit in a scenic drive

    The Geiranger-Trollstigen route is one of the most scenic in the country, with an official route of 104 km, a ferry along the way, and plenty of stops. The Scenic Routes website itself reminds you that this stretch often operates seasonally, so it’s worth checking road conditions close to your trip, especially outside summer.

    Combine train and boat

    The Flåm Railway is promoted by Visit Norway as one of the most spectacular train journeys in the world, and it works especially well when it’s part of a bigger day, linked with a boat and fjord cruise. This format keeps the excursion from becoming just a pretty ride from A to B.

    Can you explore without a car?

    Yes, and it’s much better than most people imagine. If your priorities are Nærøyfjord, Flåm, and Bergen, you can put together a well-rounded trip without renting a car. Trains, ferries, cruises, and organized tours cover the essentials.

    A car makes more of a difference when you want to connect smaller bases, reach viewpoints at your own pace, and include Geiranger, Loen, Stryn, and scenic roads with more freedom. In those cases, it’s not required, but it definitely widens your range of experiences.

    Where to stay in the fjords

    In general, think of it this way:

    Bergen for convenience

    Choose Bergen if you prefer an urban center with a wide range of hotels, restaurants, and easy transport. It’s the friendliest option for a first trip or for those going without a car.

    Flåm to live close to the scenery

    Flåm works well if you want to wake up near the fjord and catch an early boat without a long round trip. It’s more touristy and more limited, but it delivers a strong atmosphere.

    Loen, Stryn, or Geiranger for a road-trip itinerary

    These bases are best for those who want to turn the trip into a road trip and sleep between one viewpoint and the next. Geiranger is more iconic; Loen and Stryn offer a great mix of fjord, mountain, and practical travel in the northwest.

    If you want to simplify logistics from Bergen, the ferry between Bergen and Flåm can be a great connecting piece when the idea is to trade urban days for a smaller base in the heart of the fjords.

    Practical tips for better planning

    Mountains and calm water in a Norwegian fjord, a typical landscape of western Norway
    Panorama of Aurlandsfjorden with blue water and rocky cliffs, now in proper resolution for desktop reading. | Photo: Nils R / Pexels

    Avoid turning the fjords into a checklist. Instead of chasing famous names, first decide the style of your trip: a car-free round trip, a train + boat itinerary, or a scenic road trip.

    It’s also worth checking the official Visit Norway pages, the Scenic Routes, and local operators in advance if you plan to drive, take specific ferries, or travel outside summer. In the fjords, the landscape stays beautiful when the weather changes, but the logistics change with it.

    Finally, respect travel time. On the map, everything looks close; in practice, the routes include ferries, narrow roads, climbs, viewpoint stops, and plenty of scenery that makes you want to stop again. Western Norway rewards those who leave room for that.

    Frequently asked questions about Norway’s fjords

    Which Norwegian fjords should you visit on a first trip?

    For a first-timer, Nærøyfjord, Geirangerfjord, and the Sognefjord region usually make the best combination. They balance iconic scenery, feasible logistics, and a variety of experiences.

    How many days are ideal for exploring Norway’s fjords?

    With 3 days, you get a taste. With 5 days, the trip feels much more complete. With 7 days or more, you can include scenic drives, smaller bases, and more time between boat, train, and viewpoints.

    What’s the best time to visit Norway’s fjords?

    For most travelers, late spring, summer, and early fall are the easiest windows. Outside that period, the landscape is still beautiful, but seasonal roads and operations require more careful checking.

    Can you do Norway’s fjords without a car?

    Yes, especially if your focus is Bergen, Flåm, and Nærøyfjord. A car makes more of a difference when you want to explore Geiranger, Loen, Stryn, and scenic roads at your own pace.

    Bergen or Flåm: which base should you choose?

    Bergen wins on convenience and variety. Flåm wins on immersion and the ease of waking up right by the fjord. Many people get the most out of their trip by combining the two.

    Conclusion

    If the goal is to plan your first trip through western Norway without wasting energy, think less about covering everything and more about choosing your bases well. Norway’s fjords work best when you embrace the rhythm of the landscape: boat when the water calls, train when the valley opens up, and scenic drives only when you have time to stop. To keep planning other scenic trips across Europe, follow Voyage Voyage.

  • Dolomites, Italy: A 5-Day Itinerary Through the Scenic Alps

    Dolomites, Italy: A 5-Day Itinerary Through the Scenic Alps

    🇧🇷 POR | 🇫🇷 FR | 🇺🇸 EN | 🇪🇸 ES

    Putting together a 5-day Dolomites itinerary in Italy gets much easier once you accept one simple rule: the region is huge, and trying to see everything at once just turns an alpine trip into a parking-lot marathon. The best plan is to split your days between strategic bases, mix lakes, viewpoints, and villages, and use the car to connect the valleys with minimal wasted time.

    In 5 days, you can put together a very well-rounded Dolomites itinerary focused on two bases, featuring iconic landscapes like Lago di Braies, Tre Cime, Seceda, Alpe di Siusi, and the mountain passes between Cortina d’Ampezzo, Val Gardena, and Alta Badia. The secret isn’t chasing every point on the map, but rather grouping each valley smartly.

    How to get there and plan your logistics

    If you want the freedom to connect valleys, alpine passes, lakes, and cable cars all in one day, a car remains the most practical way to visit the Dolomites. Public transport exists and works well in the well-structured corridors of South Tyrol, but a 5-day itinerary with a photographer’s pace gets much simpler when you can adjust your route based on the weather, visibility, and road fatigue.

    Alpine church surrounded by mountains in the Dolomites
    First impression of the Dolomites: little churches, meadows, and layered mountains. | Photo: Cosmin Patrolea / Pexels

    In practice, many people fly into the larger airports in northern Italy and drive to their chosen base. If you’d rather rely less on driving, you can also combine trains and regional buses, especially for cities like Bolzano and villages connected to the South Tyrol system. Since schedules and frequencies change throughout the year, it’s worth checking the official mobility options before finalizing your day order on the Suedtirol portal.

    If you’re arriving via Venice and prefer to test the alpine scenery without driving on your first day, it’s worth comparing the logistics with this Dolomites Alps day trip from Venice. It doesn’t replace a full 5-day itinerary, but it helps if you want to fit the mountains in as a guided day trip before deciding whether to rent a car.

    For this itinerary, the most balanced logistics are to spend 2 nights in the Cortina d’Ampezzo or Dobbiaco area and then move on to 3 nights between Val Gardena, Santa Cristina, Ortisei, or Canazei. This way, you avoid long round trips east and west in the same block and can see some of the trip’s most famous scenery without changing hotels every day.

    Best time to visit and how long to stay

    If your dream is to see thawed lakes, open trails, working cable cars, and viewpoints with green meadows, the most comfortable window is usually from late June to early October. July and September tend to please those who want hiking and long days; August offers full infrastructure but requires more patience with traffic, parking, and busier villages. To visualize the region’s areas and bases, the official dolomiti.org portal is a big help.

    In early summer or early fall, you’ll find a great middle ground between scenery, temperature, and crowds. In late spring and late fall, however, some access points may operate at reduced capacity or depend more on the weather. That’s why, in the Dolomites, the ideal itinerary always starts with a quick check of cable cars, scenic roads, and webcams for the week of your trip.

    You can get a taste in 3 days, but 5 days is the first truly convincing timeframe for anyone who wants to mix postcard spots, light hikes, and small scenic roads without turning everything into a breathless checklist. If you have more time, it’s also worth reading an urban guide like Venice: A Complete Guide to Canals, Palaces, and Historic Churches to plan a more relaxed arrival or departure from Italy.

    5-day Dolomites itinerary

    This itinerary was designed for a first summer or dry shoulder-season trip, focusing on scenery, light to moderate hikes, and travel that doesn’t require changing hotels every day. It doesn’t try to cover every corner of the mountain range; instead, it organizes the Dolomites into blocks that flow well together and keeps the trip enjoyable from the first to the last day.

    Day 1: Lago di Braies and warming up on the eastern side

    Start at Lago di Braies if your flight or travel plans allow you to arrive early. The water with its greenish reflection, the dramatic mountain rim, and the lake’s mirror-like surface explain why this spot makes it into almost every itinerary in the region. But it works best as the first stop of the day, before the parking lot and shoreline get more crowded.

    Tre Cime di Lavaredo peaks in the Dolomites
    Tre Cime helps explain why the eastern side deserves two days on your itinerary. | Photo: Dirk Pothen / Pexels

    After the lake, head to Dobbiaco or Cortina d’Ampezzo and use the rest of the afternoon to get your bearings. If your arrival was tiring, just settle for a charming town center, a coffee with a view, and a first short scenic drive. The goal here is to save energy for the big days ahead, not to pile on viewpoints right out of the gate.

    Day 2: Tre Cime di Lavaredo and Cadini di Misurina

    This is the day the Dolomites stop being beautiful and become absolutely jaw-dropping. The Tre Cime di Lavaredo area is home to some of the most dramatic scenery of the trip, with a scenic trail, open views, and that feeling of the mountains growing as you walk. If the weather clears up, set aside the whole morning for this, because it’s the stretch where you’ll want to stop at every turn.

    If you still have energy and good light, fit in the Cadini di Misurina viewpoint or a late afternoon by the lake. The combination works because the landscapes are so different: Tre Cime impresses with its scale; Cadini, with its jagged profile. Don’t underestimate the time spent on parking, hiking, and photos; in the Dolomites, two iconic stops in one day are already enough to fill out your itinerary nicely.

    Day 3: Cortina, alpine passes, and the move to the western side

    Use the morning for a more flexible block between Cortina d’Ampezzo, Passo Giau, or Cinque Torri, depending on the weather. When the sky opens up, Passo Giau delivers that scenic road that feels made for driving slowly, rolling down the window, and deciding which side of the landscape is more dramatic. When the weather is unstable, Cortina holds up better with its cafés, town center, and shorter excursions.

    After lunch, head toward Alta Badia, Canazei, or Val Gardena and check in for the second leg of your trip. This base change cuts down on hours lost behind the wheel over the final two days and puts the western side of the range within easy reach of shorter day trips. If you enjoyed tightly packed day-by-day itineraries, there’s a similar logic in Monaco in 5 Days: A Complete Itinerary with Tours and Tips, though the vibe there is a whole different world.

    Day 4: Seceda and Val Gardena

    Seceda is the kind of mountain that looks photoshopped even when you’re seeing it live. The jagged cliff face, the sloping meadows, and the wide-open trails create one of the most memorable landscapes in the Dolomites. If the weather is clear, it’s worth dedicating a good chunk of the day to this area, heading up early and strolling unhurriedly between the viewpoints.

    Seceda peaks in the Dolomites with grassy slopes in the foreground
    Seceda is one of those places that justifies basing yourself on the western side of the Dolomites. | Photo: Roberto Baciga / Pexels

    Ortisei and Santa Cristina work great as a base before or after the climb, whether for grabbing a bite or breaking up the day. If you want to round out the itinerary even more, finish with a relaxed dinner in the valley. And if your trip through Italy continues on to art cities, Florence: A Complete Guide to Visiting the Capital of Tuscany helps you shift gears without losing the thread of your journey.

    Day 5: Alpe di Siusi, Val di Funes, or One Last Panoramic Pass

    On the final day, the best choice depends on how you want to say goodbye. If the idea is to wrap up with easy logistics and classic scenery, Alpe di Siusi is a rock-solid bet: wide meadows, gentle trails, and that horizon of mountains that seems to ripple in layers. If you prefer a more photogenic, slightly more concentrated setting, Val di Funes with its little churches and nestled valleys closes out the trip with postcard-perfect charm.

    Another option is to use the day for a farewell scenic drive, crossing a pass you may have skipped depending on the weather over the previous days. That final flexibility is precious in the Dolomites because the mountains change mood quickly. The best itinerary isn’t the one that tries to be definitive; it’s the one that leaves room to swap the order of the scenery when visibility calls for it. The Dolomiti UNESCO site is a great reference for understanding the region’s environmental and cultural weight.

    Alpine meadows of Alpe di Siusi with mountains in the background
    Alpe di Siusi is a perfect way to close out a lighter, more photogenic final day. | Photo: Julien R / Pexels

    Where to Stay in the Dolomites

    If this is your first trip, it makes sense to think less about “which is the best town in the Dolomites” and more about “which base cuts down my back-and-forth.” For the first two days, Cortina d’Ampezzo, Dobbiaco, and the surrounding areas fit well with Lago di Braies, Tre Cime, and the eastern block. For the last three, Ortisei, Santa Cristina, Selva di Val Gardena, Canazei, and a few bases in Alta Badia make Seceda, Alpe di Siusi, and the western passes easy to reach.

    Travelers after a more romantic getaway usually love the bases with tidy town centers and a solid lineup of alpine hotels. If you’re looking to keep costs a bit more rational, you can check out satellite villages and use the car to gain mobility. The most common mistake is booking a single base that’s too far from half the itinerary; you save on one hotel switch and lose hours behind the wheel every single day.

    Where to Eat Between One Cable Car and the Next

    In the Dolomites, eating well is part of the experience. Instead of turning every meal into a culinary pilgrimage, the best approach is to pair simple lunches at rifugi, huts, or mountain restaurants with more polished dinners at whatever base you’re sleeping in. That keeps the day flowing, especially on stretches where the peak light matters more than the perfect table at noon.

    Go for mountain dishes, heartier pastas, polenta, local cured meats, and desserts typical of northern Italy and South Tyrol. If you like to pace yourself well between hiking and dining, keep this principle in mind: functional lunch, memorable dinner. That same logic shows up in denser urban trips like Rome: A Complete Guide to Planning Your Trip, just with a much more alpine backdrop here.

    Practical Tips to Avoid a Fragmented Itinerary

    Check cable cars, mountain roads, webcams, and the weather a few days before your trip and again the night before each day trip. In the Dolomites, a small shift in visibility can turn a memorable viewpoint into a day with no sense of the landscape. It’s also worth heading out early for the most photographed spots and saving the second half of the day for villages, open alpine meadows, or less crowded scenic roads.

    Pack layers even in summer, because cold and wind show up fast at altitude. And if you’re putting together a broader Eurotrip, think of the Dolomites as the nature block of your journey: historic cities like What to Do in Vienna: A Complete Guide to Itineraries, Tickets, and Tips work great before or after, but the pace here calls for fewer museums and more open windows, comfortable boots, and room to improvise.

    Frequently Asked Questions

    How many days should you spend in the Dolomites?

    Five days already deliver a very solid first trip, as long as you choose your bases well and don’t try to cross the entire region every day. Less than that works for a short taste; more days help you include longer hikes and more relaxed breaks.

    What’s the best base for a 5-day Dolomites itinerary?

    For a balanced itinerary, splitting your stay between the Cortina/Dobbiaco block and the Val Gardena/Alta Badia/Canazei block works really well. That cuts down on travel time and keeps you from turning alpine scenery into a road trip.

    Do you need to rent a car to visit the Dolomites?

    It’s not mandatory, but it makes a 5-day itinerary with multiple photo stops and flexible timing much easier. Public transport covers a good chunk of the region, but it requires more planning and leaves less room for spontaneity.

    What’s the best time to see the Dolomites without snow on the trails?

    Generally speaking, the period between late June and early October tends to be the friendliest for lakes, hikes, and cable cars. Still, access openings vary depending on residual snow, maintenance, and the week’s weather.

    Can you do the Dolomites at a relaxed pace?

    Yes, and that might just be the most enjoyable way to experience the region. Instead of chasing every famous spot, focus on two bases, one or two standout landscapes per day, and plenty of room to shuffle the order based on the sky.

    Conclusion

    A 5-day Dolomites itinerary doesn’t need to be encyclopedic to be unforgettable. When you organize the trip around bases and accept seeing less to see it better, the region delivers exactly what it does best: absurdly photogenic lakes, roads that feel like movie sets, and mountains that shift color throughout the day. If the goal is to travel through Italy without falling into an obvious circuit, the Dolomites are one of the most beautiful pauses you can fit along the way.

  • Central Beach in Balneário Camboriú: What the New Waterfront Looks Like in 2026

    Central Beach in Balneário Camboriú: What the New Waterfront Looks Like in 2026

    🇧🇷 POR | 🇫🇷 FR | 🇺🇸 EN | 🇪🇸 ES

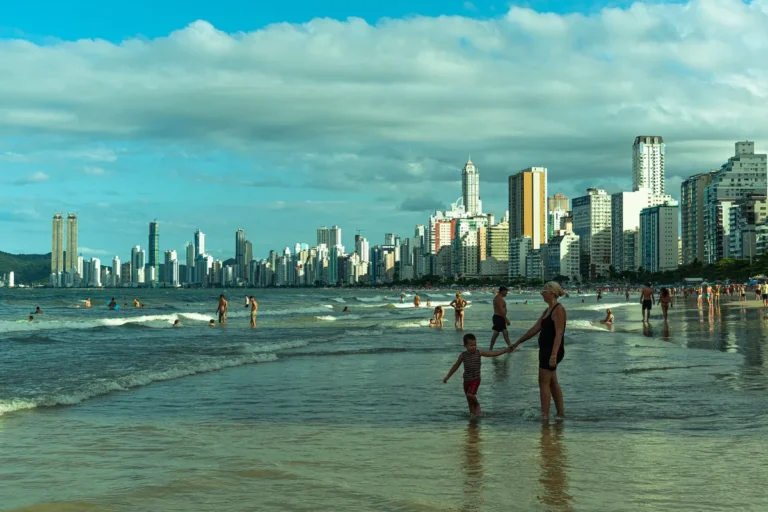
    If there’s one image that sums up Balneário Camboriú, it’s this: a stretch of sand nearly seven kilometers long, framed by high-rises rising straight from the boardwalk, with Morro da Aguada on one side and Barra Sul on the other. Central Beach is the heart of the city, and since 2023 it has been undergoing a redevelopment that’s changing the way people walk, bike, and enjoy the waterfront.

    The New Waterfront of Balneário Camboriú is the project that will transform more than 600,000 m² of Central Beach, between Pontal Norte and Barra Sul, into a linear park with a pedestrian-only boardwalk, a separate bike lane, and new leisure areas. Construction began in 2023, and full completion is expected by 2030.

    What the New Waterfront is and why it exists

    The “Parque da Orla” project was born from an architecture competition and aims to reorganize the entire Avenida Atlântica, permanently separating the flow of pedestrians, cyclists, and cars. Before the works, the boardwalk shared cramped space with a bike lane and vehicle traffic right next to the sand. The proposal widens the walkway, creates an exclusive micromobility corridor for bikes and scooters, and brings back to Central Beach the native restinga vegetation that had disappeared after decades of urban occupation.

    Aerial view of Central Beach in Balneário Camboriú with tall buildings in the background
    Central Beach is home to Balneário Camboriú’s most famous skyline. | Photo: Ezequiel Filiberto / Pexels

    Alongside the urban redesign, the city has been running a second front of works since 2024: an underground seawall of about 6 km along nearly the entire stretch of sand, part of a R$ 31 million investment (February 2026) to curb erosion and the advance of the sea. That’s why, in some sections, it’s still common to see construction barriers and temporary detours — the aesthetic redevelopment and the seawall project are happening in parallel.

    What’s already done in 2026

    The first redeveloped section, delivered in October 2024, covers part of the central area and already shows what the rest of the waterfront will look like: a wide, pedestrian-only boardwalk, a separate bike lane, new lighting, and social areas with benches and landscaping. Throughout 2026, the works advanced to new sections, with the planting of hundreds of trees and the installation of underground cabling, which replaces overhead wires and leaves the landscape cleaner.

    It’s worth setting aside some extra time for your walk: since the project moves forward in stages, it’s normal to find one stretch finished and the next still under construction, with clearly marked detours.

    People enjoying the sand at Central Beach with buildings in the background
    Even with construction underway, the beach stays busy year-round. | Photo: Ezequiel Filiberto / Pexels

    Things to do at Central Beach

    Beyond enjoying the beach itself — calmer waters, ideal for swimming, without much rough surf — the waterfront is home to a good chunk of the city’s attractions just steps from the sand. From the boardwalk, you can see the Cristo Luz, take the cable car up to Parque Unipraias, or tackle the Ferris wheel right at Barra Sul, with views of the sea and the skyline.

    If you want to experience that view from above without depending on the weather, you can book your FG Ferris wheel ticket in advance, which helps you skip the line during peak season:

    At sunset, the boardwalk becomes the go-to spot for those who want to walk, run, or simply sit at one of the kiosks to watch the sun go down behind the buildings — in winter, between May and August 2026, the sun sets early, around 6 p.m.

    Getting there and getting around

    Central Beach is literally the center of the city: anyone staying at a hotel on Avenida Atlântica or the nearby streets can walk there. From other neighborhoods, the city buses that run along Avenida Brasil and the Marginal road serve the area well, and ride-hailing apps work normally in the region. Technical details on the progress of the works, such as the schedule for sections and detours, are available on the city’s official channel on the beach recovery project. For those coming from out of town, the complete Balneário Camboriú guide rounds up the options for getting to the city from other parts of Santa Catarina.

    Once you’re on the waterfront, the redeveloped boardwalk itself is the best way to get around between the attractions — Cristo Luz, Unipraias, the Ferris wheel, and the kiosks are all within walking distance of each other.

    Practical tips

    During peak season (December to February), the boardwalk gets crowded from late afternoon onward — if you prefer more space to walk, go in the morning. Since part of the waterfront is still under construction, wear comfortable sneakers instead of thin flip-flops: some transition stretches have uneven pavement or temporary detours over compacted sand.

    Bring sunscreen and water: the new sections of the waterfront still have little shade, since the trees planted in 2026 will take a few years to grow.

    Frequently asked questions

    When will the New Waterfront of Balneário Camboriú be finished?

    The official estimate is 2030, but the project is moving forward in stages — the first section was already delivered in October 2024, and new phases continue to open throughout 2026.

    Is Central Beach good for swimming?

    Yes. It’s an urban beach with calm waters and no strong currents, which makes it one of the most popular in Balneário Camboriú for families.

    Can you walk the entire waterfront these days?

    Partially. Sections already delivered have a wide boardwalk and a separate bike lane; others are still under construction, with detours marked along the sand.

    What is there to do near Central Beach besides the beach?

    The Cristo Luz, the Parque Unipraias cable car, and the Ferris wheel at Barra Sul are just a few minutes’ walk from the boardwalk, along with bars and restaurants on Avenida Atlântica.

    Conclusion

    Central Beach in Balneário Camboriú is in the middle of a transformation worth keeping an eye on: part of it already shows what the finished waterfront will look like, and part is still a construction site. Either way, it’s the natural starting point for any itinerary in the city. To plan the rest of your trip, check out the complete Balneário Camboriú guide here on the site.


  • Fernando de Noronha: Complete Guide with Fees and Itinerary

    Fernando de Noronha: Complete Guide with Fees and Itinerary

    🇧🇷 POR | 🇫🇷 FR | 🇺🇸 EN | 🇪🇸 ES

    Fernando de Noronha shows up on every Brazilian dream destination list, but planning the trip raises some very real questions: how much do the fees cost, where do flights depart from, how many days are enough, and what should you prioritize in an archipelago where everything is pricier than on the mainland. This guide answers each one — and shows why the logistics, once understood, are simpler than they seem.

    Noronha sits about 545 km from Recife, with direct flights from Recife and Natal (1h to 1h20). Plan for 4 to 5 days and factor in the mandatory fees: the TPA (Environmental Preservation Tax) at R$ 105.79 per day and the national park entry fee of R$ 192, based on January 2026 rates. With that sorted, the rest of the trip is just picking your beach.

    How to get to Fernando de Noronha

    Every route goes through Governador Carlos Wilson Airport (FEN), the island’s only airport. Direct flights depart from Recife and Natal, last between 1h and 1h20, and are operated by Azul and Gol. Travelers coming from São Paulo, Rio, Brasília, or Belo Horizonte will need a connection, almost always in Recife. Since the number of visitors is limited by environmental regulations, seat availability is scarce — book your ticket months in advance, especially for high season and holidays.

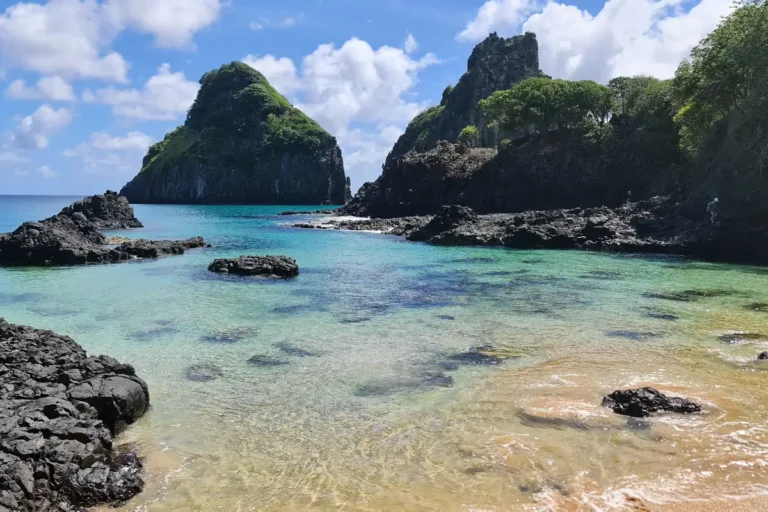
    View of the Fernando de Noronha coastline with Morro Dois Irmãos in the background
    The Fernando de Noronha coastline, with Morro Dois Irmãos in the background. | Photo: Alessander Carneiro / Pexels

    Before you board, two fees come into play. The first is the Environmental Preservation Tax (TPA), charged per day of stay: R$ 105.79 for one day, based on rates adjusted in January 2026. It’s progressive — staying 7 days costs R$ 672.85 in total — and should ideally be paid before you arrive, through the official website of the Fernando de Noronha Administration.

    The second is the entry fee for the National Marine Park, managed by ICMBio: R$ 192 for Brazilians and R$ 384 for foreigners, valid for 10 consecutive days. Without this ticket, you can’t access the island’s most famous beaches, like Sancho, Baía dos Porcos, and Sueste — buy it online before your trip and skip the line at the checkpoint. Check current rates on the official websites, as both fees are adjusted annually.

    Best time to visit and how long to stay

    Noronha works year-round, but the sea changes its mood by season. From August to November, the inner sea is calm, rain practically disappears, and water visibility reaches 50 meters — the ideal setting for snorkeling, diving, and beach days with kids. From December to March, the swell arrives: the waves at Cacimba do Padre attract the surfing circuit, and some beaches lose their natural pools.

    Between March and July, there’s more rain, and that’s exactly when prices drop. The island remains beautiful — rains are usually quick showers — and both sides of the island are accessible for scuba diving. Rule of thumb: calm seas and maximum visibility between August and November; waves and championship conditions between December and March; lowest prices between April and June.

    How long? With 4 or 5 full days, you can see the main beaches, take a boat tour, and do a dive without rushing. Since the TPA is charged per day, stretching beyond a week weighs on your budget — 7 days comes to R$ 672.85 in fees alone, not counting accommodation.

    What to see: beaches, trails, and diving

    The attractions are split between the inner sea (facing Brazil, with calm waters) and the outer sea (open to the Atlantic, wilder). The national park ticket grants access to the most sought-after spots.

    Baía do Sancho

    Repeatedly voted the best beach in the world in Tripadvisor’s Travellers’ Choice awards, Sancho is reached via a staircase wedged into a crevice in the cliff — go down with both hands free. Arrive before 10am: the beach is still empty, the light is better for the dolphin lookout on the way, and the tide usually favors snorkeling at the left end of the bay.

    Aerial view of Baía do Sancho, with green cliffs and turquoise sea
    Baía do Sancho seen from above: access via a staircase in the cliff. | Photo: Paulo gustavo Modesto / Pexels

    Baía dos Porcos, Cacimba do Padre, and Praia do Leão

    Baía dos Porcos, small and surrounded by rocks, delivers the classic photo with Morro Dois Irmãos — access is by walking from Cacimba do Padre at low tide. Cacimba itself is the beach with famous waves in the summer. Praia do Leão, on the outer sea, is the main nesting area for sea turtles: between January and June, sections may close at dusk to protect the nests.

    Diving and marine life

    Few places in the Atlantic deliver so much marine life in such clear water. The discovery dive, done with an instructor and no course requirement, is the island’s most sought-after experience; those who prefer to stay on the surface can see turtles, rays, and schools of fish while snorkeling at Baía do Sueste or the natural pool at Atalaia — the latter only with prior booking through ICMBio and limited group sizes. If reef dives are on your bigger plans, it’s worth comparing with our guide to the Great Barrier Reef in Australia.

    Sea turtle swimming in crystal-clear water
    Turtles are a constant presence at the island’s snorkeling spots. | Photo: Markos Torpillas / Pexels

    Round out your itinerary with a boat tour along the inner sea — spinner dolphins often ride the bow —, the sunset at Forte dos Remédios, and a visit to the Projeto Tamar center in Vila do Boldró, which offers free nightly talks about the local wildlife.

    What to combine: Recife, Olinda, and beyond

    Almost every trip to Noronha goes through Recife, and many people take advantage of the connection to spend a day or two on the mainland instead of just changing planes. Recife’s historic center and the colorful hills of Olinda can be visited together in one day — a guided tour of Recife and Olinda handles the logistics and includes the main landmarks of both cities, with a Portuguese-speaking guide.

    With an extra day, the natural pools of Porto de Galinhas, about 60 km from the capital, are the most requested excursion on the southern coast — the Porto de Galinhas tour from Recife includes round-trip transportation and free time for a raft ride at low tide.

    Where to eat

    Eating in Noronha is pricey — almost everything arrives by plane or boat — so it pays to choose wisely where you spend. The catch of the day and seafood are the highlights: Mergulhão, next to the port, serves moquecas with views over Santo Antônio Bay; Bar do Meio, on Praia do Meio, has become the classic sunset spot with live music; and Cacimba Bistrô, in Vila dos Remédios, covers the more elaborate dinner scene.

    To keep the budget in check, the daily lunch specials in Vila dos Remédios and Boldró do the trick, and many guesthouses include a hearty breakfast. Book the popular restaurants a day or two ahead during high season — the places are small and fill up fast.

    Where to Stay

    Accommodation on the island is all about guesthouses — from simple home stays to luxury lodges with nightly rates in the thousands of reais. Vila dos Remédios concentrates restaurants and nightlife and lets you do a lot on foot; Floresta Nova and Floresta Velha sit halfway between the beaches and cost less; the Sueste area is the quietest, ideal for those who want silence and don’t mind relying on a buggy or the bus.

    Sea seen from a lookout point in Fernando de Noronha
    Lookout points scattered across the island offer sea views from above. | Photo: Isidoro Marchesini / Pexels

    Book months in advance: the supply of beds is limited by the same rules that restrict flights. If you’re after a Brazilian beach destination with more infrastructure and lower prices, coastal spots like Balneário Camboriú play a different role — Noronha pays off with nature, not infrastructure.

    Practical Tips

    To get around, the island has a bus line that runs the full length of BR-363 and metered taxis; renting a buggy is the go-to for most, but negotiate and book ahead, since the fleet is limited. Bring hiking sneakers for the trails, sunscreen, and more cash than you planned: between mandatory fees, a boat tour, and a discovery dive, a couple can easily rack up over R$ 2,000 before even paying for a restaurant — based on a July 2026 estimate.

    Sunscreen is allowed, but the park prohibits entering the natural pools with it applied in some spots, like Atalaia — follow your guide’s instructions. Drones require a permit, feeding animals is an infraction, and don’t stray from marked trails. Cell signal and internet are spotty; download offline maps before you board. If you like mixing beach with big-city energy, check out our guide to Barcelona between architecture and beaches for your next trip.

    If freshwater beaches appeal to you more than the open sea, it’s also worth checking out what to do in Alter do Chão, in Pará — another Brazilian destination with clear waters, but river-fed, and a much calmer pace than Noronha.

    Before you finalize your itinerary, check out other activities available in your departure region:

    Frequently Asked Questions

    How many days should I spend in Fernando de Noronha?

    Four to five full days are enough to see the main beaches, take a boat tour, and go for a dive. If you want to revisit beaches and tackle every trail, stretch it to 7 days — keeping in mind the TPA (Environmental Preservation Tax) increases per day of stay.

    What’s the best time to visit Fernando de Noronha?

    From August to November, when the inner sea is calm, it barely rains, and water visibility reaches 50 meters. From December to March, surfing takes center stage; from April to June, prices drop, with quick rain showers.

    How much do the Fernando de Noronha fees cost?

    As of January 2026 values, the TPA costs R$ 105.79 per day (R$ 672.85 for 7 days), and the Marine National Park entry ticket costs R$ 192 for Brazilians and R$ 384 for foreigners, valid for 10 days. Both can be paid online.

    Do I need a car in Fernando de Noronha?

    It’s not required. The island has a regular bus line along BR-363, metered taxis, and tours with transportation included. A rented buggy gives you the freedom to chase sunsets and empty beaches, but the fleet is limited — book ahead.

    Is Fernando de Noronha good for non-divers?

    Yes. The inner-sea beaches have calm waters, surface snorkeling already reveals turtles and rays, and boat tours, trails, and lookout points fill out the itinerary without needing a tank.

    Conclusion

    Fernando de Noronha demands planning — booking flights early, paying fees online, reserving your guesthouse months ahead — but it returns every real in landscapes you won’t find anywhere else in Brazil. Pick your season based on what you want from the sea, set aside 4 or 5 days, and save Sancho for your first free morning. Here at VoyageVoyage, you’ll find more complete guides to plan your next trip.

  • Lower Zambezi National Park: The Complete Safari Guide

    Lower Zambezi National Park: The Complete Safari Guide

    🇧🇷 POR | 🇫🇷 FR | 🇺🇸 EN | 🇪🇸 ES

    The Lower Zambezi National Park sits in southern Zambia, on the northern bank of the Zambezi River, directly across from Mana Pools National Park in Zimbabwe. It’s one of the most complete safari destinations in Southern Africa: you’ll game-drive through the savanna by day, paddle a canoe among hippos at dusk, and fall asleep to the sound of lions in the distance. Few parks on the continent blend land and water this well—and it’s exactly that combination that’s drawing more and more travelers looking for a safari that breaks the classic Kruger-Serengeti mold.

    Entry costs around US$25 to US$30 per person per day plus US$15 per vehicle (July 2026), the park is open from April to November, and the best time to visit is between May and October, during the dry season. The most common way in is a chartered flight to the Jeki or Royal airstrips, departing from Lusaka, since the road via Chirundu requires a 4×4 and conditions can vary.

    How to get to Lower Zambezi National Park

    “Can I get there without a chartered flight?” You can, but it takes more time and a proper 4×4. Most visitors fly into Kenneth Kaunda International Airport in Lusaka, then hop on a short domestic flight (about 30 to 40 minutes) to the Jeki or Royal airstrip, inside or near the park. It’s the fastest route and the one most lodges arrange directly with your booking.

    Close-up of an African elephant in Lower Zambezi National Park
    Elephants move through the park in large herds, especially near the river. | Photo: Roger Brown / Pexels

    If you’d rather save money, you can drive: from Lusaka to the town of Chirundu it’s about 4 hours on paved road, and from the border to the park gate the route continues on a dirt track that calls for 4×4 traction, especially after rain. A new bridge over the Kafue River replaced the old ferry crossing, making access more reliable. There’s also public transport to Chirundu, with a local taxi covering the final stretch to the gate—a cheaper option, but slower and less predictable.

    Best time to visit and how long to stay

    “Which month should I pick?” The answer shifts depending on what you want to see. From May to August the weather is cooler (averaging 28°C during the day), the vegetation is low, and animal visibility is at its best all year—it’s also when malaria risk drops. September and October get hotter, but they concentrate wildlife near the river, which makes sightings easier, and they’re the preferred months for tigerfish anglers.

    From November to March the rains hit hard and most lodges shut down, because the “black cotton” soil turns to mud that can trap even a pickup truck. If your focus is birdwatching and green scenery, the wet season pays off—but don’t expect open roads or classic game drives. For travelers coming from Brazil, the sweet spot is at least 3 nights: a full day of game driving alone doesn’t cover the canoe and boat experiences that make this park special.

    What to see and do in the park

    “Is it only game drives?” No—and that’s the biggest difference between Lower Zambezi and other African parks. Beyond the traditional day or night game drive, the park offers canoe safaris (paddling right up to elephants drinking and hippos floating), motorized boat cruises along the river, and guided walking safaris to get up close with tracks, birds, and plants you’d never notice from a vehicle.

    The wildlife includes large herds of elephants and buffalo, lions, leopards, hyenas, a wide variety of antelope (impala, kudu, waterbuck), and, right in the river, crocodiles and hippos in high numbers. The park is also a hit with birders—more than 400 species have been recorded in the area, including kingfishers and fish eagles.

    What to pair with Lower Zambezi

    A stretch of the Zambezi River surrounded by dense vegetation in Lower Zambezi National Park
    The Zambezi River separates the Zambian park from Mana Pools, in Zimbabwe, on the other side of the water. | Photo: Kabwe Kabwe / Pexels

    Across the river lies Mana Pools National Park in Zimbabwe, a UNESCO World Heritage Site—many travelers combine both parks in a single trip, since operators arrange boat crossings between the banks. Those with more time usually head on to Lusaka (Zambia’s capital and main air gateway) or tack on Victoria Falls in Livingstone, about 6 hours by car or a short domestic flight.

    If you’re putting together a Southern Africa itinerary for the first time, it’s worth planning Lower Zambezi as a “river” safari stop, complementing a more open-savanna park like South Luangwa (also in Zambia) or Kruger in South Africa—the variety of terrain really elevates the whole experience.

    Many travelers round out a Zambia itinerary by pairing the safari with Victoria Falls, about an hour’s flight from Lusaka. Around the falls, the river takes on a whole new character: you can tackle white-water rafting on the Zambezi, one of Africa’s wildest, or cap off the day with a sunset boat cruise with the falls in the background.

    Where to eat

    “Are there restaurants outside the lodges?” Practically none, and that’s by design: inside the park there are no villages or shops, so all meals happen at the lodges and camps, almost always on a full-board basis (breakfast, lunch, dinner, and snacks included in the rate). The cooking usually blends international dishes with local touches—river fish, corn (nshima, a traditional Zambian staple), and open-air barbecue at the so-called “boma dinners,” fireside feasts that many lodges put on at least once during your stay.

    If you’re driving in via Chirundu, you’ll find small markets and simple eateries in town—your last chance to stock up before entering the park, so grab water and snacks there, because options vanish once you’re past the gate.

    Where to stay

    A lion roaring on the savanna near Lower Zambezi National Park
    At night, the sound of lions and hyenas often drifts into the riverside camps. | Photo: Kévin et Laurianne Langlais / Pexels

    Accommodation inside and around the park is almost entirely in safari lodges and camps, ranging from simple tents to luxury riverside resorts, with rates that usually include all meals and guided activities (game drives, canoeing, and boat cruises). There are no conventional hotels inside the park — it’s a completely different model from a city destination, so book well in advance, especially during peak season (June to September), when the smaller lodges fill up fast.

    For those seeking more budget-friendly options, some guesthouses and campsites are located just outside the main area, near Chirundu, with lower prices, but they require a daily commute into the park for activities.

    Practical Tips

    Hippos floating in the waters of the Zambezi River during a boat safari
    Hippos are among the most dangerous animals in Africa — keep your distance even during a canoe safari. | Photo: Frans van Heerden / Pexels

    Yellow fever vaccination and proof of it may be required upon entry into Zambia depending on your previous itinerary — check the current rules with the consulate before you travel. Malaria is present in the region, so consult a doctor about prophylaxis in advance, especially if traveling during the rainy season.

    Pack neutral-colored clothing (green, khaki, brown), a light jacket for the cool winter mornings (May to August), sunscreen, insect repellent, and binoculars — most lodges lend them out, but having your own means you won’t have to rely on availability. According to the official Zambia tourism website, national park entry fees change frequently — always confirm the current price before booking your package. Pay park fees preferably in cash in US dollars, as not every entry point accepts cards.

    Frequently Asked Questions

    How much does it cost to enter Lower Zambezi National Park?

    International visitors pay around US$25 to US$30 per person per day, plus about US$15 per vehicle per day (rates as of July/2026, subject to change). Most lodge packages already include this fee in the nightly rate.

    What is the best time to visit Lower Zambezi?

    The dry season, from May to October, is the best: mild weather between May and August, and higher concentrations of wildlife near the river in September and October. From November to March the park is flooded and many lodges close.

    How do I get to Lower Zambezi National Park from Brazil?

    There are no direct flights from Brazil. The usual route is to fly to Johannesburg or another African hub, continue to Lusaka, Zambia’s capital, and from there take a short domestic flight to the Jeki or Royal airstrip, near the park.

    Is it safe to do a canoe safari near hippos?

    Yes, as long as you’re accompanied by a licensed guide who knows the routes and maintains a safe distance from hippo and crocodile groups. You should never paddle alone or without a guide in the area.

    Can I visit Lower Zambezi and Mana Pools on the same trip?

    Yes, and it’s a common combination: the two parks sit right across from each other, separated by the Zambezi River, and some operators organize boat crossings between Zambia and Zimbabwe for those who want to experience both sides.

    Conclusion

    Lower Zambezi National Park is still relatively unknown to Brazilian travelers, but it’s precisely this combination of savanna and river — game drives by day, canoeing at dusk — that makes it one of the most complete safaris in Southern Africa. It’s worth booking in advance, respecting the dry season to make the most of the wildlife, and, if you can, extending your trip to Mana Pools or Victoria Falls. You’ll find more nature and wildlife itineraries like this one right here on voyagevoyage.

  • Yosemite National Park, California: The Complete Guide

    Yosemite National Park, California: The Complete Guide

    🇧🇷 POR | 🇫🇷 FR | 🇺🇸 EN | 🇪🇸 ES

    Yosemite National Park sits in the Sierra Nevada, in east-central California, and packs some of the most photographed granite walls and waterfalls in the United States into just over 1,100 square miles. This is where you’ll find El Capitan and Half Dome, two rock formations that define the Yosemite Valley skyline, plus waterfalls that plunge hundreds of feet in the spring. Your visit can be as simple as a day trip through the valley by car or turn into a multi-day hiking itinerary—what changes everything is the time of year you choose.

    How to get to Yosemite National Park

    The park is about a 3.5-hour drive from San Francisco and 6 hours from Los Angeles, which makes driving the most common way to get there—there’s no airport inside the park. The closest airport is Fresno (FAT), about 1.5 hours from the south entrance; travelers coming from abroad typically connect through San Francisco or Los Angeles before continuing by rental car or tour bus.

    The park has five main entrances, and the most used by those coming from San Francisco is the Big Oak Flat/Highway 120 entrance, which leads straight to Yosemite Valley. In winter, some internal roads close due to snow, so it’s worth checking conditions before locking in your itinerary.

    Those coming from the south, from Los Angeles or Fresno, usually enter via Highway 41, which passes near Mariposa Grove before descending into the valley—a good option for stopping at the sequoias on your way in. Highway 140, through the El Portal entrance, tends to stay open year-round and is considered the safest route on snowy days, as it follows the Merced River instead of climbing into the mountains.

    Starting in late 2025, the park announced there will be no entry reservation system for summer 2026—meaning you won’t need to reserve a time slot to enter, but the entrance fee is still required year-round.

    Best time to visit and how long to stay

    Between April and June, the waterfalls are at their peak, fed by melting snow from the winter—it’s the most photogenic time, with the valley still green and mild temperatures. From July to September, the weather gets warmer and all the high-altitude trails open, but the park also gets more crowded. October and November bring fewer people, crisper air, and the golden fall colors in the valley meadows.

    Yosemite Falls, one of the tallest waterfalls in North America with a total drop of about 2,425 feet, typically has strong flow from November to July and nearly dries up between August and October—it’s worth planning your travel dates around this if the waterfall is a priority.

    In 4 to 6 hours, you can see the main viewpoints in the valley; for a more relaxed pace, catching sunset from a viewpoint, and fitting in a short hike, set aside 1 to 2 full days.

    Panoramic view of Yosemite Valley with granite walls and forest
    Yosemite Valley is home to the park’s most visited viewpoints and trails. | Photo: Stéphane Christiaens / Pexels

    What to see: top attractions

    El Capitan

    A granite wall nearly 1 km (3,000 ft) tall, one of the most famous climbing destinations on the planet. You don’t need to climb to appreciate it: you can see it up close from the valley floor with no hiking required—it’s a presence that dominates the landscape the moment you enter Yosemite Valley.

    Half Dome

    The park’s most recognizable rock formation, with a rounded top sliced in half. The trail to the summit is about 25 km (15.5 miles) round trip, requires a special permit during peak months, and isn’t recommended for beginners—but the view of Half Dome from various points in the valley is already worth the visit without making the climb.

    Yosemite Falls

    The park’s tallest waterfall, split into upper and lower falls. A short, flat trail leads to the base of the lower fall, perfect for seeing it up close without much effort.

    Waterfall cascading down a rocky wall in Yosemite National Park
    The park’s waterfalls reach peak flow between April and June. | Photo: Memo Candray / Pexels

    Glacier Point

    A viewpoint about a 1-hour drive from the valley, with a bird’s-eye view of Half Dome and Yosemite Valley itself. It typically closes in winter due to snow on the access road.

    Mariposa Grove

    A grove of giant sequoias, some over 2,000 years old, near the park’s south entrance—a peaceful counterpoint to the valley’s granite walls.

    Mist Trail

    The valley’s most popular trail, which passes near the base of Vernal Fall and continues to Nevada Fall—the name comes from the mist the water creates over the stone path, making everything slippery in the spring. The stretch to Vernal Fall is about 4 km (2.5 miles) round trip and serves as a great introduction to the park’s trails, without requiring the physical fitness of Half Dome.

    Mirror Lake

    A small lake at the foot of Half Dome, with a flat, short path from the valley—ideal for an easy hike with a great photographic payoff. It tends to partially dry up in late summer, so it’s more rewarding in the spring.

    El Capitan, granite rock formation in Yosemite National Park
    El Capitan, one of the world’s most famous climbing walls, seen from the valley floor. | Photo: Kinley Lindsey / Pexels

    What to combine with your visit

    If you love dramatic rock landscapes and high altitude in the United States, you can pair Yosemite with the Grand Canyon in Arizona—both are national parks with monumental scenery, but with very different geology: granite carved by glaciers in Yosemite, sedimentary layers eroded by the Colorado River in the Grand Canyon. You can also extend your itinerary to Lake Tahoe, about 3 hours to the north, or head to San Francisco to round out your California trip.

    If you have more time on the road, you can also fit in Sequoia National Park, about 3 hours to the south, home to the world’s largest trees by volume, or continue to the California coast via Highway 1 for an itinerary that mixes mountains and coastline.

    Where to eat

    Inside the park, dining options are concentrated in Yosemite Valley: cafeterias, a market with basic supplies, and hotel restaurants, with higher prices due to the remote location. For more variety and lower prices, the towns of Mariposa and El Portal, near the west entrance, have simple restaurants and larger markets—worth stocking up there before entering the park.

    Yosemite Valley Lodge and the historic Ahwahnee have the most complete restaurants inside the park, including buffet breakfast and dinner with views of the granite walls—reserve ahead during high season, as tables fill up fast. For a more budget-friendly picnic, the Village Store market sells ready-made sandwiches, fruit, and basic items at still-reasonable prices for a national park standard.

    Where to stay

    Staying inside the park, in Yosemite Valley, eliminates daily commute time and makes it easier to get to the most popular viewpoints early, but spots sell out months in advance during high season. As an alternative, the towns of Mariposa, El Portal, and Groveland, all less than an hour from the west entrance, have more hotel options and lower prices, requiring only an extra drive each day.

    Practical tips

    Entry costs a per-vehicle fee valid for 7 days — U.S. visitors can use the America the Beautiful annual pass ($80) or the Yosemite Annual Pass ($70). Starting in January 2026, the park charges an additional $100 per person for international visitors aged 16 and older, which can be covered by the Non-Resident America the Beautiful pass ($250, valid for the pass holder and three companions in the same vehicle) — double-check the exact fees and payment methods on the official website before your trip, since the park doesn’t accept cash at the gates.

    Pack layers even in summer — nights get surprisingly chilly due to the altitude — and fill up your gas tank before entering, because gas stations inside the park are scarce and pricey. Cell service is weak or nonexistent through most of the valley, so download offline maps ahead of time.

    Black bears roam the park, so all food and anything with a strong scent (including sunscreen and toothpaste) must be stored in the metal bear boxes scattered around parking lots and campgrounds — never inside your car where it’s visible. Bring sunscreen and plenty of water: even short trails like the Mist Trail get intense sun and little shade after the first few hundred feet.

    If you’re planning to camp, the campgrounds inside the valley (like Upper Pines and North Pines) open reservations months in advance and sell out fast in peak season — it’s worth having a backup option outside the park in nearby towns in case you can’t snag a spot.

    Half Dome, the iconic rock formation of Yosemite National Park
    Half Dome anchors the valley skyline and is the destination of one of the park’s most demanding hikes. | Photo: Mo Eid / Pexels

    Frequently Asked Questions

    What’s the best time to see Yosemite’s waterfalls?

    Between April and June, when the snowmelt sends falls like Yosemite Falls at their most powerful volume of the year.

    Do I need to reserve entry to visit the park in 2026?

    No. The park has announced there will be no entry reservation system for summer 2026, but the entrance fee is still required.

    How much time do I need to explore Yosemite?

    Four to six hours is enough to hit the valley’s main viewpoints; one to two days lets you hike at a relaxed pace and squeeze in a short trail.

    Do I need to be experienced to hike Half Dome?

    Yes. The trail is about 15 miles round trip, requires a special permit in peak season, and isn’t recommended for beginners.

    How do I get to Yosemite without my own car?

    You can get there by tour bus or van from San Francisco, but most visitors use a rental car, since the park has no internal airport and public transportation inside it is limited.

    Conclusion

    Yosemite works just as well for a quick day trip as it does for an entire vacation of hiking, depending on how much time you have and when you go — it’s worth deciding this before booking lodging, since April through June brings the fullest waterfalls and July through September opens up the higher trails. Always check entrance fees and road conditions on the official website before you travel. Explore the other destination guides here on Voyage Voyage.

  • Central Park in New York: The Ultimate Guide to Visiting

    Central Park in New York: The Ultimate Guide to Visiting

    🇧🇷 POR | 🇫🇷 FR | 🇺🇸 EN | 🇪🇸 ES

    Central Park sits right in the middle of Manhattan, New York City, and is the most visited urban park in the United States, with free entry and open access every day. It occupies a rectangular strip between 59th and 110th Streets, bordered by the Upper West Side, Upper East Side, and Harlem, and is just a few minutes by subway from Times Square or 5th Avenue. The best time to visit is from April to October, when the trees are in bloom or showing off their fall colors, but the park operates year-round and doesn’t require any budget beyond what you want to spend on extra activities. What most people don’t know is that much of the “natural” look you see there was meticulously designed with rulers and compasses in the 19th century — and that history changes the way you walk through it.

    How to get there

    From the US, flights to New York land at JFK, Newark (EWR), or less frequently, LaGuardia (LGA). Major cities like Los Angeles, Chicago, and Miami have direct flights ranging from 3 to 6 hours with airlines like American, Delta, and United. From the airport to Manhattan, the most budget-friendly option is the AirTrain connected to the subway (JFK) or an express bus (Newark), with a travel time of 45 minutes to 1 hour 15 minutes depending on traffic; a taxi or rideshare costs significantly more and can take twice as long during peak hours.

    Once in the city, the park has subway stations on nearly every edge: the A, B, C, D, and 1 lines stop near the west entrance (Columbus Circle and surroundings), while the N, Q, R, and 4/5/6 lines serve the east side. There isn’t a single “main entrance” — the park has over 20 numbered gates along its perimeter, so it’s best to choose the access closest to the spot you want to visit first. Walking from one side of the park to the other (east-west) takes about 20 minutes; covering the entire length (south-north) can take over an hour on foot.

    Best time to visit & how long to stay

    “Can you see the whole park in an afternoon?” You can get a great first impression in 3 to 4 hours, covering the southern section, which has the most famous attractions. To explore it at a leisurely pace — including the Central Park Zoo, the Ramble, and the Reservoir — set aside a full day, preferably on a weekday when it’s less crowded. Spring (April to June) brings cherry blossoms near the Reservoir and mild temperatures; fall (September to November) is the most photographed season, with leaves changing color from mid-October to early November. Summer is hot and full of free events like SummerStage; winter empties the park, but there’s ice skating at Wollman Rink and, in heavy snow years, sledding on Pilgrim Hill.

    What to see in Central Park

    The park covers 341 hectares, according to the Central Park Conservancy, the non-profit organization that maintains the space, so no one can cover it all on foot in a single visit without a plan. The simplest approach is to start with the southern end, which is more concentrated with attractions, and head north as time allows.

    Aerial view of Central Park in New York City during autumn
    The 341-hectare green rectangle cuts through Manhattan from east to west. | Photo: Louis / Pexels

    Bethesda Terrace and the Angel of the Waters Fountain

    This is the most photographed spot in the park, with an arched staircase leading down to a terrace by the lake, with the Angel of the Waters statue at the center of the fountain. It’s about a 15-minute walk from the 72nd Street entrance on the east side, and street musicians often play under the arch because of the acoustics.

    Bow Bridge

    A cast-iron arch bridge over the lake, just a few steps from Bethesda Terrace. It appears in dozens of movies and is the classic New York proposal spot — arrive before 9 a.m. if you want photos without people in the way.

    Bow Bridge, the most photographed cast-iron bridge in Central Park
    The Bow Bridge connects two shores of the lake and is one of the park’s postcard-perfect spots. | Photo: Artūras Kokorevas / Pexels

    Strawberry Fields

    A memorial to John Lennon, near the Dakota Building where he lived. The circular mosaic with the word “Imagine” is close to the 72nd Street West entrance and often has flowers left by visitors.

    Bethesda Fountain with the Angel of the Waters statue in Central Park
    The Bethesda Fountain is the classic meeting point in the heart of the park. | Photo: Marta Wave / Pexels

    The Ramble and the Reservoir

    The Ramble is a wooded area with winding trails, great for birdwatching — the park lies on the Atlantic flyway and hosts over 230 recorded species throughout the year. The Jacqueline Kennedy Onassis Reservoir, further north, has a 2.5-mile track used by runners and offers open views of the surrounding buildings.

    Central Park Zoo

    The zoo is inside the park itself, near 5th Avenue and 64th Street, with tickets starting at $22.95 for adults (check current prices and hours on the official Central Park Zoo website before you go, as they change frequently). Kids under 3 get in free. From April to October, it’s open from 10 a.m. to 5 p.m. on weekdays and until 5:30 p.m. on weekends; in winter, hours shrink to 10 a.m. to 4:30 p.m.

    Sea lion in the pool at the Central Park Zoo
    The sea lion pool is the most popular attraction at the park’s small zoo. | Photo: Miguel Cuenca / Pexels

    What to combine / nearby attractions

    The park borders some of Manhattan’s most visited spots, making it easy to combine outings on the same day. On the south side, exiting at Columbus Circle leads directly to the start of Times Square, about a 15-minute walk or two subway stops away. On the east side, 5th Avenue is home to museums like the Metropolitan Museum of Art, the Guggenheim, and the American Museum of Natural History, all with entrances from the park itself. Travelers passing through New York who are putting together a broader city itinerary often also include the Statue of Liberty, though it’s much further south on Liberty Island and requires a separate ferry trip.

    Where to eat

    Inside the park, options are food trucks and kiosks — pretzels, hot dogs, and ice cream, ranging from $5 to $10 per item, with higher prices near the busier entrances. For a sit-down meal with a lake view, the Loeb Boathouse has its own restaurant, but it’s pricey and requires a reservation. A more budget-friendly alternative is to exit through any gate and eat in the surrounding neighborhoods: the Upper West Side has classic delis and pizzerias for $12 to $20 a plate; the Upper East Side tends to be pricier. Packing a snack and having a picnic on Sheep Meadow, the open lawn at 66th Street, is common among New Yorkers on sunny days.

    Where to stay

    There’s no lodging inside the park, so choosing a neighborhood depends on your travel style. Staying near Columbus Circle or the Upper West Side puts you just minutes on foot from several entrances and close to the subway for the rest of the city — it’s the most balanced option between cost and location. Midtown, further south, is a longer walk from the park but has more hotel options across all price ranges, plus it’s near Times Square. Those looking for a quieter, more residential vibe often prefer the Upper East Side, which is pricier on average but has calmer streets at night.

    Practical tips

    It’s worth setting aside a full half-day if you enjoy walking and taking photos without rushing; for a quick stop in New York, you can see the essentials of the southern section in 2 to 3 hours. The most common mistake is trying to cross the entire park on foot without planning your route — the north-south distance is longer than it looks on the map, and many of the internal trails aren’t clearly marked for first-timers. Bring water and sunscreen even on cloudy days — there are few shaded spots on the open lawns, and the drinking fountains don’t always work outside of summer. For international visitors, a U.S. visa (B1/B2 or ESTA, depending on the type of trip) is usually required; always check the current rules on the official consulate website before booking your ticket, as they change. Regarding safety, the park is well-policed during the day, but avoid more isolated areas, like parts of the Ramble and North Woods, after the announced nighttime closing.

    Frequently asked questions

    What is in Central Park?

    The park features lakes, open lawns, wooded trails, a zoo, running tracks, an outdoor theater, an ice skating rink in winter, and historic spots like Bethesda Terrace, Bow Bridge, and Strawberry Fields, along with statues, playgrounds, and birdwatching areas.

    What is the most famous part of Central Park?

    Bethesda Terrace and Bow Bridge, both in the central-southern area of the park, are the most photographed spots and the easiest to recognize in movies and New York postcards.

    What is the history of Central Park?

    The park opened in 1858, designed by landscape architects Frederick Law Olmsted and Calvert Vaux, on land that previously housed working-class neighborhoods, including the African American community of Seneca Village, which was removed to make way for the project. It was the first major planned landscape park in the United States and became a model for urban parks in other cities across the country (more details on the Wikipedia page for Central Park).

    What to do in Central Park in New York?

    Walk to Bethesda Terrace and Bow Bridge, visit the Central Park Zoo, rent a rowboat on the lake, have a picnic on Sheep Meadow, run or walk around the Reservoir, and, depending on the season, catch free SummerStage performances or go ice skating at Wollman Rink.

    What movie was filmed in Central Park?

    Several. “Home Alone 2: Lost in New York,” “When Harry Met Sally,” and “Coming to America” all have scenes in the park, among dozens of other productions that have used the setting over the decades.

    Is Central Park the largest park in the world?

    No. At 341 hectares, it’s large for an urban park in the middle of a dense metropolis, but it’s far from the largest park in the world — it’s not even the largest park in New York City, a title that belongs to Pelham Bay Park in the Bronx.