Category: Adventure & Sports

  • Monte Verde, MG: Cold Weather, Hiking Trails, and 4 Winter Choices

    Monte Verde, MG: Cold Weather, Hiking Trails, and 4 Winter Choices

    🇧🇷 POR | 🇫🇷 FR | 🇺🇸 EN | 🇪🇸 ES

    Monte Verde, MG, works best when you split your itinerary by area and leave some buffer for weather, traffic, and rain. The town combines mountain chill, hiking trails, and the village; trying to cram everything into a few hours usually turns getting around into too big a part of the trip. The right order changes the outcome a lot.

    Monte Verde needs two full days for hiking, eating well, and leaving room for the weather; pick a home base, group nearby attractions, and confirm access rules before you head out. That way, you enjoy what motivated the trip without relying on a last-minute rush.

    How to get to Monte Verde

    Monte Verde requires some transportation planning, especially if you intend to combine the center, nature, and more remote neighborhoods. Monte Verde is a district of Camanducaia, in the south of Minas Gerais, and a car makes accessing the trails and inns easier. Check the weather on the map for the day and don’t rely only on distance in kilometers as a reference.

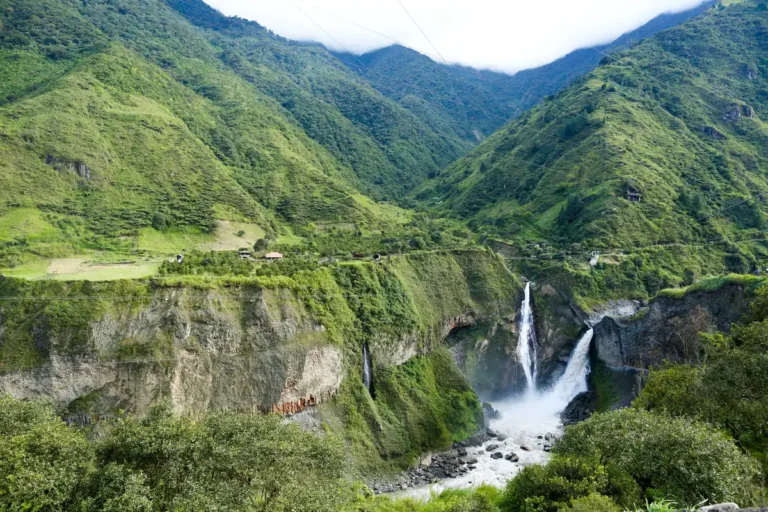
    Monte Verde landscape
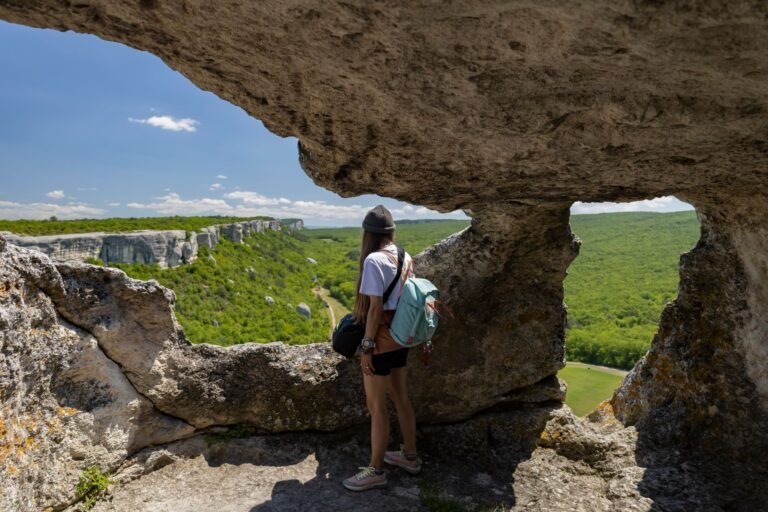
    One of the landscapes that are part of the Monte Verde itinerary. | Photo: Victor Freitas / Pexels

    The best arrival is one that gives you autonomy during the period when attractions are less crowded. If you’re driving, fill up the tank before hitting the smaller roads and save offline maps; cell signal isn’t a guarantee in rural areas.

    For those arriving by bus, the simplest strategy is to focus the first day on urban spots and leave long trips for a booked tour. Also check the official Monte Verde tourism channels before confirming your schedule.

    How many days to stay in Monte Verde

    In Monte Verde, two full days for hiking, eating well, and leaving room for the weather. One day is enough to get to know the center and pick one main experience; two days let you split the routes and avoid having the trip depend on a single schedule.

    The practical rule is to set aside a full morning for each outing that involves water, trails, boats, or mountains.

    On the second day, prefer a different area from the one you visited on the first. This choice reduces unnecessary backtracking and opens up time for a relaxed lunch, changing clothes, or waiting for better weather.

    Time Possible itinerary Pace
    1 day Center and one main attraction Focused
    2 days Two areas and a break for food Comfortable
    3 days Urban core, nature, and weather buffer Complete

    Things to do in Monte Verde

    What to do in Monte Verde depends on your travel style: those seeking scenery should start with the mountain chill, hiking trails, and the village; those who prefer history or food can mix the main attraction with the center. Reading the day gets better when you choose a priority, not an endless list.

    Outdoor attraction in Monte Verde
    Nature itineraries require sturdy footwear and time to spare. | Photo: Caio / Pexels

    Start early, bring water, and check for visitor limits, entrance fees, or the need for a guide. During peak seasons, booking ahead avoids losing your morning at the gate; on quiet days, it lets you choose your time more calmly.

    After the main outing, swap a second long activity for a viewpoint, a short walk, or a regional meal. The contrast between the action outside and the pace of the center is often the most enjoyable part of the itinerary.

    Use the tours and attractions, nature, and cities content from Voyage Voyage to build connections with other Brazilian trips.

    If you want to get your booking sorted before the trip, this selection helps you compare the activity available for your chosen date.

    Read the duration, meeting point, and cancellation policy before paying. These details change the logistics more than a small price difference.

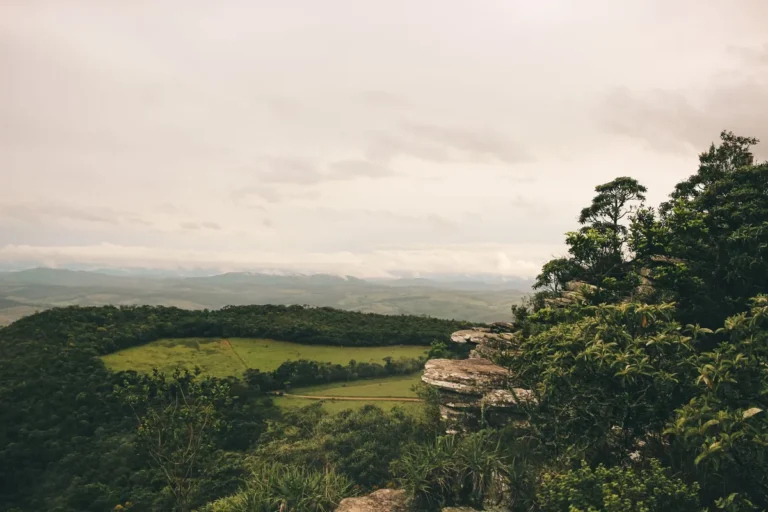
    Landscape view in Monte Verde
    The weather changes the experience in open areas. | Photo: Lucas Pezeta / Pexels

    If the option doesn’t match your pace, stick with the plan to do the main attraction on your own and use the free time for the center.

    How to plan your itinerary in Monte Verde

    An efficient itinerary in Monte Verde starts with geography, not the order of photos you saved. Mark your accommodation, the mountain chill, hiking trails, the village, and food stops on the map; then, group only what fits into the same trip.

    The day before, confirm whether you need tickets, reservations, wristbands, a guide, or cash payment. This check takes a few minutes and prevents arriving at an attraction only to be caught off guard by an exception in hours, capacity, or maintenance.

    If you’re traveling as a couple or group, agree beforehand on the priority: rest, swimming, hiking, photography, museums, or restaurants. A simple agreement reduces the urge to add a spur-of-the-moment stop at every corner.

    Reserve the first hour of the morning for the activity that can’t handle delays. Leave shops, cafés, viewpoints without access control, and short walks for the late afternoon, when a change of plans causes less damage.

    On trips with kids, choose a single attraction with good infrastructure and treat the rest as a bonus. Bathrooms, shade, parking, and travel time matter more than the number of points marked on the itinerary.

    Those traveling without a car should plan the day around confirmed transportation, not imagined transportation. Write down the contact, agreed price, meeting point, and return time; app coverage can vary outside the central area.

    Bring a small bag with your ID, a rain jacket, sunscreen, personal medication, and a change of dry clothes when water is involved. The goal isn’t to carry everything, but to avoid a basic detail cutting your experience short.

    If the weather closes in, don’t force the outdoor plan. Swap it for an urban attraction, a longer meal, or a break at the inn. Flexibility is part of the itinerary and often leads to better choices than insisting on an unsafe condition.

    It’s also worth setting aside a small contingency budget. Parking, access fees, transfers, and an unplanned meal pop up more often than you’d think, and they shouldn’t force you to cut your main activity.

    Before you turn in for the night, review the next day based on what worked. In Monte Verde, this simple check helps you adjust your departure time, drop a dispensable stop, and save your energy for the part you’re really looking forward to.

    When to Visit Monte Verde

    The best time to visit Monte Verde depends more on what you want to do than on a single answer. The cold weather everyone chases usually shows up between May and August; frost and below-freezing temperatures are possible, but they don’t happen every day. Keep an eye on the forecast, rainfall, and official announcements from the attractions, since safety and access can change from one day to the next.

    Architecture and lodging in Monte Verde
    Choosing your base well cuts down on travel time during your itinerary. | Photo: Victor Freitas / Pexels

    On holidays and school breaks, leave early and expect higher lodging prices. Outside those peaks, you gain flexibility, but you shouldn’t assume every service runs on the same schedule.

    If your trip includes a waterfall dip, a boat ride, or a hike, pack a dry change of clothes and protection for your electronics. The decision to get in the water should follow local guidelines, not your desire to stick to the itinerary.

    Where to Stay in Monte Verde

    Choose your lodging in Monte Verde based on your first commitment of the morning. Staying in the center favors restaurants and getting around on foot; a more remote base can shorten your access to the mountain cold, the trails, and the village, but it requires a car and dinner planning.

    Compare the total cost: nightly rate, parking, breakfast, distance, and travel time. A seemingly cheaper rate can end up costing more when your itinerary demands a lot of back-and-forth.

    Before you book, confirm the check-in time, access on rainy days, and whether the inn has the right setup for wet clothes, kids, or remote work, depending on your trip.

    Practical Tips for Monte Verde

    In Monte Verde, bring your ID, an alternative payment method, and a small stash of water and snacks when your day takes you away from the center. Check rules and prices directly on the official source or responsible attraction, as of July 2026, because rates and hours vary.

    Don’t treat social media photos as a guarantee of access. Ask about parking, restrooms, accessibility, and conditions for kids before you head out. On mountain roads or dirt tracks, prefer to drive in daylight and without rushing.

    Finally, leave a free slot in your itinerary. It’s there for both an unexpected stop and for when the weather forces a change of plans.

    To compare other departures and available times, use the destination panel below before you get to the FAQ.

    Don’t book just because there’s availability. Confirm that the meeting point fits your travel plans and that the activity matches the experience you’re after.

    With these precautions, your itinerary stays flexible without losing the attractions that truly justify the trip.

    Frequently Asked Questions

    When does it get cold in Monte Verde?

    Monte Verde typically sees its lowest temperatures between May and August. Frost is most likely on winter mornings, but the wind chill can shift quickly; check the forecast close to your date and pack layers.

    What to do in Monte Verde when it rains?

    When it rains in Monte Verde, prioritize cafés, restaurants, village shops, and inns with fireplaces or common areas. Trails and viewpoints should wait until the terrain and visibility are safe.

    Monte Verde or Campos do Jordão: which one to choose?

    Monte Verde works best for those who want a compact village with trails nearby. Campos do Jordão offers more urban infrastructure and spread-out attractions. The choice comes down to your car, budget, and the pace you’re looking for.

    How many days should you spend in Monte Verde?

    Two days in Monte Verde let you explore the village, hit a trail, and handle weather changes without rushing. A short weekend works if your lodging is well located.

    Conclusion

    Monte Verde pays off more when you pick your daily priority wisely and don’t try to cram an entire map into a few hours. Save this guide and keep browsing Voyage Voyage to compare destinations, routes, and tours.

  • How Much Does It Cost to Travel to Atacama: Real Daily Budget

    How Much Does It Cost to Travel to Atacama: Real Daily Budget

    🇧🇷 POR | 🇫🇷 FR | 🇺🇸 EN | 🇪🇸 ES

    How much does it cost to travel to the Atacama? A 5-day trip to San Pedro de Atacama, including flights, accommodation, five tours, meals, and transport, comes to between R$ 3,700 and R$ 6,300 per person (Jul/2026). Stretching it to 7 days will cost between R$ 5,000 and R$ 9,000. The biggest chunk of your budget isn’t the flight—it’s the tours, because every desert attraction requires transport and, often, a separate entrance fee.

    Quick summary: for 5 days in the Atacama, budget at least R$ 4,000 per person, including flights (R$ 1,800–3,500), basic accommodation (~R$ 200/night), five tours (R$ 200–450 each), and meals (R$ 50–200 per meal). Below is a breakdown of each item and where you can cut costs without skipping the tours that truly make the trip.

    Flights: how much to pay

    Flights to Calama—the closest airport to San Pedro de Atacama, about 100 km away—run between R$ 1,800 and R$ 3,500 per person, round trip, departing from Brazilian capitals with a connection in Santiago. Booking 2 to 3 months in advance and avoiding peak season (July and December/January) tends to land you closer to the lower end of that range.

    Atacama Desert at sunset with mountains in the background
    The Atacama Desert at dusk, in Chile. | Photo: Marek Piwnicki / Pexels

    From Calama to San Pedro, the ground transfer costs between R$ 60 and R$ 400 per person, depending on whether it’s shared (cheaper, takes about 1h30) or private. Booking the transfer together with your tour package is usually cheaper than arranging it separately when you arrive.

    It’s worth keeping an eye on the Chilean peso/Brazilian real exchange rate in the weeks before your trip—the rate on the Google Finance converter can shift enough to impact your final budget on a week-long trip.

    Staying in San Pedro: from hostels to desert hotels

    A night in San Pedro de Atacama ranges from R$ 146 to R$ 2,742—a huge gap because the town has everything from simple hostels to desert resorts with spas and views of Licancabur. In practice, most travelers fall into two tiers: solid mid-range lodging for about R$ 200 per day, or luxury hotels for around R$ 800 per day.

    For 5 nights, that’s between R$ 1,000 (mid-range) and R$ 4,000 (luxury) just for accommodation—so it’s worth deciding on this before building the rest of your budget, since it can double your total trip cost on its own.

    Most mid-range hotels in San Pedro are just a few blocks from the central square, within walking distance of the tour meeting points—which saves you extra money on getting to the agency every morning. Booking a place with breakfast included cuts your daily food costs by about R$ 30 to R$ 50 per person. The more remote desert hotels, usually with spas and their own stargazing setups, charge the higher nightly rate precisely for that comfort package.

    Tours: the biggest line item in your budget

    Tours average between R$ 200 and R$ 450 each, and it’s normal to book 4 to 6 during your stay—making them the biggest expense of the trip after long-term accommodation. Prices vary by time of day (early morning departures cost more) and whether park entrance fees are included.

    Rock formations of the Valley of the Moon in the Atacama Desert
    Valle de la Luna, one of the most sought-after tours in San Pedro de Atacama. | Photo: poLiMetralleta / Pixabay

    El Tatio Geysers, one of the most popular tours, costs around CLP$ 35,000 per person on a group excursion (about R$ 200), or CLP$ 20,000 for the tour plus CLP$ 10,000 for park entry if you organize it yourself—but it requires a 4 AM departure. The Valle de la Luna, meanwhile, has an entrance fee of about CLP$ 10,800 per person, separate from the tour price.

    To book in Portuguese with transport included, you can check out the Valle de la Luna and Cordillera de la Sal excursion or book the El Tatio Geysers tour in advance, skipping the lines at local agencies.

    Booking all your tours with the same agency often gets you a discount on the full package—so it’s worth asking before booking each one separately. Buying park tickets online, when available, also skips the lines and, in some cases, costs less than paying on the spot. Entrance fees for Chilean national parks, including the Los Flamencos sector where the Valle de la Luna sits, are set by CONAF, Chile’s forestry agency, and can be adjusted annually.

    Food and local transport

    Food in San Pedro ranges from R$ 50 to R$ 200 per meal, depending on whether you go for markets and set menus (cheaper) or touristy restaurants in the town center. A simple bottle of water costs about CLP$ 1,500 at local shops.

    Dirt road in the historic center of San Pedro de Atacama
    Streets of San Pedro de Atacama, the starting point for all tours. | Photo: David Vives / Pexels

    Within town, almost everything is walkable or reachable by rented bike. Extra transport costs are mostly concentrated in the Calama–San Pedro transfer (already counted above) and the occasional taxi for tours without an organized group—which is rare, since most attractions require a 4×4 vehicle and a guide, which is why few travelers rent a car on their own.

    Renting a bike to explore the center and nearby trails, like the Garganta del Diablo, costs around CLP$ 5,000 to 8,000 per day (roughly R$ 30 to R$ 45). It’s a cheap alternative for days without a booked tour, saving you from taxi or extra tour costs.

    How much a trip to the Atacama costs by number of days

    Adding up flights, accommodation, tours, meals, and local transport, the per-person budget looks like this:

    Duration Estimated budget (per person) What it includes
    5 days R$ 3,700 to R$ 6,300 Flights, lodging, 5 tours, meals, transfers
    7 days R$ 5,000 to R$ 9,000 Flights, lodging, 6–7 tours, meals, transfers

    The lower end of each range covers mid-range lodging and group tours; the higher end reflects desert hotels and private or guided tours. If you’re planning to tack on 3 days in Santiago before or after the desert, add that stretch to your total, since most flights to Calama connect through the Chilean capital.

    How to save without cutting tours

    The most effective way to save in Atacama isn’t skipping tours — it’s negotiating a package deal with a single agency, buying park tickets in advance online, and choosing mid-range lodging instead of a resort. Traveling outside of July and December/January also brings down flight and hotel prices, since high season inflates both.

    If you have more time, you can combine tours that share the same route — like Valle de la Luna and Cordillera de Sal in one outing — instead of booking each attraction separately, which cuts down on the number of paid transfers.

    Practical tips from someone who’s done the math

    Carry Chilean pesos (CLP) for markets and taxis; cards aren’t always accepted outside of larger hotels and restaurants. Exchanging dollars or reais for Chilean pesos is usually more favorable in Chile than in Brazil. Before you fly, also check the entry requirements on the official Chilean government tourism portal, since documentation and baggage rules change from time to time.

    Starry sky with the Milky Way visible over the Atacama Desert
    The Atacama sky, one of the clearest in the world for stargazing. | Photo: Wolfgang_Hasselmann / Pixabay

    Book the high-altitude tours (Géiseres del Tatio, highland lagoons) only after 2 to 3 days of acclimatizing in San Pedro (2,400 m) — that way you won’t spend on a pricey tour and then have to cancel due to altitude sickness. To figure out the ideal order for low- and high-altitude tours, check out the guide to Atacama tours without altitude struggles and the complete 4-day Atacama itinerary to lock in your plan before calculating your final budget.

    Frequently asked questions

    How much does a 5-day trip to Atacama cost?

    A 5-day trip to San Pedro de Atacama costs between R$ 3,700 and R$ 6,300 per person, including flights, lodging, five tours, meals, and local transport (Jul/2026).

    What’s the most expensive tour in Atacama?

    Géiseres del Tatio is usually the priciest tour, since it requires a pre-dawn departure and a longer drive, costing around CLP$ 35,000 per person on a group tour, plus park entry when it’s not included.

    Is it worth hiring a private guide in Atacama?

    A private guide costs more than a group tour but offers flexible hours and your own pace, which is especially handy if you’re still acclimatizing to the altitude. For most travelers, a shared group tour covers the itinerary just fine with the same safety standards.

    Is it cheaper to book tours in advance or once you arrive in San Pedro?

    Booking in advance online is usually cheaper or the same price, and it also guarantees a spot on the most in-demand tours, like Géiseres del Tatio and Valle de la Luna, which fill up fast in high season.

    Conclusion

    With flights, mid-range lodging, five tours, and balanced meals, a 5-day trip to Atacama fits into around R$ 4,000 to R$ 5,000 per person — without cutting the attractions that make the trip worth it. Adjust your lodging and travel dates to match your budget, and plan the high-altitude tours at a relaxed pace. For more itineraries and travel tips across South America, keep exploring voyagevoyage.com.br.

  • Torres del Paine Without a Car: How to Get There and Get Around by Bus

    Torres del Paine Without a Car: How to Get There and Get Around by Bus

    🇧🇷 POR | 🇫🇷 FR | 🇺🇸 EN | 🇪🇸 ES

    Torres del Paine without a car is totally doable—and for many travelers, even preferable. Chile’s most famous national park in Patagonia runs on a network of buses, shuttles, and catamarans that connect the entrances, refugios, and trailheads without needing a steering wheel or a 4×4. The secret lies in Puerto Natales: this small town, 112 km from the park, is the hub where all transport departs, and planning your route from there eliminates the need to rent a car.

    The logistics can seem intimidating at first—limited schedules, routes that depend on connections, catamarans that get canceled in high winds—but those who plan ahead discover the system is more reliable than it looks. This guide shows you exactly how to get there, move around inside the park, and put together a 3-to-5-day itinerary using only public transport.

    Getting to Puerto Natales and the park

    Puerto Natales is the gateway to Torres del Paine and the starting point for all car-free logistics. The town has its own airport (PNT), but with limited flights—most travelers arrive via Punta Arenas (PUQ), which receives daily flights from Santiago on LATAM and Sky Airline.

    Torres del Paine mountains under a blue sky in Chilean Patagonia
    The granite towers that give the park its name—visible right on arrival on clear days. | Photo: Marek Piwnicki / Pexels

    From Punta Arenas to Puerto Natales, buses from Buses Fernández and Bus Sur make the trip in 3 hours for around CLP 8,000 to CLP 12,000 (~USD 8 to 12). Frequent departures throughout the day. A private transfer costs from CLP 60,000, but it’s only worth it if you arrive at a time when no buses are running.

    From Puerto Natales to the park, buses from Buses Gomez and Juan Ojeda leave from the bus terminal with two departures a day in high season: at 7 a.m. and 2:30 p.m. The ride to the Laguna Amarga entrance takes about 2 hours; to Pudeto, 3 hours. Tickets cost roughly CLP 10,000 to CLP 15,000 per leg (~USD 10 to 16). In the low season (May to September), service is reduced or suspended—check before you travel.

    Best time to visit and how many days to set aside

    High season runs from October to April, peaking between December and February—longer days (up to 17 hours of daylight), temperatures between 41 °F and 64 °F, and all transport running. October and November bring fewer crowds and wildflowers; March and April offer autumn colors and slightly less brutal winds. From May to September the park stays open, but many transport services stop and temperatures can drop to 14 °F.

    For Torres del Paine without a car, set aside at least 3 full days in the park—5 if you want to do the full W Trek. Add 1 day for arrival and 1 for departure in Puerto Natales. In total, plan for 5 to 7 days in the region.

    Getting around the park: buses, shuttles, and catamarans

    Inside Torres del Paine there’s no public transport in the traditional sense, but three services connect the main sectors and make it possible to explore the entire park without a car.

    Laguna Amarga → Hotel Las Torres Shuttle — operated by Hotel Las Torres, this shuttle connects the main entrance to the trailhead for the Base Torres hike. Departures are synchronized with the arrival of buses from Puerto Natales. Cost: around CLP 5,000 per leg.

    Pudeto → Paine Grande Catamaran — the crossing of Lake Pehoé takes 30 minutes and links the north sector (Pudeto) to the west sector (Paine Grande), the starting point for the trail to Grey Glacier. According to the park’s official website, it runs 2 to 3 times a day in high season, for about CLP 25,000 round trip. It can be canceled in high winds—always keep 1 buffer day in your itinerary.

    Boat on the Puerto Natales fjord with mountains in the background
    Puerto Natales seen from the fjord—this is where the buses to the park depart. | Photo: Marek Piwnicki / Pexels

    Buses between sectors — the same buses that come from Puerto Natales make internal stops (Laguna Amarga, Pudeto, CONAF Administration), letting you switch sectors without returning to town. Schedules are fixed and limited, so plan each transfer with extra time.

    Things to do in Torres del Paine without a car

    Without a car, the park is explored on foot—and that’s actually how it was designed. The main trails start from points accessible by public transport, and most visitors do the W Trek or sections of it.

    Base Torres Trail — the park’s most iconic hike: 11 miles (round trip), 7 to 9 hours, with an elevation gain of 2,600 feet. It starts at Hotel Las Torres (accessible by shuttle) and ends at the viewpoint with the three granite towers reflected in the glacial lake. Leave before 8 a.m. to get back with daylight.

    W Trek — a 4-to-5-day trek passing through Paine Grande, Valle del Francés, and Base Torres. Overnights in refugios or campsites (reservation required). The W is done entirely without a car: bus to Pudeto, catamaran to Paine Grande, then the trail heads east to Las Torres, where the shuttle takes you back to Laguna Amarga for the return bus.

    Cuernos Viewpoint — for those who don’t want to do the full W, the hike from Paine Grande to the viewpoint in Valle del Francés (7.5 miles round trip, 5–6 hours) is the most spectacular section, with views of the Cuernos del Paine and Lake Nordenskjöld.

    Grey Glacier — from Paine Grande, the trail to the Grey Glacier viewpoint is 13.5 miles (round trip) and takes 7 to 8 hours. Icebergs float in the lake, and on clear days the glacier’s blue wall is breathtaking. There’s also a boat tour on the lake to see the ice up close (book in Puerto Natales, from CLP 90,000).

    Lake with glacier and mountains in Torres del Paine
    A glacial lake in the park—scenery that rewards every hour of hiking. | Photo: Pedro Massochin Medeiros / Pexels

    Where to eat inside and outside the park

    Inside the park, options are limited to the restaurants at the refugios (Paine Grande, Los Cuernos, Grey, Las Torres) and the communal kitchens at the campsites. Meals at the refugios cost between CLP 15,000 and CLP 25,000—pricey, but unavoidable for multi-day trekkers. The alternative is to bring dehydrated food and use the camp stoves at the campsites (campfires are prohibited).

    In Puerto Natales, Calle Arturo Prat is packed with restaurants serving Patagonian lamb (the regional dish), centolla (king crab), and local craft beer. The restaurant Afrigonia blends African and Patagonian flavors with dishes in the CLP 12,000 to CLP 18,000 range. To save money, the Unimarc and Líder supermarkets are well-stocked for putting together trail snacks.

    Where to stay: refugios, campsites, and Puerto Natales

    Those doing the W Trek sleep inside the park, at the refugios managed by Vertice Patagonia and Fantastico Sur. Book at least 3 months in advance during high season—the refugios sell out fast, and without a confirmed reservation, CONAF can deny you entry to the park. Refugio rates with half board: from CLP 80,000. Campsites: CLP 10,000 to CLP 20,000 (without gear, tent and sleeping bag rental adds another CLP 25,000).

    For those who prefer day hikes, Puerto Natales is the most practical base. Hostels in the CLP 15,000 to CLP 25,000 per night range are just a few blocks from the bus terminal. We Are Patagonia and Erratic Rock are two of the highest-rated among backpackers, with free daily park logistics briefings at 3 PM.

    Practical Tips for Going Without a Car

    Park entrance — the entrance fee for foreigners is CLP 38,000 in high season and CLP 18,000 in low season (rates as of Jul/2026, check the CONAF website). Payment at the gate in Chilean pesos or by card.

    Visa — Brazilians don’t need a visa for Chile (stays up to 90 days). Passport must be valid for at least 6 months.

    Layers — the weather changes in minutes in Patagonia. Bring a thermal base layer, a fleece mid-layer, and a waterproof outer layer with a hood. We’ve covered it all in our guide on how to dress for Patagonia.

    Bus schedules — always double-check the day before at the terminal or with your accommodation. Schedules can change without notice, especially at the start and end of the season.

    Buffer day — the catamaran from Pudeto gets canceled when winds exceed 80 km/h (common in Patagonia). Always build in 1 extra day to absorb weather-related hiccups.

    Group of people trekking on a Patagonia trail
    Trekking in Patagonia: the trail is the transportation. | Photo: Álvaro Arcelus / Pexels

    No car vs. with car — renting a car in Punta Arenas starts at CLP 45,000/day plus fuel (~CLP 15,000/day). Over 5 days, that’s CLP 300,000. By bus, the Puerto Natales–park leg runs ~CLP 30,000 (round trip) plus shuttle and catamaran (~CLP 30,000). Total without a car: around CLP 60,000 — a fifth of the price. The downside is rigid schedules, but for trekkers spending the day on the trail, the car would just sit in the parking lot anyway.

    If you want to pair the trip with the Argentine side of Patagonia, check out our guide on going beyond the Perito Moreno viewpoint in Los Glaciares — you can connect the two by bus via El Calafate.

    Frequently Asked Questions

    Is it possible to visit Torres del Paine without a car?

    Torres del Paine is perfectly accessible without a car. Daily buses leave Puerto Natales for the park entrances (Laguna Amarga and Pudeto), and inside the park, shuttles and catamarans connect the sectors. Most trekkers complete the entire W circuit using only public transport.

    How much does transport from Puerto Natales to Torres del Paine cost?

    The bus from Puerto Natales to Torres del Paine costs between CLP 10,000 and CLP 15,000 per leg (~USD 10 to 16), with Buses Gomez or Juan Ojeda. The internal shuttle from Laguna Amarga to Hotel Las Torres runs about CLP 5,000, and the Pudeto–Paine Grande catamaran costs roughly CLP 25,000 round trip.

    How many days do you need for Torres del Paine without a car?

    For Torres del Paine without a car, the recommended minimum is 3 full days in the park — enough for the Base Torres trail and Valle del Francés. Those wanting to complete the full W circuit need 4 to 5 days of trekking. Add 1 to 2 days in Puerto Natales for logistics, totaling 5 to 7 days in the region.

    Do you need to book refugios in advance at Torres del Paine?

    The refugios and campsites at Torres del Paine require advance reservations, and CONAF can deny park entry without a confirmed booking. In high season (December to February), book at least 3 months ahead on the Vertice Patagonia or Fantastico Sur websites — the best spots sell out fast.

    What’s the best time to visit Torres del Paine?

    The best time to visit Torres del Paine is from October to April, peaking between December and February, when days have up to 17 hours of daylight and all transport runs normally. March and April offer fewer crowds and autumn colors, but some services start reducing frequency.

    Conclusion

    Torres del Paine without a car isn’t plan B — it’s the lightest, cheapest, and most fitting way to experience a park made to be explored on foot. With buses, shuttles, and catamarans, you reach every major trail, sleep in refugios among the mountains, and spend a fraction of what you would on a rental car. Plan the schedules, book your refugios early, and leave a spare day for the Patagonian wind. The rest is just walking. For more tips on the region, check out our first-timer’s guide to Torres del Paine here on Voyage Voyage.

    For an urban trip with the same car-free logic, read Montevideo and Colonia del Sacramento without a car.

  • How to Dress for Patagonia: Cold, Wind, and Layers

    How to Dress for Patagonia: Cold, Wind, and Layers

    🇧🇷 POR | 🇫🇷 FR | 🇺🇸 EN | 🇪🇸 ES

    If you’re packing for Patagonia, the first thing you need to know is: the wind changes everything. The thermometer might read 5 °C, but with gusts of 80 km/h, the wind chill can plummet to –10 °C in seconds. So, how to dress for Patagonia isn’t about piling on coats—it’s about building a three-layer system that blocks the wind, traps heat, and still lets sweat escape.

    Quick answer: to dress for Patagonia, build a three-layer system—a merino wool or synthetic base layer, fleece or down as insulation, and a waterproof, windproof jacket with a Gore-Tex membrane. Add a buff, beanie, waterproof gloves, mid-calf hiking boots, and UV protection. This setup works from Patagonian summer to winter.

    Here’s how the layering system works: a synthetic or merino wool base layer against your skin to wick away moisture; a second insulating layer of fleece or down to retain heat; and a third windproof, waterproof outer layer, preferably with a Gore-Tex or similar membrane. With these three right pieces, you can handle everything from a snowy hike on Perito Moreno to a sunny, windy afternoon at Torres del Paine or Ushuaia.

    How to get to Patagonia

    Patagonia is split between Argentina and Chile, and both sides have airports with direct flights from Buenos Aires and Santiago. On the Argentine side, El Calafate (FTE) serves Los Glaciares National Park and Perito Moreno, while Ushuaia (USH) is the gateway to Tierra del Fuego. On the Chilean side, Punta Arenas (PUQ) provides access to Torres del Paine.

    Patagonia mountains with fog and strong wind
    The Patagonian mountains shrouded in fog—the wind here is constant year-round. | Photo: Marek Piwnicki / Pexels

    From Buenos Aires, flights on Aerolíneas Argentinas and Flybondi to El Calafate take about 3 h 10 min. To Ushuaia, it’s 3 h 30 min nonstop. There’s no direct flight between El Calafate and Punta Arenas—the overland crossing takes about 5 hours by bus via the border at Cerro Castillo. A tip: book tickets in advance during high season (November to March), because flights fill up and prices double.

    Best time to visit and how long to stay

    The best time to visit Patagonia is from November to March, when days are longer (up to 17 hours of daylight in December) and temperatures range between 5 °C and 18 °C. But “best time” doesn’t mean guaranteed good weather: the climate shifts several times within a single day, and wind gusts above 100 km/h aren’t rare even in summer.

    For an itinerary that includes El Calafate and Torres del Paine, set aside at least 7 days. If you want to add Ushuaia, tack on 4 more days. In winter (June to August), many trails close and transport services are reduced, but the snow-covered landscape has a different appeal—and prices drop by half.

    Glacier in Argentine Patagonia with ice and mountains in the background
    Glacier in Argentine Patagonia—even in summer, the wind chill can hit –10 °C. | Photo: Bren Pintelos / Pexels

    How to dress for Patagonia: the layering system

    Dressing in layers is the only strategy that works in a place where you can start the day at –2 °C and end it at 14 °C, all with constant wind. There are three layers, each with a specific job—and swapping any one for something inadequate compromises the whole system.

    Base layer: next-to-skin

    The base layer sits against your skin with one job: wick sweat away, keeping your skin dry. The ideal material is merino wool (no itch, regulates temperature, resists odor) or quick-dry polyester. Wear a long-sleeve top and a base-layer legging underneath everything. On the coldest days, also wear a base layer under your trekking pants.

    Mid layer: thermal insulation

    This is where fleece (200 g/m² for most scenarios, 300 g/m² for winter) or an ultralight, packable down jacket comes in. Fleece is more versatile because it dries quickly if it gets wet, but down has an unbeatable warmth-to-weight ratio. For long treks like the W in Torres del Paine, bring both: fleece for hiking and down for stops.

    Outer layer: windproof and waterproof

    The most important piece in your bag. It needs to be waterproof (at least 10,000 mm water column), breathable, and above all, windproof. Jackets with Gore-Tex, eVent, or similar membranes are the standard in Patagonia. The hood needs a snug fit—if wind gets in through the hood, the jacket loses half its effectiveness. Waterproof pants over your trekking pants also make a difference on days of horizontal rain.

    Accessories that make a difference in the wind

    In Patagonia, accessories aren’t an afterthought—they’re a core piece. Your head and neck lose heat faster than any other part of your body, and the wind amplifies that brutally.

    Person dressed in layers for cold weather in a mountain landscape
    Well-assembled layers make the difference between enjoying the cold and suffering through it. | Photo: Orkhan Sweden / Pexels

    The minimum list: a merino wool buff (tubular neck gaiter) that protects your neck and turns into a balaclava in strong wind; a beanie that covers your ears; waterproof gloves (fleece lining + windproof outer layer); and sunglasses with UV400 protection—radiation in Patagonia is intense due to the proximity of the ozone hole. For treks, an adjustable trekking pole reduces knee impact on descents with side winds. Your boots need to be waterproof, mid-calf, with a grippy sole (Vibram or similar); in El Calafate, you’ll frequently step on ice and loose rock.

    Common packing mistakes for Patagonia

    The most frequent mistake is wearing cotton as a base layer. Cotton absorbs sweat, doesn’t dry, and when hit by wind, turns cold against your skin—mountaineers call it “death cotton.” The second mistake is underestimating sun protection: the UV index in Patagonia can hit 11 even on cloudy days, and cold-weather sunburns happen more often than you’d think.

    Other common mistakes: bringing a large hard-shell suitcase instead of a backpack (many stretches are on dirt roads or trails); not waterproofing your backpack (a rain cover costs little and saves your electronics); and forgetting lip balm with SPF — the wind dries out your lips within hours.

    Where to Buy Technical Gear (and How Much It Costs)

    In Brazil, brands like Curtlo, Solo, and Trilhas & Rumos offer base layers and fleece starting at R$ 90–150 (July 2026). Waterproof Gore-Tex jackets from national brands run between R$ 600 and R$ 1,200 (July 2026), while imported ones (The North Face, Patagonia, Arc’teryx) exceed R$ 2,000 (July 2026). If your trip includes Buenos Aires before Patagonia, it’s worth checking out stores like Montagne and Ansilta on calle Florida — prices in Argentine pesos tend to be more competitive for mid-layer pieces.

    In El Calafate and Ushuaia, there are gear shops, but the selection is smaller and prices are inflated by tourism. If you plan to go beyond the Perito Moreno viewpoint, bring everything ready from Brazil or Buenos Aires.

    Practical Tips for Everyday Cold-Weather Life

    Before leaving the hotel, check the forecast on Windy — it shows hourly wind gusts, which no conventional app does. Above 70 km/h, trails like the Base of the Towers are usually closed by park rangers.

    Group trekking in Patagonia with mountain scenery
    Trekking in Patagonia demands technical gear and planning — the wind gives no warning. | Photo: Álvaro Arcelus / Pexels

    Pack granola bars and dried fruit in your backpack — the combination of wind and cold increases your calorie burn, and many trails have no food stops. A stainless steel thermos with hot tea is a must-have for long hikes. And here’s a detail few people mention: intense cold drains your phone battery much faster — keep the device in your jacket’s inner pocket, close to your body, to preserve the charge.

    For tours like the Perito Moreno Glacier excursion, the operator provides crampons, but your clothing is your responsibility — and the viewpoint walkways channel the wind like a tunnel.

    Frequently Asked Questions

    Do you need waterproof boots for Patagonia?

    Yes, waterproof boots are essential for Patagonia. The trails in Torres del Paine and Los Glaciares National Park cross flooded sections, melting snow, and wet rocks, and a boot with a waterproof membrane (Gore-Tex or similar) and a mid-height cuff keeps your feet dry — wet feet with cold wind quickly cause localized hypothermia.

    Does cotton work as a base layer in Patagonia?

    Cotton does not work as a base layer in Patagonia. Cotton absorbs sweat and doesn’t dry, and when exposed to the region’s constant wind, it turns cold against your skin, increasing heat loss. Mountaineers call this material “death cotton” precisely because of that risk. Use merino wool or quick-dry polyester as your base layer.

    How many layers of clothing should you bring to Patagonia?

    For Patagonia, the three-layer system is the standard: a base layer (merino wool or synthetic), a mid layer of fleece or goose down for insulation, and an outer layer of a waterproof, windproof jacket. On the coldest days, a thin fourth layer (like a down vest) between the fleece and the jacket helps.

    Is it cold in Patagonia in the summer?

    It’s cold in Patagonia even in summer (December to February). Temperatures range between 5 °C and 18 °C, but the constant wind — with gusts exceeding 100 km/h — pushes the wind chill below 0 °C. That’s why the layering system is a must year-round in Patagonia, even at the height of summer.

    Is it worth buying cold-weather clothing in El Calafate or Ushuaia?

    Buying cold-weather clothing in El Calafate or Ushuaia is possible, but prices are inflated by tourism and the selection is limited. It’s better to bring your essential pieces from Brazil or buy them in Buenos Aires, where stores like Montagne and Ansilta offer better prices on technical gear. In El Calafate, save last-minute purchases for smaller items like gloves or buffs.

    Conclusion

    If your trip includes snow, also check out our Bariloche five-day itinerary for winter or summer to spread out mountains and tours without depending on perfect weather.

    Packing the right bag for Patagonia is half the trip planning. With the three-layer system dialed in — base layer, fleece or down, and a waterproof windproof jacket — you can handle any weather surprise without missing a tour. Add the right accessories (buff, beanie, gloves, UV sunglasses, and waterproof boots) and skip the cotton. The rest is scenery. For more itinerary and planning tips in the region, explore the Voyage Voyage guides.

  • Atacama Tours Without Altitude Sickness: The Order That Works

    Atacama Tours Without Altitude Sickness: The Order That Works

    🇧🇷 POR | 🇫🇷 FR | 🇺🇸 EN | 🇪🇸 ES

    To do Atacama tours without altitude sickness, spend 1 full day in San Pedro de Atacama (2,408 m) before going above 3,500 m, alternate a high-altitude day with a low-altitude day, and never combine the El Tatio Geysers with the Altiplanic Lagoons on the same day. Both tours go above 4,200 meters and take a real toll on your body.

    Laguna Miscanti in the Altiplanic Lagoons of the Atacama Desert at over 4,200 meters
    Laguna Miscanti, one of the Altiplanic Lagoons at over 4,200 meters. | Photo: Éder Prado / Pexels

    The most common mistake is squeezing two high-altitude tours into the same day — that’s what sends people back to their hotel with a headache and nausea. An itinerary that respects this logic usually delivers 4 to 5 full days without getting sick, enough time to cover the desert’s main highlights without turning your trip into a race against altitude sickness. Anyone who’s already done Lake Titicaca at a similar altitude will recognize the same principle: acclimatize first, climb later.

    How to get to San Pedro de Atacama

    The gateway is El Loa Airport in Calama, about 1h30 by car or van from San Pedro. Most agencies and hotels arrange the Calama–San Pedro transfer; book ahead, because flights usually land in the afternoon and the road isn’t well-lit at night. According to Chile’s Agricultural and Livestock Service, you must declare food and products of animal or plant origin upon arrival, something common for those entering via the border with Bolivia or Argentina.

    Travelers arriving by plane feel the altitude jump (Calama sits at 2,300 m) less than those who head straight to the highland tours the day after arrival. That’s why your first full day in San Pedro should be reserved for light walks and hydration, not the most demanding tour on the itinerary.

    Best time to visit and how long to stay

    The Atacama Desert has dry weather year-round, but May through August (winter in the Southern Hemisphere) brings nights as cold as -10°C at high points, making the El Tatio Geysers even more extreme at dawn. December through February is warmer during the day, but with sporadic summer rains (the so-called “Bolivian winter”) that sometimes close roads to the Salar de Tara.

    Sunset at Valle de la Luna in the Atacama Desert
    Valle de la Luna at dusk, one of the most recommended acclimatization tours. | Photo: Csaba Marosi / Pexels

    Book at least 4 nights in San Pedro: 1 acclimatization day, 2 days of high-altitude tours interspersed with 1 day at moderate altitude, plus a buffer or extra day in case a tour gets canceled due to weather. March, April, September, and October tend to balance clear skies with fewer weather surprises.

    What to see: lagoons, geysers, and starry skies

    The three pillars of any San Pedro de Atacama itinerary are the Altiplanic Lagoons (Miscanti and Miñiques, at 4,200 m), the El Tatio Geysers (4,320 m, visited at sunrise), and stargazing in the desert — one of the clearest skies on the planet, free of light pollution, which is why major international observatories operate in the region.

    The Valle de la Luna, closer to town (2,500 m) and best at sunset, is the ideal acclimatization tour for the first or second day. Meanwhile, Laguna Cejar and Ojos del Salar, in the Salar de Atacama, sit at a lower altitude (2,300 m) and serve as a “breather” between two tougher days. It’s worth noting that the Atacama is a salt desert and has no geological connection to Salar de Uyuni in neighboring Bolivia, even though many itineraries combine both destinations.

    Those who want to book the El Tatio Geysers tour with transportation and a Portuguese-speaking guide avoid driving alone in a rental car at 4 a.m. on unmarked roads — it’s the tour where going with a group is most recommended.

    Atacama tours without altitude sickness: the order that works

    The recommended order among lagoons, geysers, and stargazing follows the logic of climbing gradually: day 1 arrival and rest in San Pedro (2,408 m); day 2 Valle de la Luna and Death Valley (2,500 m, acclimatization); day 3 Laguna Cejar, Ojos del Salar, and Salar de Atacama (2,300 m, moderate); day 4 Altiplanic Lagoons and Salar de Tara (4,200–4,300 m, high altitude); day 5 El Tatio Geysers (4,320 m, high altitude, at dawn) — never on the same day as day 4.

    Tours that shouldn’t be on the same day: El Tatio Geysers + Altiplanic Lagoons (both above 4,200 m, with long van rides and extreme cold); Altiplanic Lagoons + long trekking (physical exertion combined with altitude); stargazing at night + El Tatio the next morning, because the geyser departure is usually at 4 a.m. and sleep deprivation worsens altitude symptoms.

    Stargazing can fit into any night of the itinerary, preferably not the night before an early-morning tour. Many agencies offer this stargazing tour in the Atacama Desert with telescopes and Portuguese-speaking guides, usually lasting 2 to 3 hours.

    Where to eat

    Caracoles Street concentrates most of San Pedro’s restaurants, with Chilean and international options. After a day at high altitude, opt for light meals and plenty of fluids — your body burns more energy digesting in thin air, and heavy meals worsen the typical altitude discomfort.

    Fumaroles at the El Tatio Geysers at dawn in the Atacama Desert
    El Tatio Geysers, at 4,320 meters, visited before dawn. | Photo: Marek Piwnicki / Pexels

    Where to stay

    Almost all lodging is concentrated in San Pedro de Atacama itself, just a few minutes’ walk from the center and Caracoles Street. Prioritize hotels with a hearty breakfast and water available all day — small details that help with acclimatization in the first few days. If you’re linking the Atacama with other destinations in Chile, you can also check out the guide to Santiago in 3 days, a common connection point before or after San Pedro.

    Practical tips for dealing with altitude

    Drink 3 to 4 liters of water a day, skip alcohol for the first 48 hours, and take it easy on day one. According to the U.S. CDC, mild symptoms like headaches and fatigue are common above 8,200 feet; severe dizziness, shortness of breath at rest, or confusion mean you need to descend and seek medical attention right away.

    It’s worth bringing a mild painkiller approved by your doctor and, if possible, arriving in Calama in the morning instead of at night—that gives you more daylight hours for the first drive and keeps you from driving tired on an unlit desert road. Anyone with a history of heart or respiratory issues should talk to a doctor before planning several consecutive days above 13,000 feet, since how your body responds to altitude varies a lot from person to person.

    How to compare tour agencies beyond price: ask whether the vehicle carries oxygen and a first-aid kit, what the refund or rescheduling policy is in case of altitude sickness, the maximum group size (smaller vans climb faster and stop more for acclimatization), and whether the guide speaks Portuguese or only Spanish/English. Agencies that hesitate to answer these questions tend to be the same ones that pack the vehicle to cut costs.

    It’s also worth confirming the return time of each tour before booking two on the same day: a delay coming back from El Tatio Geysers, for example, can push another tour’s schedule into the evening, when the cold at altitude makes discomfort even worse. Always check each operator’s official website to confirm current prices and schedules, since they vary by season.

    Starry sky over the Atacama Desert during an astronomy tour
    The Atacama sky at night, one of the clearest on the planet for stargazing. | Photo: Marek Piwnicki / Pexels

    If you’d rather lock in your itinerary without the day-to-day planning, our guide to a 4-day Atacama itinerary lays out a ready-made sequence of tours per day, including transportation and departure times.

    Frequently Asked Questions

    How many days do you need to visit Atacama without suffering from altitude?

    Ideally, plan 4 to 5 days in San Pedro de Atacama, with 1 day of acclimatization before any tour above 11,500 feet and a moderate-altitude day between the two highest tours, Lagunas Altiplânicas and El Tatio Geysers.

    Can I do El Tatio Geysers and Lagunas Altiplânicas on the same day?

    It’s not recommended. El Tatio Geysers sit at 14,170 feet and require a pre-dawn departure, while Lagunas Altiplânicas tops 13,780 feet with long van rides; doing both in one day stacks fatigue and altitude, raising the risk of feeling unwell.

    What’s the best time of year to visit Atacama?

    May through August brings very cold nights, especially at high-altitude spots, while December through February is warmer during the day but can bring summer rains that close roads to Salar de Tara. March, April, September, and October usually strike the best balance of weather and fewer surprises.

    How can I tell if an Atacama tour agency is reliable?

    Beyond price, ask about vehicles with oxygen on board, refund policies for altitude sickness, group size, and the guide’s language. Agencies that answer these questions clearly tend to run smaller vehicles with guides better prepared for altitude emergencies.

    Conclusion

    Atacama rewards travelers who plan their tours by altitude, not just by proximity on the map. Alternating high and low days, avoiding back-to-back El Tatio and Lagunas Altiplânicas, and choosing your agency by the right criteria makes the difference between a smooth trip and lost days with a pounding headache. For more Chile and South America itineraries, keep exploring Voyage Voyage.

  • Rome Florence Venice by Train: How Many Days in Each City

    Rome Florence Venice by Train: How Many Days in Each City

    🇧🇷 POR | 🇫🇷 FR | 🇺🇸 EN | 🇪🇸 ES

    If you only have one trip to see Italy for the first time, the Rome-Florence-Venice train route is the classic itinerary that wastes the least time: these are cities connected by high-speed trains that take between 1h15 and 2h15 between one and the other, with no need for a car or internal flights. The question for planners isn’t whether you can do all three—you can, easily, in 8 to 10 days—but in what order to go, how many days to set aside for each city, and how to buy tickets without ending up on a bad connection.

    Quick answer: the most efficient Rome-Florence-Venice train route follows the order Rome → Florence → Venice, with direct high-speed Frecciarossa or Italo trains. Set aside 4 days in Rome, 2 to 3 in Florence, and 2 to 3 in Venice—8 to 10 days total, with tickets booked 60 to 90 days in advance.

    How the train between Rome, Florence, and Venice works

    The three cities sit on the same high-speed line that cuts Italy from north to south, operated by two competing companies: state-owned Trenitalia (Frecciarossa and Frecciargento trains) and private Italo. That means competitive prices and plenty of departures every day—this isn’t a rare train that only runs in the morning. In July 2026, the Rome–Florence leg takes 1h17 to 1h40 on a direct high-speed train, versus 3h to 3h30 on a regional or Intercity—the price difference usually makes up for the time saved. Florence–Venice runs between 1h55 and 2h15, and a direct Rome–Venice trip is around 4 hours, but nobody usually does that leg in one go: the logical move is to stop in Florence along the way.

    The Colosseum in Rome seen from below on a clear blue-sky day
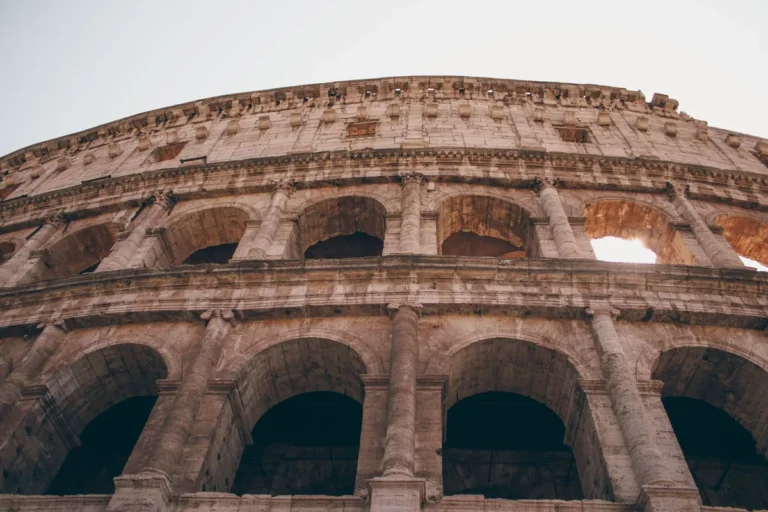
    The Colosseum, the starting point for anyone doing Rome, Florence, and Venice by train. | Photo: Ozan Tabakoğlu / Pexels

    The central stations help too: Roma Termini, Firenze Santa Maria Novella, and Venezia Santa Lucia are all in the historic heart of each city, just a few minutes’ walk from the main sights—no airport trains or far-flung stations here. Arrive 20 to 30 minutes early: there’s no baggage check or airport-style X-ray, just direct boarding on the platform shown on the board. If you want to dive deeper into the capital’s historic side before boarding, check out the complete guide to historic Rome.

    Minimum days in each city

    The minimum that avoids that “I only saw it in passing” feeling is 4 days in Rome, 2 to 3 in Florence, and 2 to 3 in Venice, for a total of 8 to 10 travel days. Rome demands more time because it packs the Colosseum, Roman Forum, Vatican, and historic center into spots that are far apart, requiring at least one full day just for the Vatican. Florence is compact and walkable—in 2 days you can see the Galleria degli Uffizi, the Duomo, and the Ponte Vecchio at a relaxed pace, and a third day frees up a day trip to rural Tuscany. Venice is also small on foot, but getting lost along the canals and islands like Murano and Burano eats up an extra day that’s well worth it.

    Frecciarossa high-speed train at a train station in Italy
    A high-speed train connecting Italy’s major cities. | Photo: Mihaela Claudia Puscas / Pexels

    If you only have a week, you can still do Rome, Florence, and Venice by train, but you’ll need to trim it to 3 days in Rome, 2 in Florence, and 2 in Venice—it works, just with no wiggle room for surprises like longer-than-expected lines or a rainy day. If you have extra time, the complete Florence guide helps you decide between 2 or 3 days in the city.

    Route order and how to book without a bad connection

    The most efficient order is Rome → Florence → Venice, following the natural south-to-north train line, with no backtracking or repeated legs. Starting in Rome also makes arrival easier, since most international flights land at Fiumicino Airport, with a direct train to Termini. Ending in Venice works well if you’re planning to tack on another European destination, as Marco Polo Airport has flights to several capitals.

    The most common mistake is booking at the last minute and ending up on a connection that requires a train change—avoid tickets with “cambio” on the Florence–Venice leg if your goal is to arrive without hauling luggage across platforms. High-speed train tickets in Italy go on sale about 60 to 120 days in advance depending on the operator, and booking early directly on the official Trenitalia or Italo sites gets prices starting around R$ 32 to R$ 38 per leg—buying the day before costs double or triple. Always pick “direct train” (diretto) in the search, with no changes.

    What to see in each city without rushing

    In Rome, prioritize the Colosseum and Roman Forum on one day, the Vatican (Vatican Museums and St. Peter’s Basilica) on another full day, and set aside at least half a day to wander through Piazza Navona, the Fontana di Trevi, and the Pantheon at your own pace. In Florence, the Galleria degli Uffizi and the climb up the Duomo’s dome take up most of a day—book tickets in advance, because lines without a reservation stretch past two hours. The second day is perfect for the Ponte Vecchio, Palazzo Pitti, and the Boboli Gardens.

    View of Florence's Duomo dome at sunset
    Florence’s Duomo, a must-stop between Rome and Venice. | Photo: Matheus De Moraes Gugelmim / Pexels

    In Venice, the essentials are St. Mark’s Square with the Basilica and the Doge’s Palace, plus a vaporetto ride along the Grand Canal—save the second day for the islands of Murano (blown glass) and Burano (colorful houses), which are a 40-45 minute boat ride from the center. It’s worth visiting each city in the early morning hours, before 9am, to dodge the waves of cruise ship tourists and day-trippers who start arriving around 10am. The guide to Venice’s canals, palaces, and churches details a walking route through the city.

    Luggage, check-in, and what to bring on the train

    Italian high-speed trains don’t have baggage check-in or a strict weight limit, but space for large suitcases is limited to racks at the front of each car — during busy times, latecomers run out of room for their bags and have to leave them far from their seat. Go with a suitcase up to 23kg that fits in the racks (something between 60 and 70 liters) and a smaller backpack to keep at your seat with your passport, charger, and a snack, since the dining car often has a line.

    Arrive at the platform with your ticket already on your phone or printed out and your seat reserved — Frecciarossa and Italo trains have assigned seating, so there’s no need to rush to grab a spot, but board with time to spare because stops at each station only last a few minutes.

    Where to Stay Near the Stations

    Staying just a few minutes’ walk from the train station eliminates the cost and time of a taxi or metro ride every time you arrive in a new city with luggage. In Rome, the Termini area is packed with hotels in every price range and connects directly to the metro. In Florence, the area around Santa Maria Novella is a 10-minute walk from the Duomo, blending convenience with proximity to the main sights. In Venice, since there are no cars or metro, staying near Santa Lucia or in the Cannaregio district, linked by a short walk, saves you from hauling your suitcase over bridges and through narrow alleys.

    Canal in Venice with gondolas and historic buildings
    Venice’s canals, the final stop on the Italian train itinerary. | Photo: Vladimir Srajber / Pexels

    Practical Tips to Save Time

    Book your tickets for the Colosseum, the Vatican Museums, and the Galleria degli Uffizi in advance through the official websites — at all three attractions, showing up without a reservation can cost you half a day in line. Download the app for your chosen train operator to get alerts about platform changes, which happen often at the larger stations. And don’t underestimate transfer times within the city itself: walking from your hotel to the station in Venice can take longer than in Rome or Florence because of the bridges and the lack of wheeled transport.

    Frequently Asked Questions

    How many days do you need for Rome, Florence, and Venice by train?

    The ideal is 8 to 10 days: 4 days in Rome, 2 to 3 in Florence, and 2 to 3 in Venice. If you only have a week, you can still hit all three cities by trimming it to 3-2-2 days, but there’s no wiggle room for unexpected hiccups.

    What’s the best order to visit Rome, Florence, and Venice?

    The most efficient route is Rome → Florence → Venice, following the south-to-north path of the high-speed rail line without backtracking. You can also do it in reverse without losing any time.

    How long is the train ride between Rome, Florence, and Venice?

    Rome–Florence takes 1h17 to 1h40 on the direct high-speed train. Florence–Venice runs between 1h55 and 2h15. A direct Rome–Venice trip is around 4 hours, but the usual move is to split that leg by stopping in Florence.

    How far in advance should you buy train tickets in Italy?

    Trenitalia and Italo high-speed tickets go on sale 60 to 120 days before your trip, and booking early directly on the official site locks in fares starting at around R$ 32 to R$ 38 per leg — way cheaper than buying the day before.

    Conclusion

    Rome, Florence, and Venice by train is one of the easiest itineraries to put together in Europe: frequent trains, central stations, and short hops that leave you plenty of time to soak up each city instead of burning the day on travel. With 8 to 10 days, the Rome → Florence → Venice order, and tickets booked in advance, the trip goes off without a hitch. Over at Voyage Voyage, you’ll find full guides to each of these cities to dig deeper into your itinerary once you’ve locked in your dates.

  • Baños in 3 Days: Waterfalls and Hot Springs with a Rain Plan

    Baños in 3 Days: Waterfalls and Hot Springs with a Rain Plan

    🇧🇷 POR | 🇫🇷 FR | 🇺🇸 EN | 🇪🇸 ES

    Baños de Agua Santa packs in waterfalls, adventure sports, and thermal pools between the Andes and the Amazon. Three days give you time to bike or ride the Ruta de las Cascadas, pick one adrenaline activity, and keep a window open for rain, fog, or shifts in volcanic activity.

    Quick answer: book three nights, hit the Ruta de las Cascadas on the driest day, and save the hot springs for late afternoon. Don’t stack rafting, canyoning, and biking on the same day. Operations depend on the weather and must use certified gear.

    Getting to Baños

    Baños has no commercial airport. Buses connect Quito, Ambato, Riobamba, and other cities, with transfers depending on where you’re coming from. The road winds through mountainous terrain and can face closures due to roadwork, rain, or landslides. Arrive during daylight when possible and double-check your arrival terminal.

    Waterfall between green mountains in Baños
    Water and green slopes define the landscape of Baños. | Photo: K Photographer / Pexels

    Private transfers cut down on connections but cost more. Compare activities in Baños by cancellation policy, equipment, and guide experience.

    Best time to go and how many days to stay

    Rain can happen year-round, with local variations. Water makes the waterfalls more dramatic, but it also raises the risk on rivers and slopes. Three days give you room to swap activities; two only work if the weather is steady. Ecuadorian holidays drive up demand for hot springs and tours.

    Baños in 3 days with a rain plan

    Day 1: town center, hot springs, and viewpoints

    Stroll through the Basílica de Nuestra Señora del Agua Santa and the central streets. Pick a thermal pool based on hours, water temperature, and facilities; bring a swim cap where required. Viewpoints like Casa del Árbol need transport and clear visibility. Don’t hike up just to photograph a swing in thick fog.

    Green mountains around Baños
    Steep slopes surround the city. | Photo: Shad Meeg / Pexels

    Day 2: Ruta de las Cascadas

    The route heads toward Río Verde and passes falls like Agoyán and Manto de la Novia, ending for many at Pailón del Diablo. Biking gives you freedom but shares stretches with vehicles and tunnels; check brakes, helmet, shoulder space, and the ride back. Chivas and tours cut down on effort and navigation time.

    Agoyán waterfall near Baños, Ecuador
    Agoyán is one of the falls along the waterfall corridor. | Photo: Shad Meeg / Pexels

    If it’s pouring, don’t push biking or canyoning. Swap them for hot springs, cafés, and a city day.

    Day 3: rafting, canyoning, or rest

    Pick one activity, not several. Ask about river class, certification, insurance, wetsuit gear, and rescue protocols. If you’d rather skip the adrenaline, take a short hike, visit nearby farms, or hit the hot springs again. The official Only in Ecuador campaign highlights rafting, ziplining, canyoning, and the Ruta de las Cascadas.

    What to pair with Baños

    Quito works as a gateway; check out Quito in three days. Cuenca pairs heritage with Cajas. For an island leg, read Galápagos in seven days. The Ecuadorian Amazon looks close on a map, but it needs planned transport and lodging.

    Where to eat

    The center serves up Ecuadorian set meals, trout, international dishes, juices, and melcochas made from sugarcane. Heavy meals don’t mix with rafting or biking. Tell tour operators about any food restrictions if lunch is included, and pack a snack that survives the rain.

    Where to stay

    The center puts agencies, restaurants, and hot springs within reach, though busy streets can be noisy. Hillside lodgings offer views but depend on taxis and can feel isolated at night. Check for hot water, storage for wet gear, and cancellation policies tied to road conditions.

    Practical tips and safety

    The Tungurahua volcano is part of the regional landscape. Follow alerts from the Secretaría Nacional de Gestión de Riesgos, evacuation routes, and local instructions; don’t rely on rumors. Bring a rain poncho, a dry bag for your phone, and grippy footwear. Make sure your insurance covers the activity you book.

    Waterfalls along the Ruta de las Cascadas
    Wet trails call for handrails, grip, and patience. | Photo: K Photographer / Pexels

    A cheap agency without proper gear isn’t a deal. Inspect helmets, life jackets, carabiners, and wetsuits before heading out.

    Frequently asked questions

    How many days should I spend in Baños?

    Three days give you room for rain and two main activities.

    Can I bike the Ruta de las Cascadas?

    Yes, but there’s traffic, tunnels, and downhill sections. Gauge your experience and the weather.

    Is Baños only about adventure?

    No. There are hot springs, viewpoints, food, and easy outings.

    Is it safe to visit Tungurahua?

    It depends on official monitoring; follow alerts and stick to authorized areas.

    Do I need to book tours in advance?

    On holidays and for small groups, yes. Confirm certification.

    Conclusion

    Baños works best when the weather sets the order of your itinerary. Save the dry day for waterfalls, pick one adventure, and use the hot springs as your reset; Voyage Voyage helps you travel without challenging the mountain.

  • Atacama in 4 Days: Acclimate to the Altitude the Right Way

    Atacama in 4 Days: Acclimate to the Altitude the Right Way

    🇧🇷 POR | 🇫🇷 FR | 🇺🇸 EN | 🇪🇸 ES

    San Pedro de Atacama is the base for exploring valleys, salt flats, lagoons, and geysers, but not all tours are at the same altitude. A smart itinerary starts low and climbs gradually, reducing the risk of losing your most beautiful days to altitude sickness.

    Quick answer: Book four days: start with Valle de la Luna, save the high-altitude lagoons for day three, and hit the Gêiseres del Tatio once you’re acclimated. How you feel matters more than a rigid schedule.

    How to plan your trip

    The nearest airport is El Loa, in Calama, about 100 kilometers from San Pedro. Shared transfers handle the ride. In town, many tours include transportation, but entrance fees may be charged separately. Book with registered operators and check schedules, cancellation policies, and maximum altitude.

    Atacama — landscape 1
    Atacama. | Photo: Eleanore Stohner / Pexels

    Suggested itinerary

    Day 1: town and Valle de la Luna. Day 2: Salar de Atacama, Chaxa, or hot springs depending on availability. Day 3: Lagunas Altiplânicas and Piedras Rojas. Day 4: Gêiseres del Tatio at sunrise, then rest. Stargazing tours depend on cloud cover and moon phase. Always leave a buffer for weather and delays.

    Atacama — landscape 2
    Atacama. | Photo: Miguel Cuenca / Pexels

    When to go and what to watch out for

    Dress in layers: days can be hot, but early mornings can dip below freezing. Drink water, skip alcohol on your first night, and avoid intense exertion right after arriving. April through June usually sees fewer crowds; summer can bring the altiplanic winter rains and closures.

    Atacama — landscape 3
    Atacama. | Photo: Miguel Cuenca / Pexels

    Bookings, costs, and safety

    Compare what’s included, read recent reviews, and save your reservations offline. Check out Chile Travel and the official San Pedro page. Don’t skimp on safe transportation. Pair this trip with our Salar de Uyuni guide. To understand exactly which tours shouldn’t be on the same day and how to compare agencies beyond price, see the guide on Atacama tours without altitude sickness. To know how much budget to set aside before booking tours, check out the guide on how much it costs to travel to Atacama.

    Atacama — landscape 4
    Atacama. | Photo: Marco Vidal / Pexels

    Frequently asked questions

    How many days should I stay?

    Four to five days make for a well-balanced first trip.

    Do I need to book in advance?

    Yes, during high season and for activities with limited capacity.

    Is it worth renting a car?

    It depends on the destination and your experience; organized tours save you from tiring drives.

    What’s the most common mistake?

    Trying to fit distant regions into the same day.

    Conclusion

    Atacama rewards those who respect distances, weather, and the local pace. Plan the essentials before the details.

  • La Bombonera: How to Visit Without Falling for Fake Tickets

    La Bombonera: How to Visit Without Falling for Fake Tickets

    🇧🇷 POR | 🇫🇷 FR | 🇺🇸 EN | 🇪🇸 ES

    Visiting La Bombonera isn’t the same as scoring a ticket to a Boca Juniors match. The stadium is known for its museum and day-of experiences, while games follow their own rules, prioritize club members, and have limited availability. Plan your daytime visit around Caminito and treat any informal ticket promises with caution.

    Quick answer: go in the morning, check the official channel to confirm the museum and stadium access are open, arrive via a busy avenue, and pair the visit with Caminito. Don’t buy game tickets from scalpers or unverified profiles.

    How to Visit La Bombonera

    The official name is Estadio Alberto J. Armando. Check the Boca Juniors site before heading out, since construction, matches, and events can change which areas are accessible. The museum experience doesn’t guarantee access to the pitch, locker rooms, or the full stands.

    Stands of the La Bombonera stadium
    Soccer stadium in Buenos Aires. | Photo: Juan Salamanca / Pexels

    Tickets, Hours, and Matches

    Hours and tour options vary; avoid relying on outdated prices. On game days, the neighborhood sees roadblocks and access control. A tourist ticket doesn’t work like a regular attraction pass. If an agency offers match tickets, verify their registration, terms, seating section, and cancellation policy.

    What to See at the Stadium

    The compact facade, stands that sit close to the pitch, and the blue-and-yellow identity explain the place’s fame. The museum provides context on titles, players, and club culture. Give the displays time, not just the stands photo.

    Inside a soccer stadium in Buenos Aires
    Stadium stands. | Photo: Julieta Hermo / Pexels

    How to Get There Safely

    La Boca doesn’t have a subway station right by the stadium. Buses, taxis, and ride-hailing apps are options; on a regular day, stick to busy avenues and walk along the tourist route. Check mobility info on Buenos Aires Tourism.

    What to Do Nearby

    Caminito is just a few minutes away on foot. Do both during the day and don’t wander down empty streets without a purpose. Usina del Arte can round out the circuit depending on its schedule. Also check out our complete Buenos Aires guide.

    Colorful house in the La Boca neighborhood
    La Boca architecture. | Photo: Garon Piceli / Pexels

    Frequently Asked Questions

    Can you get into La Bombonera?

    It depends on the museum’s operation and the experiences available on the day.

    Can tourists get match tickets?

    Availability is limited and rules favor club members; only use trusted channels.

    How long does the visit take?

    Set aside one and a half to two hours.

    Conclusion

    La Bombonera is worth it for the architecture and history, even without a match. Confirm the operation and plan your morning with Voyage Voyage.

  • Ushuaia in 4 Days: An Itinerary That Works With the Weather

    Ushuaia in 4 Days: An Itinerary That Works With the Weather

    🇧🇷 POR | 🇫🇷 FR | 🇺🇸 EN | 🇪🇸 ES

    Ushuaia demands a choice before you book anything: do you want snow, hiking, or sailing? The season completely changes the itinerary, the price, and even what’s accessible. With four well-spread-out days, you can combine Tierra del Fuego National Park, the Beagle Channel, a mountain landscape, and the small downtown without turning your trip into a race.

    Straight answer: set aside four full days for Ushuaia. Use one for Tierra del Fuego National Park, another to sail the Beagle Channel, a third for Laguna Esmeralda or Lago Escondido and Lago Fagnano, and save the last one for downtown and a weather buffer. In winter, swap hikes for snow and ski centers.

    Getting to Ushuaia without wasting a day

    Flying is the most efficient option. The airport is close to downtown, and a taxi or shuttle gets you there in minutes. If you’re driving, you’ll need to factor in the Strait of Magellan crossing and stretches through Chilean territory. It’s a scenic drive, but a long one, and it’s at the mercy of the wind.

    Ushuaia nestled between snow-capped mountains and the Beagle Channel
    Aerial view of Ushuaia. | Photo: Alex Dos Santos / Pexels

    Don’t count on a car for everything. Downtown is walkable; tours usually include transportation; and parking near the port isn’t always a help. Renting makes more sense for Lago Escondido and Lago Fagnano, or if you want to explore at your own pace.

    Best time to visit and how long to stay

    From December to March, the days are long, hiking takes center stage, and sailing pairs better with outdoor activities. Between June and September, snow shifts the focus to Cerro Castor and winter sports. Spring and fall bring fewer crowds but demand flexibility.

    Four days is the comfortable minimum; five will protect your itinerary against wind, rain, and cancellations. Check the bulletin from the Ushuaia Tourism Board before you head out.

    Ushuaia in 4 days: an itinerary that respects the weather

    Day 1: Downtown and the Beagle Channel

    Stroll along Avenida San Martín, watch the port, and board your sailing excursion. The classic route takes you close to islands full of birds and sea lions, and past the Les Éclaireurs Lighthouse. Wear a windbreaker even if the sun is out.

    Catamaran in front of the Les Éclaireurs Lighthouse
    Sailing the Beagle Channel. | Photo: Jose Luis Vanasco / Pexels

    Day 2: Tierra del Fuego National Park

    Set aside the day for bays, forests, and boardwalks. The End of the World Train is optional; travelers interested in history will get more out of it, while nature lovers can spend their time on the trails. Check conditions on the Argentina National Parks website.

    Lake and mountains in Tierra del Fuego National Park
    Landscape of Tierra del Fuego. | Photo: Caroline Cagnin / Pexels

    Days 3 and 4: Mountain and weather buffer

    Choose Laguna Esmeralda if you’re up for mud, elevation gain, and rapidly changing weather. Prefer Lago Escondido and Lago Fagnano if you’re looking for scenery with less walking. In winter, use this day for a snow center. Save your fourth day for the activity that’s most dependent on the weather.

    Where to eat without falling for the generic menu

    Centolla (king crab), merluza-negra (Patagonian toothfish), and cordero fueguino (Fuegian lamb) are the local staples. Compare the crab’s weight, how it’s prepared, and the sides before you order. To save money, make lunch your main meal and go for empanadas or a brewery at night.

    Where to stay in Ushuaia

    Downtown cuts down on transportation costs and works well for a first visit. Hotels on the hillsides offer sweeping views but require a taxi or shuttle. Before choosing a remote lodging, calculate the daily cost of going up and down.

    Practical tips to avoid mistakes

    Dress in layers, not one heavy piece. Bring waterproof protection, light gloves, and footwear with good grip. Don’t schedule your sailing trip and departure flight in the same tight window. To explore more of Patagonia, also check out our guide to where to stay in El Calafate.

    Les Éclaireurs Lighthouse on the Beagle Channel
    Lighthouse on the Beagle Channel. | Photo: Pedro Massochin Medeiros / Pexels

    Frequently asked questions

    How many days should I spend in Ushuaia?

    Four full days cover the classics; five give you a buffer against the weather.

    What’s the best time to visit?

    Summer for hiking and long days; winter for snow and skiing.

    Do I need to rent a car?

    Not for the classic itinerary. It helps for the lakes and for staying in remote lodgings.

    Do Brazilians need a passport?

    You can enter Argentina with an accepted, valid ID document, but confirm the official rules before your trip.

    Conclusion

    Ushuaia works best when you plan your priorities and let the weather decide the order. Save this itinerary on Voyage Voyage and keep one flexible day.